Author:
Tamara Smith
Date Of Creation:
22 January 2021
Update Date:
1 July 2024

Content
- To step
- Method 1 of 6: A collage of paper
- Method 2 of 6: A collage of fabrics
- Method 3 of 6: A sand collage
- Method 4 of 6: A collage of objects from nature
- Method 5 of 6: A digital collage
- Method 6 of 6: Show your collage
- Tips
- Warnings
- Necessities
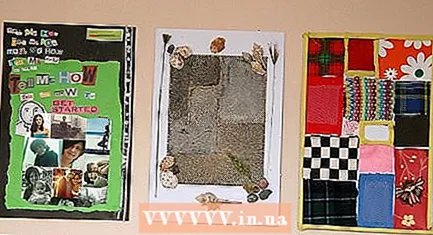
A collage is a work of art that is composed of different materials, such as paper, newsprint, photos, ribbons and other objects attached to a surface of paper or sturdy cardboard. You can even make a collage with all kinds of objects or with digital images that you then paste on a digital background, as it were. "The word" collage "comes from the French verb" coller "which means" paste ". With a collage you can experiment with many different materials and achieve a great end result. This article will give you some examples of the many possibilities you have when creating a collage.
To step
 Choose a style for your collage. As the definition says, a collage should consist of several different parts. These can be all kinds of materials or objects, such as paper, wool, cloth, stamps, magazine clippings, plastic, raffia, foil, labels, lids, matches, corks, objects from nature (bark, leaves, seeds, egg shells, shells, twigs, etc.), knots, and much more. You can choose one type of material, such as paper or fabric, or mix different materials, such as paper, buttons and foil.
  Choose a suitable surface for your collage. Often a sheet of paper or a piece of cardboard is chosen, but in fact you can use anything that you think is suitable and fits well with your collage. For example, you can use tissue paper, colored cardboard, a piece of fabric such as burlap, newspaper, old book covers, wood, a smooth piece of bark, or plastic. If the surface is suitable and you can glue things to it, then you can most likely use it to make a collage.
 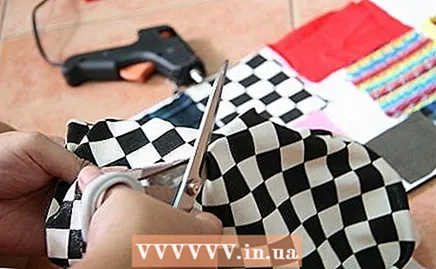 Collect materials for collages you ever want to make. As you get better at making collages and start to like it more and more, you will probably see more and more possibilities and suitable materials that you can use. So find a box where you keep all the collected material for your collages.
Method 1 of 6: A collage of paper
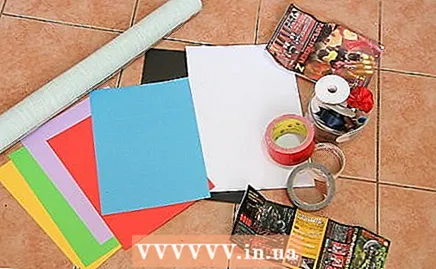 Gather all the materials you need to make a paper collage. You can use the following materials:
 - Craft paper, copy paper, paper bags, blotting paper, marbled paper, homemade paper, etc. You can use soft or hard paper, or mixed together.
- Photos and images that you cut from magazines and newspapers. Especially in fashion and news magazines you can find suitable images for your collage. Text and images from a newspaper can also be a nice addition to your collage; keep in mind that the ink can sometimes run.
- Old pieces of wallpaper. Maybe you still have some leftover wallpaper in your closet. You can also get some wallpaper samples from a DIY or hardware store.
- Different types of foil and adhesive tape. Use kitchen aluminum foil, masking tape in different colors, or duct tape.
- Photos. Cut pieces from old photos to give your collage a retro look. Just make sure you don't cut up the only copy of a photo. You may need that photo again later.
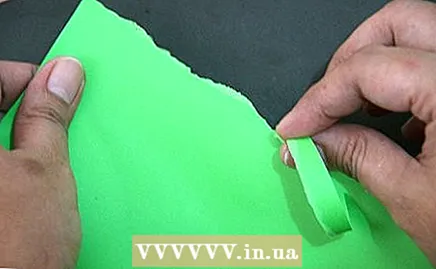 Fold, cut, or tear the paper into different shapes. You can use scissors or a craft knife to make different shapes. You can also tear the pieces of paper to give your collage more structure and a looser look.
 - Cut out an entire image, a recognizable part of it, or just enough to evoke a certain texture, color or feel.
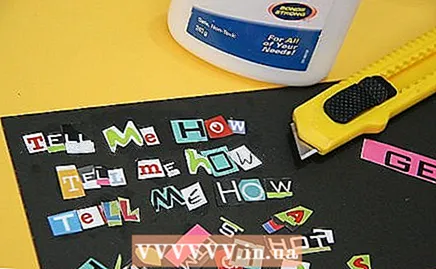
- To form a word, cut out letters in different fonts from different magazines and newspapers.
 Come up with a topic. Maybe you were assigned a topic or maybe you came up with your own when you were collecting materials. Either way, compose your collage based on a subject or image.
  Consider adding decorations. You are not obliged to add them, of course, but decorations can make your collage more vivid, special and interesting. This gives your collage that little bit extra. Add ribbons, beads, twine, feathers, or fabric to your paper collage. Look for beautiful decorations around the house or buy them at a hobby store.
 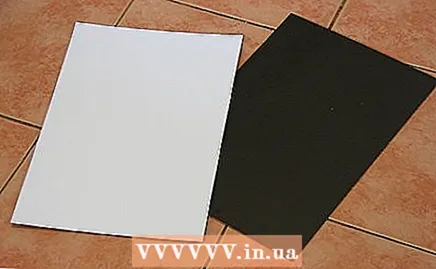 Think about which surface you will stick your collage on. For example, you can use a sheet of paper, a large piece of colored cardboard, or a piece from a cardboard box. Whatever material you choose, make sure your substrate is strong enough to withstand the weight of multiple layers of material. Also make sure that your surface is suitable for easy hanging or setting up your collage.
 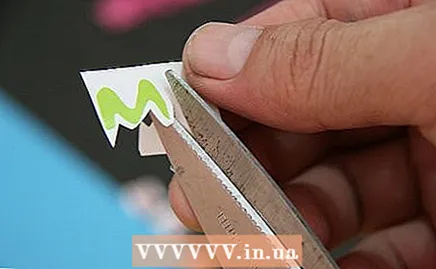 Put the different parts in the right place before you glue them on. When you have collected all the materials for your collage, put them all on the table in front of you and create a design for your collage. This is of course not necessary, but it will make your work easier in the future. Place all materials on a large surface, for example on a table or on the floor. Build up your design in different layers. Start with the background and then work your way forward. This should give you a good idea of what your collage might look like before you start pasting. If you want to remember exactly what your design looks like, take a picture of it. Here are some design ideas:
 - A landscape or a seascape.
- A fractal.
- An image of a person, such as a pop star or someone wearing recognizable clothing or a headgear such as a diadem.
- Newsprint People - As in the old tradition, use newsprint to make people and add them to your collage.
- Animals. Use small pieces of paper or stamps to make an animal shape. For example, you can make a cat, a crocodile, or a bee. First draw the shape of the animal on the surface and then fill in the shape by pasting pieces of paper inside the lines.
- A mosaic or a special mix of colors and materials. You can add a shape or pattern to your mosaic, but you can also just mix it up.
- The alphabet. Cut out letters from the paper and recreate the alphabet in your collage. You can also create words and sentences.
- Patterns that contain only a certain shape, such as circles, squares, etc. Patterns that repeat over and over also work well for a collage.
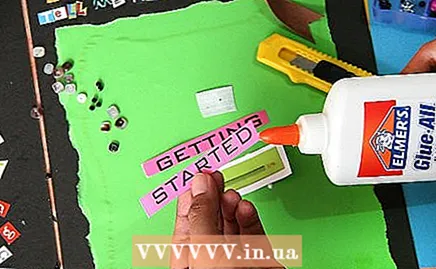 Stick on all materials. Start with the background and then work your way forward. Stick all parts of your collage on the surface. Use regular white or clear glue, a glue stick, or rubber cement and proceed with caution.
 - Try to organize your materials around one particular area that you think is interesting or eye-catching.
- Remember that you don't have to just stick every piece of your collage flat. You can also fold and crumple the paper to give your collage a different texture.
 Let the collage dry. Since your collage will likely contain several layers of glue, you will need to leave your work for a while to dry.
 - One hour of drying time should be enough for a small collage.
- You have to let a larger collage dry at least overnight.
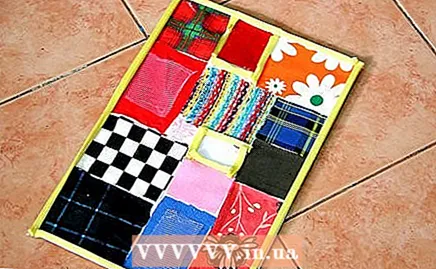
Method 2 of 6: A collage of fabrics
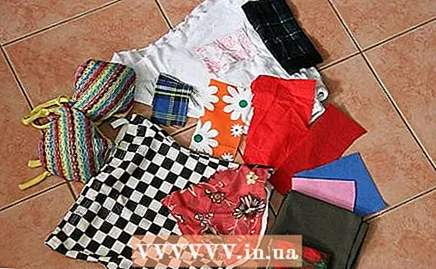 Gather all the pieces of fabric you want to use for your collage. Look in your wardrobe or stock of craft supplies for pieces of fabric or clothing that you no longer wear. You can also go to a thrift store or hobby store to find beautiful fabrics. Some examples are:
 - Scraps of fabric left over from sewing.
- Cut-out pieces of fabric with a pattern you like.
- Cut-out pieces of fabric from favorite pieces of clothing that you can no longer wear (you can use pieces from old children's clothing as a nice memory).
- Fabric from quilts.
- Special fabrics such as tulle, organza, silk, satin, etc.
- Thread, wool, yarn, rope, ribbons, lace, mesh, etc.
- Embellishments such as buttons, sequins, pictures that you can sew on garments, etc.
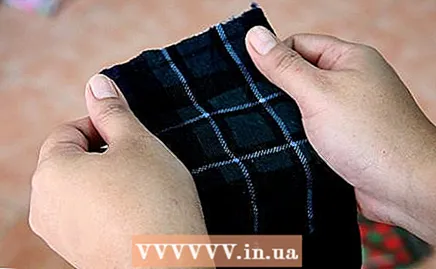 View the texture of the fabrics. Fabrics come in a variety of textures and thicknesses, which means that you have to work these differences into your collage in a certain way to get the right effect.
  Select a suitable substrate. Some ideas for a suitable surface are described above. Keep in mind that fabric may be more difficult to stick on than paper. Not every material is therefore suitable as a surface for your collage. Test the surface you have chosen in advance by sticking a piece of fabric on it. This way you can be sure that the fabric will stay in place. Other possible surfaces for your collage include: another piece of fabric, a tapestry or piece of clothing that you no longer like, paper or cardboard, a lampshade or another object that you would like to spruce up, such as an old stuffed animal.
 - Use a transparent glue that is suitable for both fabric and the substrate of your collage.
- Draw a design on paper. Design ideas can be found in the paper collage method above. When you have a design in mind, match the pieces of fabric with different textures and colors appropriately.
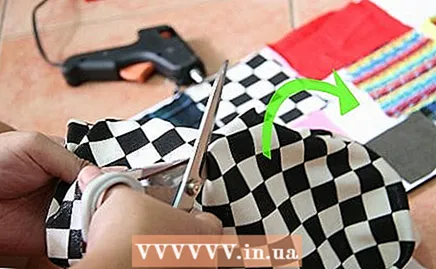 Cut out the pieces of fabric and arrange them as you conceived in your design. You can also layer pieces of fabric over each other, so do something crazy.
 - If you are making animals, faces or other things out of fabric, look at the texture of the fabrics you are using. For example, you can use wool or fluffy fabric to make a sheep or use yarn to make hair for a face.
- You can arrange wool, thread and yarn in a spiral to make flowers, the sun, the moon or faces.
- Buttons and sequins can be used well to make flowers, eyes in a face, animals or other figures, for example.
 Let your collage dry. Hang or put down your work.
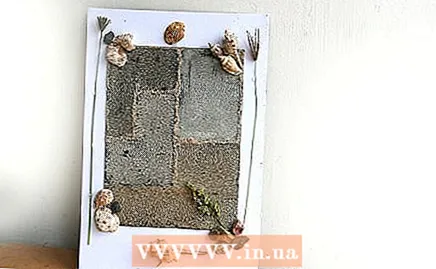
Method 3 of 6: A sand collage
Sand is great for making a collage and is a good choice for young children.
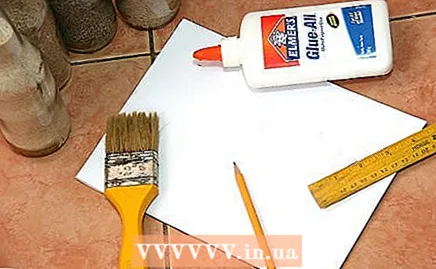 Gather all the materials you need. These are, very simply, a piece of paper or cardboard for your substrate, transparent hobby glue, sand, a pencil and a glue brush.
 - Draw your design on paper. It is best for children to choose a simple design; let them draw whatever they want.
 Follow the lines on the paper and fill the faces of your design with glue using the glue brush. If you have a complicated or large design, do it in small steps. This way you can work with the glue while it is still wet.
  Sprinkle the sand over the glue. You can do this by hand or with the help of a paper cup.
 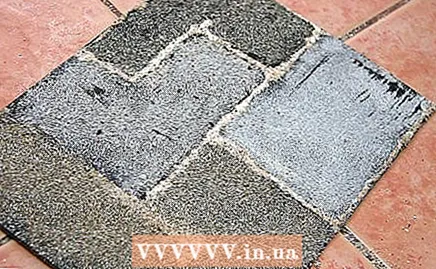 Shake off the excess sand from your collage when you are done. The leftover sand on your collage represents your design.
Method 4 of 6: A collage of objects from nature
 Look outside for suitable objects for your collage. This is a good collage to make if you have been hiking in nature and have brought items you found along the way. Suitable items are:
 - Shells, both whole shells and broken ones;
- Shells of insects;
- Flowers (these can be dried and then incorporated into your collage);
- Dried grass;
- Leaves;
- Seeds and nuts;
- Chestnuts and acorns;
- Straw;
- And much more...
 Make sure all items are dry before using them. If not, they may rot or mold when incorporated into your collage.
  Select a suitable substrate. Paper, a piece of smooth tree bark, colored craft paper and cardboard are suitable materials to use as a surface.
 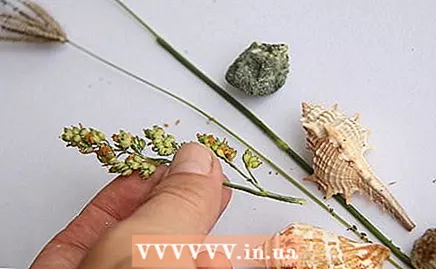 Create a design. Maybe you want to recreate an image from nature, such as a few flowers that you have suitable as they occur in nature or a clump of dried grass. You can also create a landscape or seascape with the objects you found.
 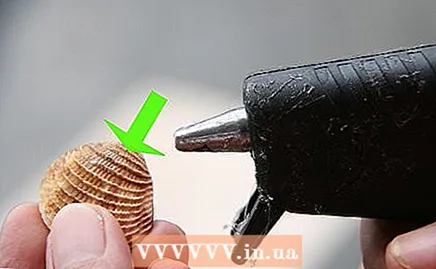 Tape the objects. Use a transparent hobby glue for this. Make sure that the objects actually stick to the surface.
 - If you used plant material in your collage and you want it to last, make an icing mixture. Dilute some white wood glue with a little water. Spread this mixture all over the paper; this is how your collage is glazed. Attach the plant material to the glazed paper. Then lubricate all plants with the same mixture. Make sure to smear every little bit of the material. When the glaze has dried, it will protect the plant material for years and also give your collage a glossy effect. Note that icing can affect the more delicate plants and flowers in your collage. So be careful.
 Let your collage dry. Hang your collage or put your work somewhere. You can also take pictures of it and show it on the internet.
Method 5 of 6: A digital collage
 Choose a photo editing program that is easy to use. You can use different types of software to edit your photos, depending on your budget and the specifications of your computer. Choose a simple program, unless you can already work well with a more complicated program; you can improve your skills as you keep making new collages.
 - Choose a subject. You may have been assigned a topic, or you may have already come up with one yourself when you were collecting materials. Either way, it is best to assemble your collage from a subject, image, or pattern. If you have a subject, it is much easier to collect photos and other images for your collage.
 Collect suitable materials for your collage. Search the internet for images and fonts that you think could fit well in your collage. You can also scan old photos, scraps of fabric, magazine clippings and other things you would use in a paper collage. Choose images that inspire you.
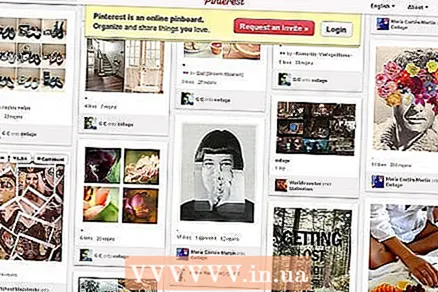
 - Check out the Pinterest website for inspiration; look up photos with subjects you love, like cupcakes, horses, racing cars, beautiful people, whatever!
 Edit the images as needed. Adjust the shape and color of the images using the functions in the photo editing program. You really don't have to keep the original shape of the image - choose whatever best suits your design.
 - You can also adjust the transparency, brightness, or colors of the images, depending on what options your photo editing program has.
 Create layers. Build up your collage layer by layer. Start adding a digital background at the back and then work your way up.
  Save your work regularly. Click the button from time to time to save your work, in case your computer crashes. Of course you don't want to lose the piece of work that you have worked so hard on.
 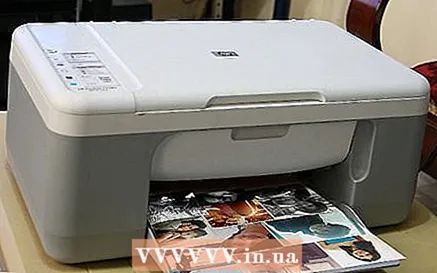 Print your collage. You can do this, for example, if you want to hang your collage on the wall. Choose a paper type on which you want to print your work. You can choose glossy printer paper or a matte type of paper. Whichever type you choose, make sure it matches your design and the way you want to display or use your collage.
Method 6 of 6: Show your collage
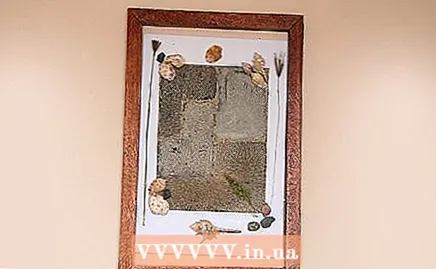 Think about how you want to show your collage to others. You have several choices, such as:
 - Hang your collage on the wall.
- Frame your collage using cardboard or a wooden frame. You can then hang your collage or place it on a shelf.
- Take a photo of your collage and show it on the web (if you didn't take a digital collage)
- If you made a digital collage, show your work on the internet. You can use photo sharing websites, as well as sites about hobbies and crafts. Also use social networks to show people your craft projects.
- Think of ways you can add your collage to other art or craft projects, such as painting your work and attaching it to your wardrobe or attaching it to a wooden box using decoupage technique. You can sew a collage of fabrics onto a garment.
Tips
- Be creative!
- If the materials do not adhere properly to the substrate of your collage, spread a diluted glue and water mixture (about 3 parts water and 1 part glue) over your collage when you are done. This is how you "paint" your work.
- Make your collage like you want that. Don't be afraid to try out different techniques and images; one learns by doing.
- You can combine digital and paper images by printing processed digital images and adding them to your collage of paper or other materials.
- The back of your collage should match the back of what you show on the front of your collage.
Warnings
- It is better not to use hot glue for your collage if you only work with paper. This type of glue does not work as well as white or transparent glue, a glue stick or rubber cement. Check with your local hobby store if you are unsure.
- Always be careful when using scissors. Always supervise young children when using scissors.
- Lay out some newspapers to protect your workplace from glue and other debris.
Necessities
- Glue
- Scissors or a hobby knife.
- A surface, such as a piece of sturdy paper or cardboard.
- Pictures, words and letters.
- A photo editing program (optional).
- A box to keep the leftover paper you don't need anymore.
- A plastic bag where you keep leftover objects that you want to use for another collage.


