Author:
Judy Howell
Date Of Creation:
2 July 2021
Update Date:
1 July 2024

Content
- To step
- Method 1 of 4: Increase the number of villagers
- Method 2 of 4: Build houses in the village
- Method 3 of 4: Trade with villagers
- Method 4 of 4: Build gardens for villagers
- Tips
- Warnings
Once you have found a village and collected a number of villagers, there are a number of things you can do to increase the population. For starters, you need to build houses with doors all over the village to make sure there are more doors than villagers. Then you have to trade frequently with the villagers to get them to multiply. You can also achieve this by creating a garden to provide the villagers with food.
To step
Method 1 of 4: Increase the number of villagers
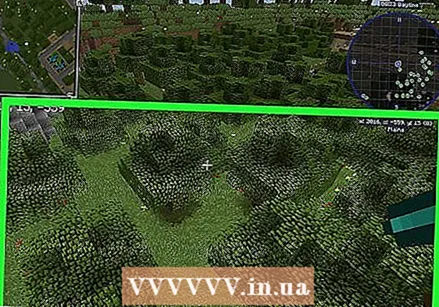
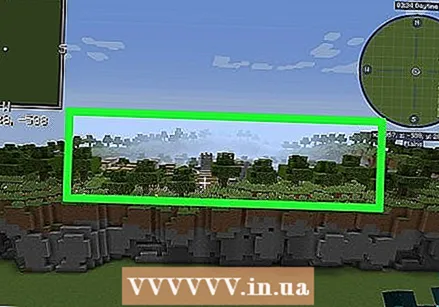 Find a village. Villages can be found in steppe biomes, in desert biomes, and in savanna biomes. The village must consist of at least two villagers. Be patient. It is not always easy to find villages. It may take a while to find one. Use the map you receive at the start of the game to keep track of where you are.
 - You can also heal a zombie villager by first using a Splashing Potion of Weakness, then having him eat a golden apple. Make sure it does not get into the sun until it is completely transformed. Otherwise it will be reduced to dust and ash.
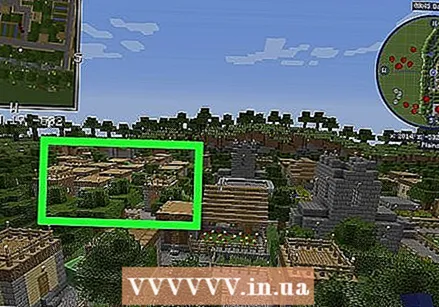 Build more houses with doors in the village. Villagers will multiply as long as the total population of villagers in a village is less than 35% of the number of valid doors (rounded). A valid door is a door with a space with a roof on one side and the outside world on the other.
 - To increase the number of doors in your village, you can create a single building with multiple doors.
- To add more doors to a village, you must create a building with multiple doors.
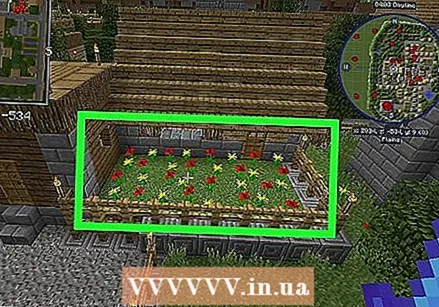 Build gardens for the villagers. Villagers love to grow crops. Most of the villagers have already built a number of gardens. You can build more to increase the chances of the villagers multiplying. To build a garden, you need a well-lit area of land and dig a ditch next to blocks of soil and fill it with water. Then use a hoe to work the soil blocks. You can plant seeds or vegetables in the soil blocks yourself, or you can let the villagers do this.
 - You can also throw food at the villagers. A villager only wants to multiply if he has either three loaves or 12 carrots or 12 potatoes in his inventory.
- To make a loaf, select a workbench and place three wheat stalks in any row of the 3x3 grid. Drag the bread to your inventory.
- You can also throw food at the villagers. A villager only wants to multiply if he has either three loaves or 12 carrots or 12 potatoes in his inventory.
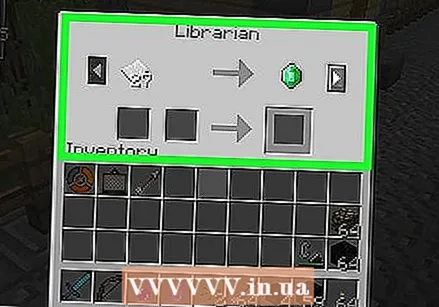 Trade with the villagers. Trading with villagers is the way to make them want to multiply. Each villager has different items that they want to trade for certain items. In order to trade with villagers, you must have the items the villagers want. By trading multiple times with the same villager, he gets a wider offer. Trade with the villager until another trade prompts him to want to multiply. After that, each subsequent trade has a 1 in 5 chance of getting the villager to do this again. Green particles appear around a villager when he, by means of barter has become more inclined to multiply.
 - A villager who wants to multiply will not automatically look for a partner. Two villagers who both want to multiply must be in each other's vicinity.
- After they multiply, you must reactivate their desire to multiply.
Method 2 of 4: Build houses in the village
 Gather the necessary materials. Houses for villages can be made of any material of your choice. Not all materials require tools to collect or mine them, but they do speed up the process. Read articles on wikiHow about making tools. What follows is a list of standard materials and how to get them:
 - Soil: Earth can be found everywhere. To collect soil you only have to attack the earth block with your hand (or a shovel) until the block breaks and you are left with a small earth block. Walk over the small earth block to pick it up.
- Wood boards: To collect wood you have to walk to a tree and attack the trunk with your hands (or an ax) until the logs fall apart and you are left with a small log. Walk over the small log to pick it up. Then open the create menu and create plank wood blocks from the wood.
- Cobblestone: Cobblestone is a bit firmer (and more resistant to creeper explosions). To mine cobblestones, you must first make a pickaxe and take it up. Attack stone blocks found in caves or on mountain slopes with the pickaxe.
 Choose a location. Make sure your selected location is in the village. The game calculates the center of the village, based on the average of the coordinates of all the doors in the village. The outer edge of a village is either 32 blocks from the center or the furthest door, whichever is the greater.
 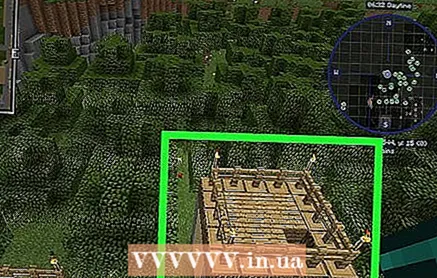 Build the building. Use the materials you collect to create the exterior of your home or building. It can have any shape as long as the roof consists of opaque blocks. The house must be at least three blocks high so that villagers (and the player) can walk around the house. Keep an opening in the wall 2 blocks high in front of the door.
 - To build, you must place the building material in your hotbar at the bottom of your inventory. Select the material in your hotbar to take it up. Aim the reticle in the center of the screen where you want to place a block of the material. Then right click (or press the left action button) to place a block. Read articles on wikiHow on how to build.
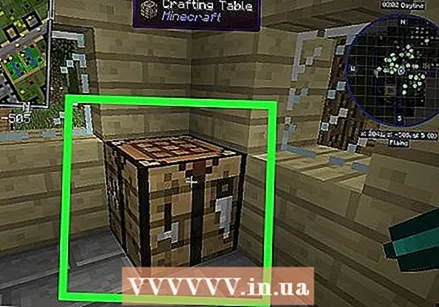
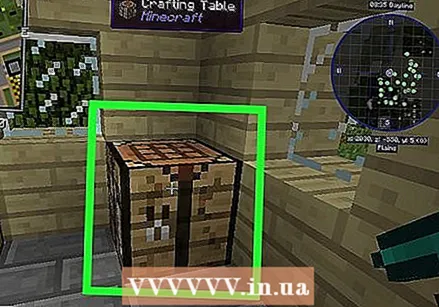 Build and set up a work table. A work table is made from four wooden plank blocks in the create menu. After you create a work table, you can put it wherever you want.
 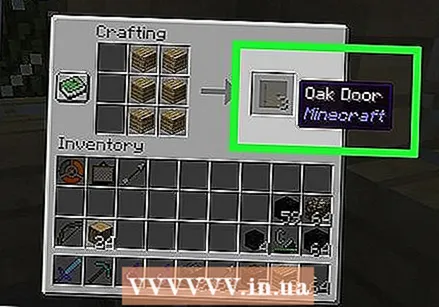 Use the work table to make a door. To make a door, select the work table and place 6 wooden plank blocks in the 3x3 grid of the work table. Drag the door into your inventory.
 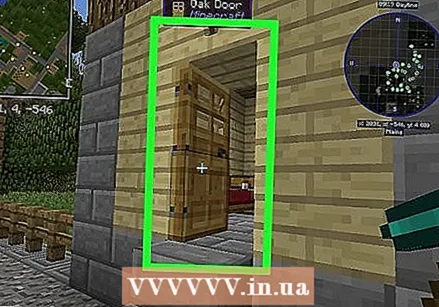 Place the door in your building. To place the door in your building, aim the reticle, in the center of your screen, at the bottom of the space you left open for your door. Then right click (or press the left action button on your game controller) to place the door. The more doors in a village, the more likely it is that the villagers will want to multiply.
 - Villagers can detect a door at a distance of 16 blocks in either horizontal direction, three blocks above them and five blocks below the village ground level. A valid door has more opaque blocks within five blocks of one side of the door (inside) than on the other side (outside).
Method 3 of 4: Trade with villagers
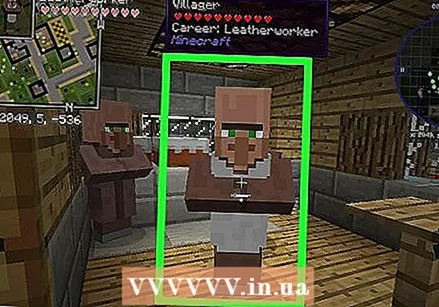 Select a villager. You select a villager by standing in front of him and aiming your reticle at him. Right click or press the left action button on the controller. A window will open.
 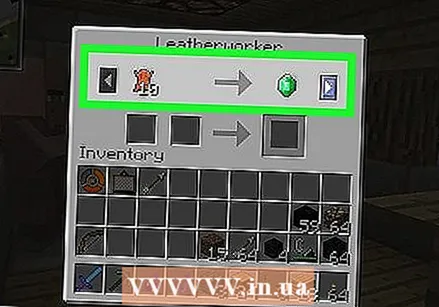 View the villager's inventory. The spaces at the top of the window show what the villager wants to sell. The box in the lower left corner of the window shows what you will have to pay for it. To make the trade, you must have the item the villager wants in your inventory.
 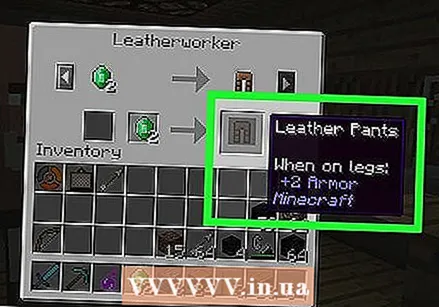 Select the item you want to buy. You select an item by clicking on it or by pressing the "confirm" button on your controller. The item you exchange will be automatically removed from your inventory, and the item you purchase will likewise be placed in your inventory.
 - When you trade with a villager for the first time, he will have a small supply of only one or two items. But the more you trade with him, the more items he will sell.
Method 4 of 4: Build gardens for villagers
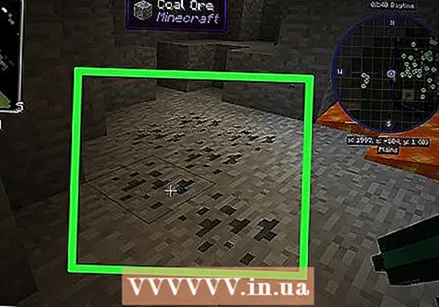 Mine cobblestone, coal and iron ore. All these materials can be found in caves. To collect these minerals you need a pickaxe. Read articles on wikiHow on how to make a pickaxe and other tools.
 - Stone blocks look like gray blocks. Use a pickaxe to remove cobbles from blocks of stone.
- Coal blocks look like blocks of stone, but with black spots. Remove coal from the coal blocks with a pickaxe.
- Iron ore blocks look like blocks of stone with yellowish spots. Use a stone pickaxe to mine iron ore.
 Create and set up a workbench. You make a workbench from four wooden plank blocks, in the create menu. After you have made a workbench you have to place it in a random place.
 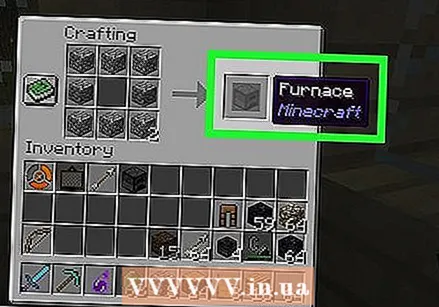 Make an oven with the workbench and place it. To make an oven, select the workbench, then place eight cobblestone blocks along all sides of the 3x3 grid. Drag the oven into your hotbar, below your inventory. Next, you need to grab the furnace and then place it by right-clicking, or by pressing the left action button on your game controller.
 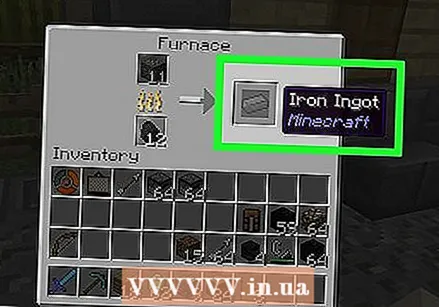 Use the furnace to melt the iron ore. To melt your iron ore, select the furnace and place the coal in the bottom box of the screen (below the icon in the shape of flames). Then place your blocks of iron ore in the top box. Wait a few minutes for all the iron from the iron ore to melt. Once your iron ore is smelted, select the furnace and drag the iron bars from the right box and place them in your inventory.
 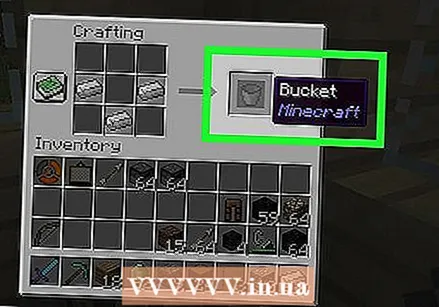 Use the workbench to make a bucket. Create a bucket by selecting the workbench and placing an iron block in the left, right, and bottom center of the 3x3 grid. Then drag the bucket into your inventory.
 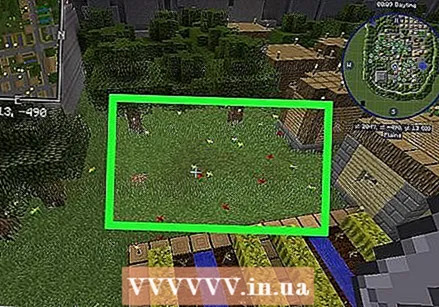 Find a well-lit spot in the village. Find a spot in the village that gets a lot of sunlight and is about 5x10 blocks of earth.
 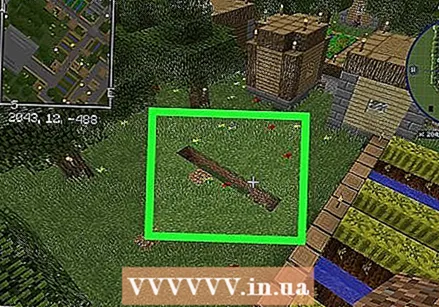 Dig a trench through the center of your yard. You can use your hand (or a shovel) to dig a trench through the center of your yard. The trench should be no more than one block deep.
  Use the bucket to collect water. Place the bucket in your hotbar and take it in hand. Then find a source of water nearby and use the bucket to collect water.
 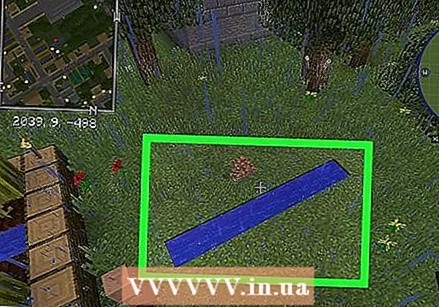 Fill the trench with water. After you collect water, go back to your trench garden and put the water in the trench to fill it.
 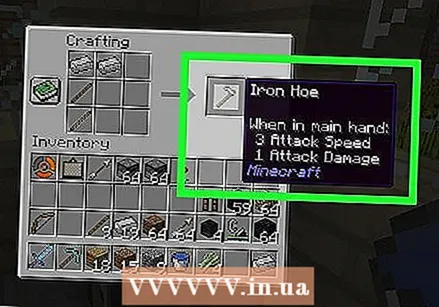 Use the workbench to make a hoe. You make a hoe by selecting the workbench and placing two sticks in the middle and bottom center of the 3x3 grid. Then place two wooden planks, pieces of cobblestone, iron bars or diamonds in the top center and top left spaces. Drag the hoe into your inventory.
 - You make sticks from wooden plank blocks, in the create menu.
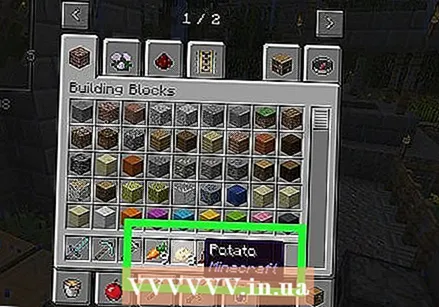 Collect the things you want to cultivate. Carrots, potatoes, wheat seeds, beets, cocoa seeds, melons and pumpkins can all be planted and cultivated.
 - You can collect carrots, potatoes, beets and wheat seeds in existing gardens in villages. You can also collect wheat seeds by breaking grass.
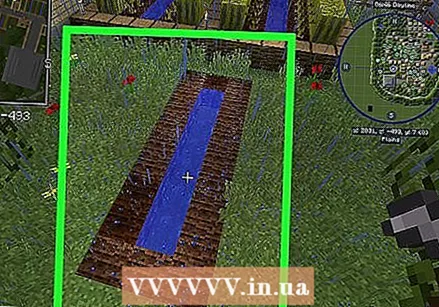 Use the hoe to work the garden. Place the hoe in the hotbar at the bottom of your inventory. Then take it up and use it to work the soil on either side of the water-filled trench up to a distance of two blocks from the trench.
 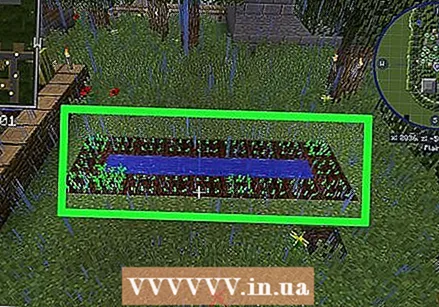 Plant your crops. After the soil has been tilled, place the crops in your hotbar and plant them in the group by right-clicking or pressing the left action button on your controller. Give the crops a few days to grow.
 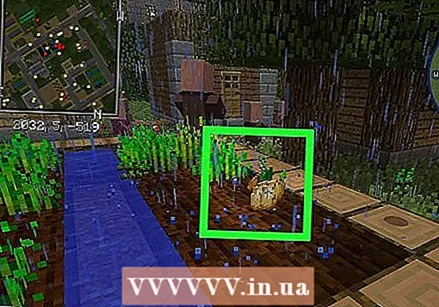 Harvest the crops. Once the crops are fully grown, click on them, or press the right action button, to harvest them.
 - Often villagers will harvest the crops for you and also cultivate new ones, in the gardens you build for them.
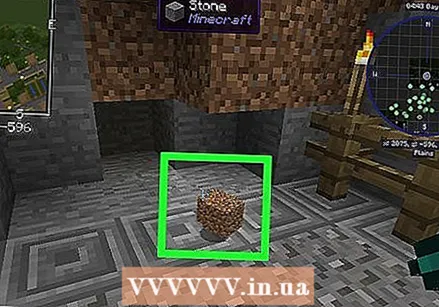
- If a villager has three loaves, 12 carrots, 12 potatoes, or 12 beets in his inventory, he will want to propagate.
- To make bread, you must select a workbench and place three wheat stalks in any row of the 3x3 grid. Drag the bread into your inventory.
Tips
- When villagers are satisfied and when all their wishes are fulfilled, their urge to reproduce is greater.
- Try to reproduce the villagers as often as possible, because the more villagers, the more you can trade and the more likely there is a good trade between them.
Warnings
- Try to keep zombie villagers away from sunlight while you heal them as they will burn and die in sunlight which will waste your potion and golden apple.


