Author:
John Pratt
Date Of Creation:
16 April 2021
Update Date:
1 July 2024

Content
- To step
- Method 1 of 3: Make plans for your model
- Method 2 of 3: Using gelatin
- Method 3 of 3: Using hobby materials
- Tips
Every student has to learn about the structures of living cells at some point during their high school years. It may have been your turn recently to learn about the various organelles in the cells of animals and plants. If you have decided to show off your newly acquired knowledge by creating a 3D model of the cell and its structures (or instructed to do so by a teacher), this article can help you with that.
To step
Method 1 of 3: Make plans for your model
 Understand cells. You need to understand the primary organelles (parts of the cell, in fact the organs of the cell), their relationship to each other and the differences between plant cells and animal cells if you want to make a correct 3D model.
 - You need to know the different organelles if you are going to make models of them. It is vital that you understand their shapes. The colors usually given to the different parts of the cells in textbooks are used for contrast and usually don't match reality, so you can be creative in that regard. But you have to develop the right shapes to be able to shape them properly.
- It is also important to know how the different cell structures relate to each other. For example, the endoplasmic reticulum (ER) is always close to the cell nucleus because it processes the proteins used in DNA reproduction. You must understand this fact when shaping your model.
- Know the differences between plant cells and animal cells. Most importantly, plants have an outer cell wall made of cellulose, have a large vacuole (an amount of water containing enzymes enclosed by a membrane) and contain chloroplasts (the parts of the plant cell that convert sunlight into usable energy, also called leaf green granules).
 Develop a concept of your model. Will your model be a transparent representation, in which the cell parts are suspended in a translucent material? Or will it instead be an exploded model that looks like a cell cut in two, but with organelles giving a three-dimensional representation? Instructions on how to make two different styles of the model will follow later in this article, but will be briefly outlined here:
 - The first possibility is a fully three-dimensional representation of a cell, with all organelles floating in clear gelatin.
- The second option involves using craft materials to create an exploded model that shows a cell with some of it removed to make it possible to see everything.
 Think about the materials you would use. The materials will of course vary depending on the type of model you have decided to make.
 - It's easiest to use items that already have the general shape of the object you're building - something that's roughly round for a cell nucleus, for example.
- Of course, many of the organelles are so strangely shaped that it may be impossible to find something that already has the same appearance. In this case you have to think of materials that are flexible and can be adapted to whatever shape you need.
 Be creative. Will your 3D model be edible? What kind of dye will you use for the different organelles? Never lose sight of the vital elements to be displayed in this project, but the shape of your model doesn't always have to be limited in style and creativity.
Method 2 of 3: Using gelatin
 Gather the materials to make your cell parts. You will make the parts of your cell from different foods and kitchen materials. What you use is up to you, but here are a few ideas:
 - Clear gelatin will suffice as the cytoplasm. If you're simply going for authenticity, gelatin with no added flavorings will work very well. If you have chosen edible, choose a variety that is not so dark in color that it obscures the model organelles you place in it.
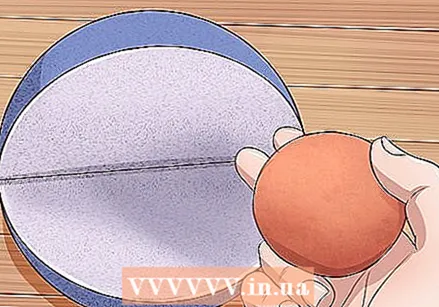
- For the core, the core body and the nuclear membrane: Buy a fruit with a large stone, such as a plum or peach. The kernel is the core body, the fruit is the core, and the skin is the core membrane. (If you are not expected to deliver at this level of complexity, a simple round piece of food will do).
- Centrosomes or coil bodies are supposed to be pointed, try putting pieces of toothpick through a gum ball or other small rubbery item.
- Shape the Golgi apparatus using pieces of cardboard, wafers, crackers, banana slices or, perhaps best of all, a fruit stacked like an accordion.
- You can use small round candies or chocolate chips for the lysosomes.
- Mitochondrium is somewhat rectangular, so see if you can use lima beans or possibly certain nuts without the shell.
- Ribosomes: For ribosomes, you want something small. Try bedding, peppercorns, or plain pepper.
- The coarse endoplasmic reticulum looks very similar to Golgi apparatus in that it is a structure of flat, folded parts that are clumped together; but unlike the Golgi devices it has a rough surface. You can use similar materials for this, but try to find a way to stick something rough or textured (maybe litter) on top to distinguish the two.
- The smooth endoplasmic reticulum looks more like a series of tangled and irregularly shaped interconnected tubes. For this you want to use something smooth and flexible. Use cooked spaghetti, gummy worms, or stretched toffee.
- Vacuole: For an animal cell, you can use a pair of medium sized gum balls - ideally similar in color, but slightly transparent (they're basically just sachets of water and enzymes, after all). In plant cells, vacuoles are much, much larger. If you want to do this really well, you can make a separate gelatin beforehand (for example, made with the concentrated formula for extra strength) and try to incorporate it into the model of the plant cell.
- Microtubules can be formed using uncooked pieces of spaghetti or, depending on the scale of your project, straws.
- For chloroplasts (leaf green granules, only in plant cells) you can use peas, green jelly beans, or cut green beans in half. Keep them green.
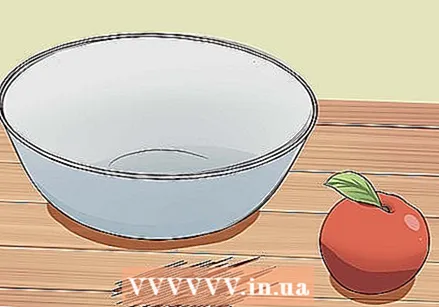
 Get a mold for gelatin. You will need a mold to make your cell, but you will first have to decide what kind of cell to make. Animal cells and plant cells have different shapes and will require different molds.
 - If you are making a plant cell, the first thing you need will be a rectangular baking dish, preferably made of porcelain. The shell itself will be your cell wall and membrane in your model.
- If you are making an animal cell, you will need a round or elongated baking dish, such as a frying pan. This shell can be your cell membrane, or you can later take the model of the cell out of the shell and wrap it in cling film, cut to size, and call it the membrane.
 Make the gelatin. Cook the gelatin according to the package instructions - it usually starts with boiling water on the stove and then mixing in the gelatin. Carefully pour the hot liquid into the roasting dish or frying pan. Put it in the fridge and let it set for an hour or until it's almost set. Do not wait for the gelatin to set completely. You want the gelatin to be able to adjust or stiffen around the areas where you put the model organelles in.
 - If you can't find colorless gelatin, buy the lightest color possible, such as yellow or orange. You can also make your own gelatin from scratch.
 Add your cell parts. Start by placing your cell parts in the gelatin. This is how you could place the pieces:
 - Put the nucleus at the center (unless you are making a plant cell).
- Place the centrosomes near the nucleus.
- Place the smooth endoplasmic reticulum near the nucleus.
- Place the Golgi apparatus near the nucleus (but further away than the endoplasmic reticulum).
- Add the rough endoplasmic reticulum to the opposite side of the smooth endoplasmic reticulum (away from the core).
- Put everything else where you have room. Try not to cram too much into a room. In a real cell, there are a few structures that float around in the cytoplasm. These can be put in almost arbitrarily.
 Put the model back in the refrigerator. Let the gelatin set for another hour or two until it is completely set.
  Create a table or key that names each part. After placing your cell parts, write a list of which article corresponds to which part of a cell (for example gelatin = cytoplasm, drop = raw ER). You will likely have to tell people about the different parts of your cell later on.
Method 3 of 3: Using hobby materials
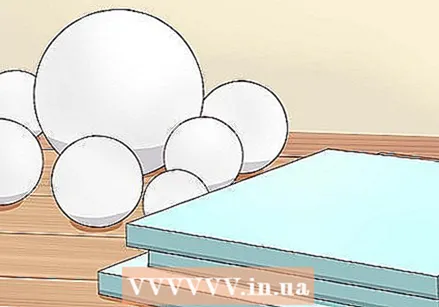 Gather the materials. Here are a few options:
 - You can use a styrofoam cell base. Hobby or art stores will have styrofoam balls (if you're making an animal cell) roughly the size of a basketball, or a rectangular styrofoam cube (if you're making a plant cell).
- Maps can be used to create a number of cellular structures, such as the Golgi apparatus or rough endoplasmic reticulum.
- Straws or small hoses can be used to make tube-like structures. The microtubules can be formed from stirring straws, while flexible straws or tubes can be used to form the smooth endoplasmic reticulum.
- Use various shapes and sizes of beads for other cell structures such as mitochondria or chloroplasts. Try to keep them on the correct scale compared to the other structures in the cell.
- Modeling clay can be used to make any structures that are difficult to make from existing materials.
- Paint can be used to fill in the cytoplasm and to distinguish between the cytoplasm and the outside of the cell. You can also paint any clay shapes you have formed.
 Cut a quarter piece out of the styrofoam piece. Measure the base and place points on the places that indicate where you are halfway up one side. Draw lines that indicate where you can cut. Then use a hobby knife to cut and remove a quarter part.
 - For the plant cells, you can draw the centerline on any two adjacent sides and continue these lines all the way until they are back at the starting point.
- If you are doing this for the animal cell, draw the lines as if you were drawing the equator and meridians on a globe.
 Paint it. Paint the inside of the quarter to help make your cell stand out better. You can also paint the outside in a different color to contrast with the cytoplasm.
 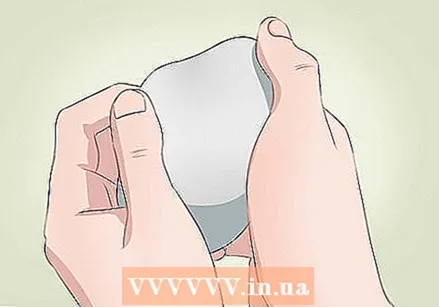 Create the parts of the cell. Make them from the hobby materials mentioned above.
 - The trickiest of these will be the parts you have to shape from clay. Keep these shapes as simple as possible while staying true to the basic shape you are creating. It may be better to make only the simplest structures from clay and the more complex parts - for example, the smooth endoplasmic reticulum - from tubes or other materials.
 Add the cell parts. Add the parts to your cell base (the styrofoam). You can do this by using hot glue, regular glue, toothpicks, pins, staples, or one of several other methods. In some cases, you may have to literally dig or carve space in the styrofoam to make room for the parts.
 - The Golgi apparatus and rough endoplasmic reticulum can be formed from cardboard with your hands. In this case, make cuts in the styrofoam and insert pieces of cardboard to follow the folded shapes of these structures.
 Create a table or key that names each part. After placing your cell parts, write a list of which item corresponds to which part of a cell. You will likely have to tell people about the different parts of your cell later on.
Tips
- You will be able to add parts more quickly if a friend or parent wants to help you.
- Make sure the gelatin has enough time to set after you put the organelles placed. Try to let it sit in the fridge overnight.
- Take extra care when removing the model from the refrigerator.
- For safety reasons, consider covering the styrofoam with papier-mâché. Apply extra layers for good sizing.


