Author:
Clyde Lopez
Date Of Creation:
18 June 2021
Update Date:
1 July 2024
Content
- Steps
- Method 1 of 3: Desktop Browser
- Method 2 of 3: Mobile device
- Method 3 of 3: Third Party Program
- Tips
- Warnings
Regardless of the topic of your Facebook page, it's best to post regularly to keep your readers engaged. To avoid continuous posting, plan this process ahead of time. You can do this using built-in Facebook functionality when you post from a group, or using a third-party application (this is how you can schedule personal posts).
Steps
Method 1 of 3: Desktop Browser
 1 Log into your Facebook account from your computer. This will help you schedule posting.
 - Open facebook.com.
- Enter your email address and password.
- Click Sign In.
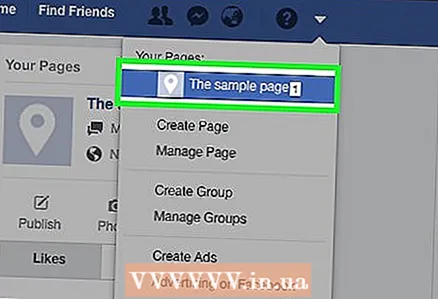 2 Access an alternate Facebook page. It's important to note that Facebook won't let you schedule posts from your personal account. You can only schedule posts if you have created group pages, fan pages, business pages, and the like. To access one of these pages, click on the small arrow in the upper right corner of the main screen (near the globe and castle icons). In the "Use Facebook As" dropdown menu, click on the name of the page you created.
 - If you haven't created a page yet, do it using the "Create Page" option in the same menu. Read this article for details.
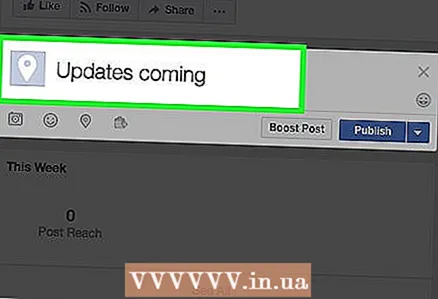 3 Create a post. At the top of the generated page, enter status update in the text box. By default, this field will display "What are you doing?" Don't post yet.
 - At this point, you can insert any media file into your post by clicking on the "Photo / Video" link above the text field. Do this before you schedule posting.
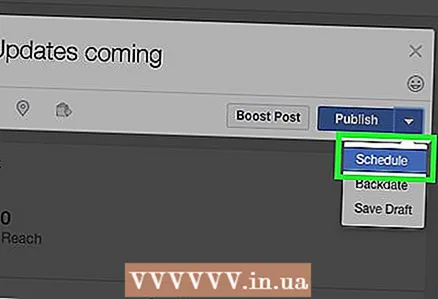 4 Select "Schedule" from the menu. Once you've created your post, click the arrow next to the blue and white Submit Post button. Select "Schedule" from the menu.
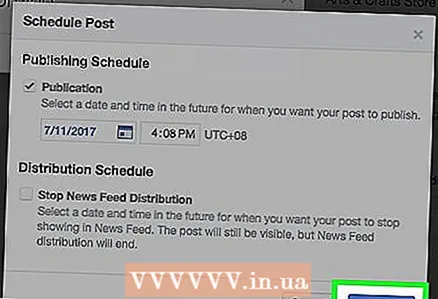
  5 Choose a date and time. In the window that opens, select a date from the pop-up calendar (to do this, click on the small icon in the form of a calendar). Select the time (accurate to the minute) in the box on the right by clicking on the time and using the up and down arrow keys.
 - The minimum period for posting a scheduled post is 10 minutes, and the maximum is 6 months.
- The selected time refers to your time zone.
 6 Click Schedule. Your post will be automatically posted on the specified day and time. On your page you will see the message "1 scheduled post".
 - If you need to make changes, in the "1 scheduled post" window, click "View post". Then click on the small arrow in the upper right corner of the post window to edit, publish, move or delete it.
- You can also do this by clicking Activity (at the top of the page) and then clicking Scheduled Posts in the left column.
Method 2 of 3: Mobile device
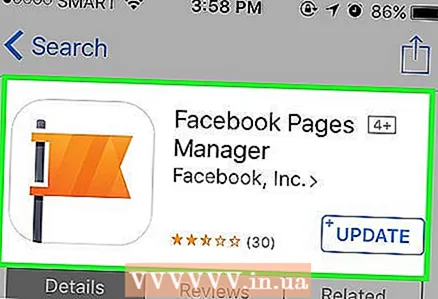 1 Download the Pages Manager app to your device. The main Facebook mobile app (as well as the mobile browser) will prevent you from scheduling posts. To do this, you need the Pages Manager app. This is a free app created by Facebook and available for download in major mobile app stores.
 - For iOS, the app is available here
- For Android, the app is available here.
 2 Log in to your Facebook account through the app. If your Facebook account is already synced with your mobile device, you will see the "Continue as your name>" option. Click on this option to continue.If you don't see this option, sign in with your email address and password.
 - Note: the above instructions are for Android app. An iOS app should work similarly, although there may be some minor differences.
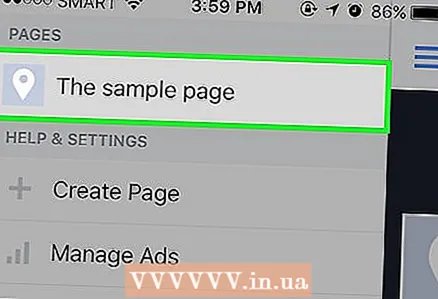 3 Open your Facebook page. After logging into your account, you will automatically be taken to the page of your first group; otherwise, just select it from the group list. You can also find your group at any time by clicking on the blue menu icon (in the upper right corner) and selecting a group from the list.
 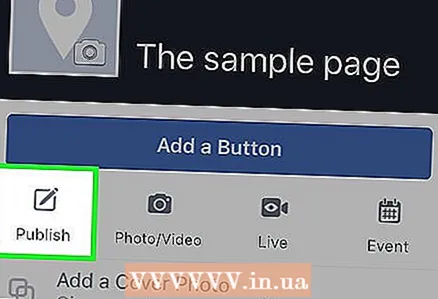 4 Click on "Click here to create a post." It's a blue round button at the bottom of the screen. Select Text, Photo, Video, or Event from the list of options. Enter the post using the keyboard of the device. Don't post yet.
 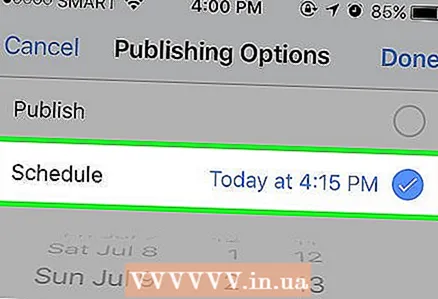 5 Click Schedule in the post options menu. Click the menu button in the lower right corner of the post window. Select "Schedule" from the list. In the pop-up window, select the date and time. Select the date, hour, minute by scrolling through the numbers in the corresponding columns.
 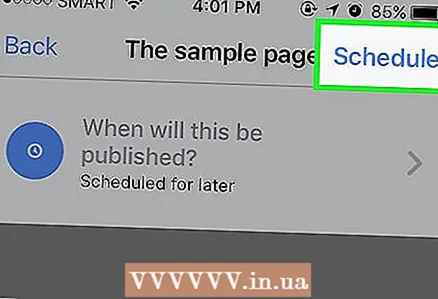 6 Click the blue Schedule button to finish. Returning to your post, you will see that the Post Post button (in the upper right corner) has been replaced with a Schedule button. The date and time of the planned post will be displayed below your post text, and the clock icon turns blue. Click Schedule to complete scheduling.
 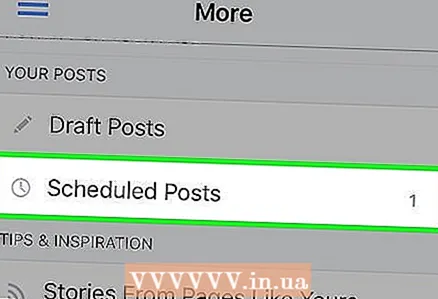 7 Edit scheduled posts through the "Advanced" menu. At any time, you can use the Pages Manager app to edit or delete scheduled posts. To do this, launch the application and go to the "Advanced" tab (at the top of the screen, to the right of the globe icon). On the next page, click Scheduled Posts. Find the post you want to edit and then click on the arrow in the upper right corner of the window and use the menu options to edit the selected post.
Method 3 of 3: Third Party Program
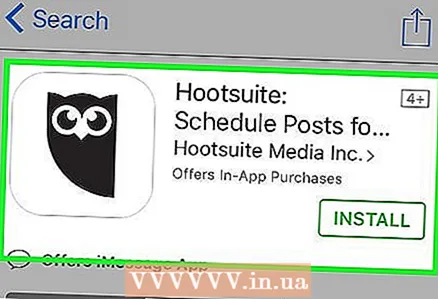 1 Select and download a post scheduling software. Facebook's built-in features will prevent you from scheduling posts from your personal account, so you need to download a third-party program. There are many such programs. Here are some of them:
 - Hootsuite (Note: The instructions below will be specific to this application.)
- Postcron
- Massplanner
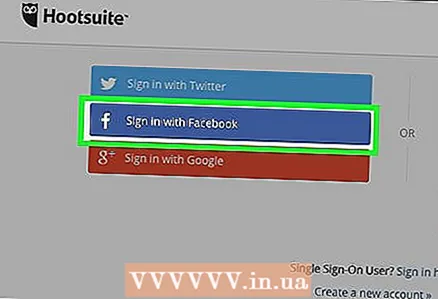 2 Open the site HootSuite and create an account. Click the blue Facebook button to log into Facebook from your computer. HootSuite uses information from your Facebook account to register your account.
 - To download and install HootSuite on your mobile device, click here.
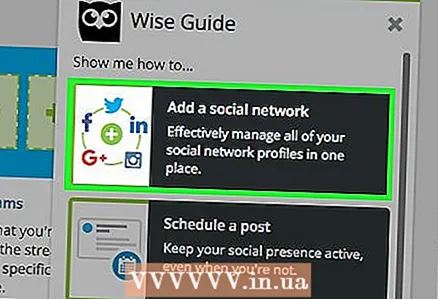 3 Choose a social network. When you log into HootSuite for the first time, click on Add Social Network. Click Connect to Facebook (at the bottom of the pop-up window). Click "Okay" in the three windows with tips for connecting to your profile, pages and Facebook groups. You must do this in order to schedule posts on both your profile and pages.
 - When finished, click the green Continue button. Then click "Finish adding social network" to go to the dashboard.
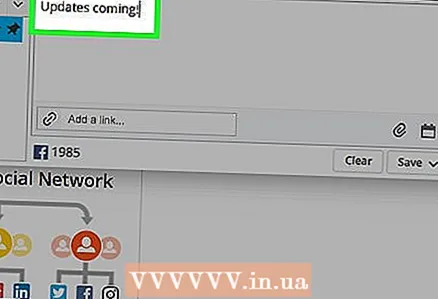 4 Create a post. You can view or skip a short tutorial on how to use HootSuite. When you're done, at the top of the HootSuite homepage, click the Create Post field and enter your post text. Don't post yet.
 - To attach an image or file to your post, click the paperclip icon.
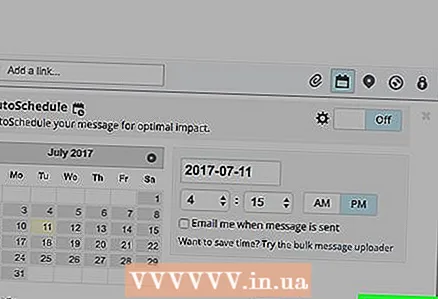
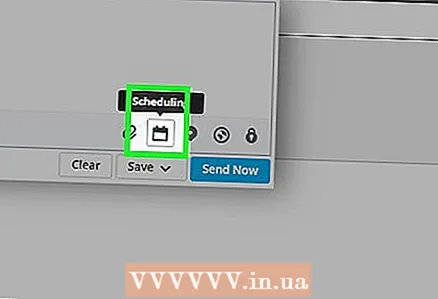 5 Click "Scheduling". It's a calendar-shaped icon below your post. The planning menu will open. Select the date and time for posting using the calendar and clock from the pop-up menu.
 - If you want to be notified by email when a post is posted, check the box at the bottom of the menu.
 6 Plan posting. To do this, click the "Schedule" button at the bottom of the window.
 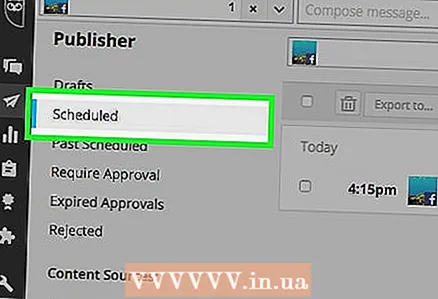 7 Edit the scheduled post using the paper airplane icon. This icon is located on the left side of the screen in the vertical HootSuite toolbar. The HootSuite Editor window will open and you will see a list of upcoming posts.
 - You can use the options in this window to edit and delete scheduled posts.
Tips
- Many users find that scheduling posts at regular intervals, especially during periods of increased traffic, attracts more followers. If you are working with HootSuite, you can use the Auto Schedule option to maximize the value of your posts.
- When using any of the methods described, you can attach photos, videos, or links (just like you would do it manually). However, you cannot schedule the publication of photo albums or events.
Warnings
- As mentioned above, Facebook's interface will not allow you to schedule posts on your personal profile at this time. You can only schedule posts on pages. If you want to schedule posts both in the profile and on the pages, use third-party programs (HootSuite and others mentioned in the article).


