Author:
Sara Rhodes
Date Of Creation:
13 February 2021
Update Date:
1 July 2024
Content
This guide will walk you through the process of installing subwoofers for a CD player, both factory and later, in your car.
Steps
 1 It is most advisable to buy an amplifier wiring kit first at an online auction. It includes a large power wire, a short ground wire, a control wire, many fuses and various connectors to make the installation correct and tidy. Some record stores have huge spools of wire that come in lengths. This is a profitable alternative to buying a wiring kit if you know the exact dimensions of the car.
  2 Route the 12V power cable (usually the longest wire in the kit, mostly red, and can vary in diameter from 3.3mm to 11.7mm) from the battery through the motor housing to the amplifier. You can find the factory hole in the case at the bottom right. Do not connect the power cable to the battery or amplifier yet.
  3 Find a solid metal ground near the amplifier. To maintain good grounding quality, you need it to be located about a meter from the amplifier. This can be achieved by lifting the mat and completely removing paint from the metal. If the amplifier is installed in the trunk, multiple suspension bolts can be used, which are located directly above one of the rear wheels. The bolts attach the suspension elements directly to the chassis, making them ideal for grounding.
  4 Remove the outer cover of the purchased CD player. You should see a blue wire with a white stripe that sticks out of the back of the deck and is called the steer. The control wire carries a simple 12V signal that the CD player sends to the amplifier to turn it on.
  5 Weld the control wire that came with the amplifier kit to this blue wire with a white stripe and run it through the body of the turntable and then along the door.
 6 Before you set up your CD player, insert the black and red RCA connectors into the back of the deck where it says “Subwoofer Output”. If your CD player does not have these outputs, or you have a factory-installed CD player installed, you will need a device called an inline converter. It is a small box with 4 input wires and 2 required output RCA types, which are connected to the amplifier. It will take the high-level speaker voltage and pull it down to a low-level signal that the amplifier can process. 4 input wires can be connected to the rear speakers (+ and - for left and right).
  7 Route all wires directly to the amplifier. Route the power and control wires on the right side exactly as the factory speaker wires on the left for fire safety reasons. If your wires are routed on the same side as the power cable and short-circuits it, it will destroy the head deck (CD player). RCA cables should be placed in the bottom center of the machine as they can pick up noise from wire insulation and transfer heat from power cables.
  8 Use an audio cable to connect the subwoofers to the amplifier. The size is not too important here, since the wire is copper, the resistivity per meter is several tens to hundreds of mΩ, which means that if there is any voltage drop across the wire, it will be only the smallest.
  9 By now, you should have purchased a subwoofer box / enclosure. There are many different types of enclosures (sealed, ported, narrowband, labyrinth, etc.) There are many articles that cover the pros and cons of each, and it would take too much space here. If you want to get the most complete answer to this question, then refer to the user manual of the subwoofer - in it you will find which type of cabinet is best suited for which sound. If you don't want to "wade" through the volumetric calculations, then just buy a case larger than you need, and stuff it with the contents of the pillows until the subwoofers sound the way you would like.
  10 Determine the impedance value of the subwoofer (s) you are using and try to match the impedance of your amplifier. For example, if you have a 500W and 4 Ohms amplifier and 1000W and 2 Ohms, it is worth connecting your speakers to 2 Ohms. To achieve this, two 4 ohm subwoofers can be connected in parallel. If you are new to circuit calculation methods, you can refer to the amplifier's user manual, which in most cases will show your wiring diagram.
 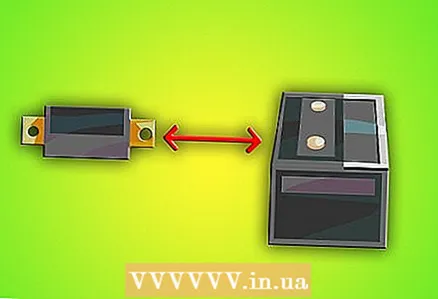 11 Place a fuse on the 12V wire in the engine compartment, no more than half a meter from the battery. If your amplifier kit comes with a “built-in fuse holder,” it is worth finding a suitable place in the engine compartment to install it. After making sure the power cable is not energized, cut it to reach the fuse and attach it to one side of the fuse holder. The other side (the one you just cut) needs to be peeled off and attached to the other side of the fuse holder.
  12 Connect the power cable to the battery. You can find quality ring connectors on the market and even battery terminals (they sometimes come with an amplifier kit) that will make the connection to the battery more reliable and tidy.
  13 Finally, connect the battery cable to the amplifier. Then, under the hood, press the cable down against the battery. Be aware that a decent spark can sometimes slip through the first time when you touch the power cable to the battery. Don't worry about this! This is because the amplifier charges the massive internal capacitors.
  14 Do not make the sound too loud, otherwise the subwoofers may “cut off” it. In this case, the peak power will be supplied to the amplifier output for a fraction of a second. This will negatively affect the subwoofer as it will create an abnormally widened or extremely compressed peak in amplitude for a period of time. Not only will you not make a single decibel of sound during it, but you will load the voice coil too much and damage it. Beginners should make it a rule to play a fairly loud song at ¾ of the maximum volume of the CD player. Increase the volume gradually, starting from zero, until it is obvious that you will not make it louder. The volume control is in no way a "volume" control. The volume control should never reach its limits.
Tips
- Make sure that when you install the fuse, all other work has already been done.
- Connecting the subwoofers to the factory system can involve several additional steps, such as using an input converter, which is described in the Steps section, or connecting the control wire to the ignition circuit fuse on the fuse panel.
- A good quality subwoofer can be used for years, but until you understand 100% of this topic, it is better to take a good new amplifier when problems arise with the old one. For simplicity, take a mono amplifier, since subwoofers (especially the woofer section) are technically not stereo.
- If you burned a fuse when you wanted to turn on the amplifier, the problem is almost always a poor ground connection. Disconnect it, clean the wire or ground area and try again. If that doesn't work, find a new grounding point.
- Make sure all wires fit neatly to the amplifier so you don't have to do the same thing a hundred times over.
- Be sure to wrap all wire connectors with electrical tape to reduce the chance of wires touching other metal parts or short circuiting.
- Make sure there are no blown fuses in the fuse box, otherwise you may have problems with the amplifier - for example, it will not turn on when connected to subwoofers. This can be the case with any device that only works when the ignition is on (windshield wipers are a good example).
- Check "soundproofing", use foam or spray to fill cracks that may appear in the cabin and trunk after installing the equipment.
- Do not mount the amplifier on the trunk floor so that if something spills, you do not have to change the amplifier.
Warnings
- Disconnect the battery before working on any electrical parts of the machine that contain bare wires or connectors; An incorrectly connected wire can damage relays, blow fuses, or harm your computer, which costs a lot of money.
- Be careful to avoid electric shock as it is painful.
- Consult a mechanic or a competent auto electrician if your car model has special features or additional risks may arise (problems with installing software or harm from an incorrectly connected battery). This is especially important for new machines.
What do you need
- wire stripper
- wire with a diameter of 2mm or more (2.3mm, 2.6mm, etc.)
- long power cord (red is best)
- fuse inserts (for small or medium amplifiers, usually 20-30 pieces are enough)
- wire crimper
- tin scissors or wire cutter
- insulating tape
- zippers
- pin and detachable butt connectors
- bifurcated wire connectors
- crimp connectors (tubular or heat shrink if you want to look solid)
- a multimeter (just to make sure the wires are okay)
- torch
- wiring diagrams for purchased or factory stereo
- screwdrivers (with Phillips and straight tips)
- knife
- nuts, washers, bolts and possibly a small amount of sealant (to fill the voids) when installing the amplifier.
- wire tester (usually has a small flame at the end)
- a small metal file (to remove paint from the floor to install a ground wire)
- possibly an electric drill (for installing an amplifier, drilling holes for wires, or installing a sub body [which is also a good idea])


