Author:
William Ramirez
Date Of Creation:
15 September 2021
Update Date:
1 July 2024

Content
Light pits are small recesses in the ground opposite the windows of the basement floors and basements, which improve the illumination of the room and protect the windows from moisture. Usually they are made about a meter deep and poured a small layer of gravel on the bottom so that moisture does not accumulate there. These structures serve as decorative functions and are of practical use.With simple maintenance, the pits will help extend the life and improve the appearance of the basement windows. In this article, we'll show you how to install window pits and avoid some common problems.
Steps
 1 Take the pit box and place it on the ground by the window to mark the perimeter of the pit you need to dig. Use a shovel to mark a rectangular area around the box, about 15 cm from the outer walls.
  2 Dig a hole.
- The top edge of the box should protrude about 15 cm above the ground, and the hole should be made 10 cm deeper in order to pour a layer of gravel there. Use the box to control the depth of the hole.
- Be sure to make the bottom of the pit slope. This means that it must be tilted away from the foundation so that water entering the sump leaves the wall.
 3 Pour about 10 cm of gravel on the bottom of the pit.
 4 Place the box in the pit close to the foundation.
 5 Mark the points on the wall where the anchor bolts will be attached.
- As a rule, pit boxes are attached to the foundation with anchor bolts. This is the most reliable mounting method, but there are other methods. Refer to the installation instructions to properly secure your box.
 6 Drill holes in the foundation at the marked points.
 7 Secure the box with anchor bolts.
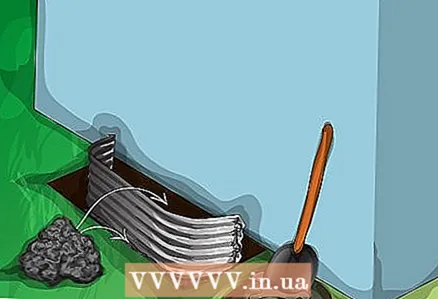 8 Pour about 10 cm of gravel on the bottom of the pit and around the perimeter between the box and the edge of the pit. Remember to tilt away from the foundation.
  9 Fill the voids between the outer walls of the box and the edge of the pit with earth. Compact the earth and gravel well around the sides of the box.
Tips
- If a lot of water accumulates around the pit, make a blind area that will drain water from the foundation.
- Always make the pit deeper and wider than you think is necessary for this: for proper installation of the pit, you need enough space, and the voids can always be filled with earth.
- When it is raining, snowing and falling leaves, cover the pit with a lid or plastic sheet. Even if the bottom of the pit is tilted, water and debris can still collect there and ruin the window.
Warnings
- Check the sump periodically for moisture. Although you have placed a layer of gravel on the bottom for good drainage, a low slope or poor duct installation can be counterproductive.
- Small windows do not require special government approvals. If you have a large-scale project, you may need to negotiate technical regulations with the relevant institutions.
What do you need
- Pit box
- Shovel
- Gravel
- Drill
- Anchor bolts
- Work gloves


