Author:
William Ramirez
Date Of Creation:
18 September 2021
Update Date:
21 June 2024
Content
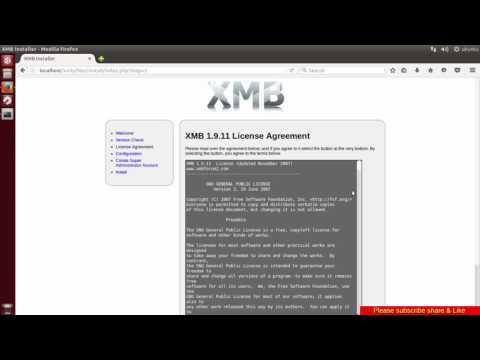
1 If you already have an installation package on your computer, skip this step. Go to http://www.xmbforum.com In the upper left corner, "" under the heading Download XMB "", select the latest version of the forum. 2 Depending on the browser, you will receive a download notification. Select the folder where the file will be saved. Remember where this folder is, as you will need it soon. 3 If you have already created a database for your forum, skip this step. Open your server control panel and go to the database section. Create a new database, add a user with full access rights to the database, remember its name, as well as the username and password to access it. 4 Extract the contents of the zip file downloaded from the XMB site to a folder on your hard drive. Open your FTP client and connect to the server. Create a new folder on the server where you will install the forum. Transfer all forum files from your computer to this folder. This may take a few minutes. 5 In your browser, go to the forum folder on your domain and add install / at the end. It should look something like this: http: //www.domainname.extension/forumfolder/install/. You will be taken to a page titled as XMB Installer. 6 Follow the instructions on this page until you complete the installation and see a page that says Installation Complete. If the installation fails, check your database settings and verify the location of the forum on the server. For additional support, head over to http://forums.xmbforum.com/index.php?gid=20.
 Method 2 of 2: Setting up a forum
- 1 In the upper right corner of your forum page, you will see "Login" and "Register" buttons. Sign in to your account using the information provided during installation. Now, in the same corner, you will see a few more buttons. Click on "Control Panel". This section contains options for managing the forum (see picture 2).
- 2 In the control panel, select the Settings section. When registering a new user, the forum rules will appear. They can also be read by clicking on the corresponding button on the panel at the top of the page. Additional languages and themes can be installed by downloading from http://www.xmbforum.com/download/. The "Additional Fields" function adds additional fields to be filled in when registering a new user. The "News" section is located on the main page in the form of scrolling text. There you can place any text you like.
- 3 In the control panel, select the Themes section. Click on the "New Topic" button. Fill in the fields as you like to make the forum look the way you want. Color values can be specified both in words and using hexadecimal numbers. You can define the hexadecimal color values on this site: http://www.2createawebsite.com/build/hex-colors.html
- 4 In the control panel, select the Forums section. "Category" is the name of a group of forums. "Forum" is the place where discussions are posted. "Subforum" - a separate section of the forum, also intended for posting discussions.
- 5 To create a new category, click on the field labeled New category and enter the name of the category, for example, "Section for newbies".
- 6 To create a new forum, click on the field labeled New Forum and enter a name, for example "Introduction". In the drop-down list, select in which category the new forum should be placed. The process for creating a sub-forum is similar to the process for creating a forum.
- 7 In the "Order" column, enter a number to determine the position of the created object relative to other categories, forums within a category, or sub-forums within a forum. To delete something, check the box on the left and click "Save Changes". Remember to click the "Save Changes" button every time you change the content of the form for the changes to take effect (see picture 3).
Tips
- Binary mode is used for file transfers. Most FTP clients do this automatically, but if you are using an FTP client from the command line, use the "bin" command before transferring files.
- In step 4 of the installation process, on the Settings page, the default method is the simplest. As indicated on the page, fill out the form (see picture 1) copy the resulting code into a new file called config.php and upload it using your FTP client to the main folder of your forum. Replace existing files (if any). Only after configuring the config.php file, proceed to the next step.
- You are a super administrator. This means that you have absolute access to anything on your forum. You can also see users in stealth mode.
- On the Themes page, click Details next to an existing theme to edit it. You may consider changing the width of borders, tables, spacing between tables, font size.
Warnings
- Failure to upload a file or folder may crash your forum.
- The default path to theme pictures is http: //www.domainname.extension/forum/images/themename. When you save your own graphics, create an appropriate folder with the theme name at the above address. After that, you should specify this folder as the folder with pictures for your theme. For example, a theme with images called Red will be located at http: //www.domainname.extension/forum/images/red, and in the theme settings, in the Image folder field, images / red will be indicated.
What do you need
- Internet connection
- Internet browser
- About 320 MB on your hard drive and on the server hard drive
- FTP server access
- Database on server


