Author:
Helen Garcia
Date Of Creation:
22 April 2021
Update Date:
26 June 2024

Content
- Steps
- Part 1 of 3: Moisten the wood
- Part 2 of 3: Steam the dent
- Part 3 of 3: Sand the wood and apply a protective coating
- Tips
- Warnings
- What do you need
If you notice an unsightly dent on the wooden floor or furniture, don't be in a hurry to get upset - the situation can certainly be corrected. It is quite easy to remove a dent from a softwood surface. Just a magical combination of heat and moisture is enough. Minor dents and damage can be ironed out with a simple clothes iron, restoring the original smoothness of the wood. The process itself takes only a few minutes, after which you are unlikely to be able to find a flaw.
Steps
Part 1 of 3: Moisten the wood
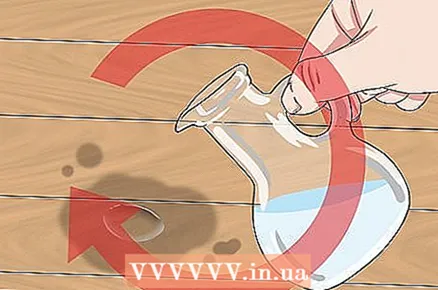
 1 Blot the dent with water. Pour about 30 ml of water over the problem area - there should be enough water to cover the dent and a small part of the surrounding wood. The dent should be completely wet. Accumulation of water at the bottom of the dent is a good sign that the area is wet enough.
 - Use a dropper or cooking injector for better control over where you pour the water.
- If you see serious cracks or chips around the dent, you may want to leave the repair to a professional to avoid making it worse.
 2 Place a damp paper towel or cloth over the dent. Dampen a cloth or paper towel and squeeze out excess water, then place it directly on the dent. This will increase the amount of moisture and create a layer that will protect the wood from heat damage from the iron.
 - Use an old T-shirt, dust rag, or any other piece of fabric you don't mind ruining.
- If the dent is on the side or corner of the furniture, you will most likely need to hold the fabric with your free hand while you steam the wood.
 3 Wait for the wood to absorb water. Wait one to two minutes for the wood to absorb as much water as possible. Water-soaked wood becomes soft and pliable. Under the influence of heat, the wood will expand and the flattened area will rise.
 - The deeper the water penetrates into the wood, the more efficient the steaming process will be.
Part 2 of 3: Steam the dent
 1 Heat the iron. Plug the iron into a power outlet, turn on the appliance and set it to the maximum temperature. Wait a few minutes for the iron to warm up enough - for best results, it should be hot to the touch.
 - When you turn on the iron, it will heat up very quickly. Careless touching the surface of the iron can cause painful burns.
- When not in use, leave the iron on a firm, level surface from which it will most likely not fall.
 2 Run the iron over the dent. Press the iron against the fabric over the dent and move it in slow, circular motions. Make several passes, gradually expanding the affected area. Continue heating the wood until the fabric is dry, then lift it by the corner to check the result.
 - The heat from the iron (combined with moisture) will swell the pressed wood, returning it to its original shape.
- Try not to hold the iron in one place for too long, or you may burn through the fabric or wood underneath.
 3 Moisten the wood again and repeat the process. A single steaming session may be enough to remove minor dents. For more severe indentations or areas with a lot of damage, continue dampening and applying the iron until the worst dents appear.
 - After each procedure, be sure to dampen the cloth with fresh water or use a new paper towel.
- You may not be able to fully repair deep dents. However, steaming will flatten them out and make them less noticeable.
Part 3 of 3: Sand the wood and apply a protective coating
 1 Let the wood dry completely. Water softens the wood, making it prone to chips and cracks. Let the surface dry naturally before moving on to the next step. In the meantime, do not rearrange furniture or place anything on the wood to avoid accidental damage.
 - The iron should help to evaporate most of the moisture, but the previous density and hardness will return only after a few hours.
- As it dries, the wood will begin to shrink, which can cause problems if you start sanding or loading it too early.
 2 Remove roughness with sandpaper. Sometimes small imperfections remain on the wood, and water can cause slight discoloration. To eliminate them, walk over the area with coarse sandpaper until it no longer stands out from the surrounding surface.
 - Use light, gentle movements to avoid scratching the surface of the wood that may have been loosened by the dent.
 3 Apply a protective coating. When you are finished fixing imperfections from the finished surface, be sure to paint over it with a fresh coat of paint or varnish. This will help hide the dents and act as a barrier against future blows.
 - As a rule, one layer is enough to hide the dent marks.
- Let the finished surface dry overnight before touching it.
 4 Seal large dents with wood putty. The steaming effect is not always sufficient to remove dents. Deep dents and areas with kinks, cracks or chips should be left to a professional. Severe damage can usually be repaired with a strong epoxy filler or varnish filler.
 - For larger work, ask the carpenter to cut a special piece of wood to fit the damaged area.
- After that, the repaired surface will most likely have to be repaired or blocked up.
Tips
- Using the steam function of the iron will increase its effectiveness in removing dents.
- Heat is best for removing minor dents from unfinished soft woods such as pine, birch or cedar.
- Try to protect vulnerable surfaces with pillows, rugs, or coasters.
- A coat of varnish will protect wood furniture or floors from falling objects, spills, and other annoyances.
Warnings
- Do not let the iron come into direct contact with the wood surface.
- Do not cover wood with synthetic fabrics, as heat may melt them.
- There is no guarantee that steaming will work on hardwood surfaces or thick layers of paint or varnish.
What do you need
- Iron
- Water
- Thin cloth or paper towel
- Coarse sandpaper
- Dropper or Cooking Injector (optional)
- Varnish, stain or acrylic paint (optional)


