Author:
Joan Hall
Date Of Creation:
5 July 2021
Update Date:
1 July 2024
Content
- Steps
- Part 1 of 3: Getting Started
- Part 2 of 3: Removing the carpet
- Part 3 of 3: Cleaning the Floor
- Tips
- What do you need
Most professionals charge a fee per square meter to remove the old carpet, which can cost several hundred dollars, depending on the size of the room. Whether you are changing the carpet in your home, or simply cleaning it up to renew your floors with parquet or tiles, you can save a lot of money by removing the old carpet yourself. Removing old carpet is just a matter of "dirty elbow": taking it off the floor, rolling it up, cleaning up any glue, buttons or nails that it might leave behind.
Steps
Part 1 of 3: Getting Started
 1 Take the tools you need to get the job done. Before you begin to rip off the carpet with just your hands and desire, it is best to prepare yourself by taking all the tools that will be needed for a successful job. Nothing is expensive among them, everything should be available at any hardware store:
 - Sturdy leather gloves with palm lining are very important for hand safety. You can bump into sharp nails or buttons while pulling out the carpet, and a good pair of gloves will also help you grip the carpet. A dust mask (respirator) is also good protection, especially if you have asthma or other respiratory problems.
- You will need a pry bar, pliers, and a hammer to lift the carpet and buttons / nails. When you can rip off the rug with your hands, start, but you will need help to rip it off.
- To keep your work area clean, it is good to have a roll of duct tape to roll up and move the carpet after you loosely cut it, and a knife to cut the strips of the covering.
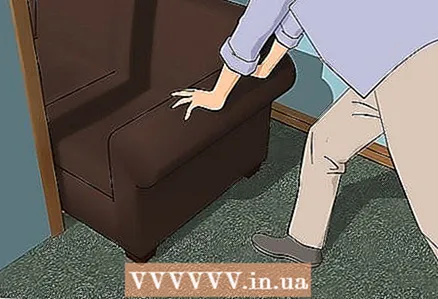 2 Remove all furniture from the floor. Obviously, you need to remove whatever is on the carpet from the room before you start ripping it off. Actually, it can take longer than removing the coating, which will not take more than 45 minutes or an hour if done with the right technique.
 - Find temporary space for beds, chairs, bookcases, and other furniture from the room. Move furniture to a new location carefully. Don't worry about pushing it across the old carpet and ruining it, as you will throw it away anyway.
 3 Remove decorations and other trimmings from the walls. You must remove anything that will hold the corners of the carpet during removal. Clean up any sculpting / edging that might get between the wall and the floor.
 - In most parts, the carpet should not be under the edging or skirting board because it is usually not installed this way. If you change it, in any case it must be removed before you start working on the carpet, but if you are going to keep the baseboard it is better not to touch it.
 4 Complete the repair schedule. If you are remodeling an entire room, it would be foolish to install new carpeting before painting the walls. Use an old rug as a rag to drop paint drips onto it can really save you time. In most cases, it is better to change the carpet at the end of the repair.
  5 Vacuum the carpet. An old carpet can really be a dust collector and it will be much easier for you to first clean it and then peel it off.Do not fight with moisture, dust or large dirt
Part 2 of 3: Removing the carpet
 1 Pick a corner to start. For most jobs, it is recommended to start at the back corner and work your way towards the door, but you can start at any corner. Corners are the easiest places to pick up carpet because you have a comfortable edge to grab onto.
 - If the carpet is already being removed anywhere, start there. Sometimes the carpet will start tearing around the edges, or pets will dig on it and make your job much easier. Start where you think is most convenient
 2 Grab one corner of the carpet and pull it up off the floor. Once you've chosen a starting point, grab the carpet with pliers and pull firmly upward. Do not jerk too hard, otherwise you may rip off the carpet and have to start over. After you get a good piece, you can use your hands to pull the cover towards you.
  3 Use a pry bar for robots under the carpet. Pull it out from the corner along both edges to make it easier to remove the cover. There will likely be carpet buttons which are quite sticky, making it much easier to use a pry bar for this. Continue pulling, using a pry bar to separate the carpet from the floor as evenly as possible.
 - When you find carpet buttons / nails, remove them. Look for buttons that can be attached to the bottom of the carpet. Slide the pry bar under the rug to make sure they come off before folding it.
 4 Fold it up. Roll the rug towards one wall and then the other until it folds into a large flag-like section. Continue pulling the cover towards you until you have a large strip to transfer.
 - Don't try to pull out the entire carpet at once, or you'll end up with a mess. To keep it clean, it is best to remove the substantial but portable part in one go. Estimate by eye a piece no larger than 60-90 cm when you fold the carpet. In other words, pull 1.8m of carpet, sometimes from the width of the room. It will be much harder for you and the helper.
 5 Cut off the strip. When you fold the rug, use a knife to cut off a piece of the rug and roll it up as evenly as possible. Even if this deforms part of the carpet, try rolling it into a small bundle to make it easier to carry. Use the tape to secure the end of the roll, then the helper takes one end and you the other and throw it away.
 - Eventually, you will be working with the entire carpet in this basic way. Lift up the section, cut it into strips with a knife, and fold it up. This will make it easier to move it out of the room and place it somewhere.
 6 Lift up the carpet backing using the same technique. Carpet lining is a vapor barrier found in some types of rugs. Some floors may not have any carpet at all. If it is there, then it is easier to clean than the actual carpet, but you can use the same technology if needed. Start at one corner, pull the lining and cut into comfortable strips.
 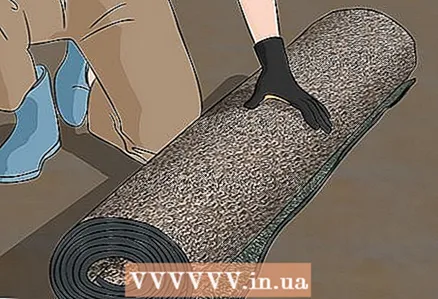 7 Dispose of old carpets properly. For the most part, you can dump your old, leaky carpet in any trash can in your city. Regions have different rules on how to dispose of carpets, although if you wish, check with your local authorities about the disposal of your area.
 - The American Carpet Recycling / Recycling Company (CARE) is an organization that collects old carpet to recycle and use as a base for a variety of products, including new carpet backing and even lumber. It is available in 26 US states and provides a good alternative to throwing away the carpet.
- When you replace your carpet, consider purchasing from Mohawk, Shaw, Miliken or Flor - these are all carpet dealers that have recycled materials
Part 3 of 3: Cleaning the Floor
 1 Remove any remaining nails on the floor. If you are not going to remap the carpet to a new floor, pull them out by hand.They should come out relatively easily as long as you are wearing your sturdy gloves. Use a pry bar if necessary.
 - If you are going to re-install the carpet, check the nails / buttons for wear and determine if they are recyclable. If they are dull, loose, or worn, pull them out and replace.
- It's also a good idea to watch out for any extra carpet nails, screws, or buttons that may be on the floor after removing the carpet. Sweep them up or pick them up by hand and discard them. Sometimes there will be a lot of staples that may be difficult to remove. Use a pair of pliers to pull them out, and make sure to get all of them out.
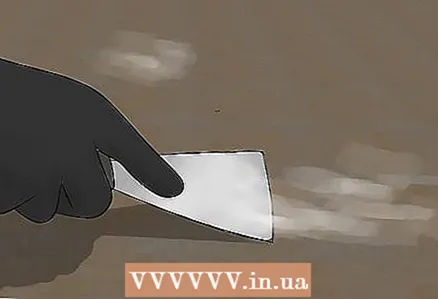 2 Clean the floor with a pry bar or knife. Various types of adhesives are used for carpet, and some require simple cleaning and others more thorough. Do it the best you can.
 - Look for a floor cleaner that removes the glue if you don't want to scrape it off. You can find it at your local hardware store.
 3 Check the condition of the floor. This is very important no matter what you want to do with the next room that you checked for the condition of the floor and made the necessary repairs when you removed the carpet. It would be a shame to install a new $ 800 rug on a creaky floor, or if it shows signs of mildew.
 - Walk on the floor and jump on it. The planks need to be attached to wood beams with screws or nails, and if you find some planks that squeak, you can secure them to the beam with screws or round head nails. There are grooved nails with safer grip strength, which reduces the likelihood that this squeaky area will squeak again. Drive nails or screws about two or three inches (5-7.5 cm) apart and you should be fine.
- If your carpet is damaged or wet, it may have affected the floor as well. Look for signs of rot or mold. If you see signs of severe damage or rot, these planks need to be replaced before installing new decking.
 4 Vacuum up the rest of the debris. Once you're done making your repairs, sweep or vacuum clean any remaining debris and adhesive staples before proceeding with installation. After you have removed the old carpet, you can install a new one, laminate, or other types of flooring.
Tips
- Wear safety glasses to keep out buttons, nails, dust and debris from your eyes. A mask is a good idea if you have asthma or are sensitive to allergens and other airborne particles.
What do you need
- Gloves
- Pliers
- Knife
- Pry bar
- Broom
- Protective glasses
- Mask


