Author:
William Ramirez
Date Of Creation:
15 September 2021
Update Date:
21 June 2024
Content
- Steps
- Method 1 of 5: iPhone 7 and 7 Plus
- Method 2 of 5: iPhone 6, 6s, 6 Plus, 6s Plus
- Method 3 of 5: iPhone 5, 5s, 5c
- Method 4 of 5: IPhone 4 and 4s
- Method 5 of 5: iPhone 3G
- Tips
- Warnings
- What do you need
In this article, you will learn how to remove the battery from iPhone by disassembling it. Please be aware that removing the battery yourself will void your phone's warranty. If it's still under warranty, take your iPhone to an Apple Service Center to have it repaired free of charge.
Steps
Method 1 of 5: iPhone 7 and 7 Plus
 1 Make sure iPhone is turned off. Failure to turn off the phone may result in a short circuit. To turn off your iPhone 7, press and hold the lock button on the right side of the case, and then swipe the Turn Off slider on the screen.
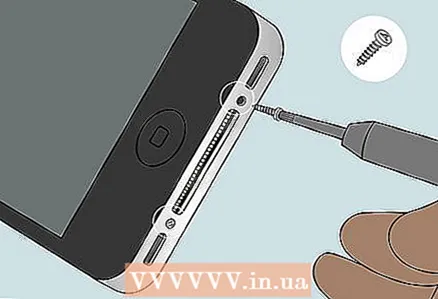
  2 Unscrew the Pentalobe screws on both sides of the Lightning connector. This is the charger connector located on the bottom of the case. You will need a 3.4mm Pentalobe P2 screwdriver to remove these two screws.
  3 Place the back of the phone on a not very hot heating mat. This will loosen the adhesive holding the screen, allowing it to be lifted later. Leave it on the mat for 5 minutes, then move on to the next steps.
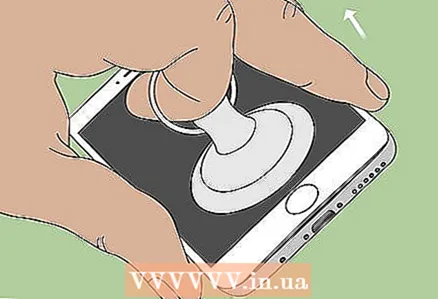
  4 Attach a suction cup to the front of your iPhone. Place it at the bottom of the screen, directly above the Home button.
 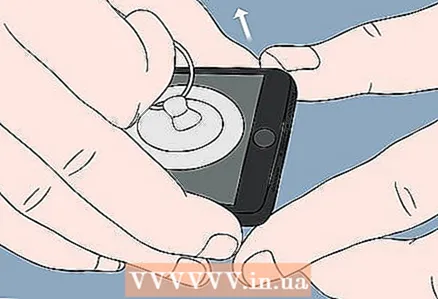 5 Pull the suction cup up to raise the screen. Only a small gap should appear between the screen and the case. Do not pull on the suction cup sharply to avoid tearing the screen off the case. Proceed carefully.
 - While pulling on the suction cup, hold the iPhone with your other hand.
- If the screen does not give way, try warming the back panel for a few more minutes.
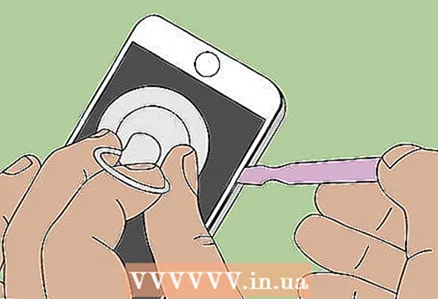
 6 Insert a plastic spudger into the gap in the lower left corner of the iPhone. When you gently pull on the suction cup, a gap forms and the scapula should fit snugly into it.
 - Use only a plastic spatula, not a metal one, to avoid damaging your phone.
 7 Slide the spatula up the left side of the body, then repeat on the right. By slightly turning the paddle around its axis, you can gently move the screen away from the body. Not use the spatula close to the top of the phone - there are plastic clips that hold the screen in place and you could break them. Only push the paddle up to the middle of the phone.
  8 Raise the screen so that it is at a 10 ° angle to the body. Pulling it higher can tear the fragile cables leading to the screen, so be careful.
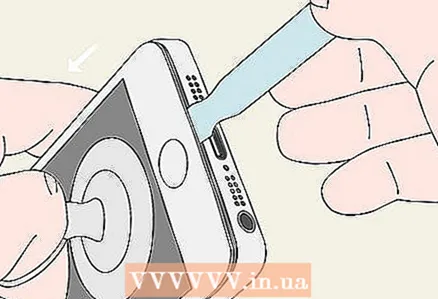
  9 Run a thin card or guitar pick along the top of your iPhone. This will peel off the last glue.
  10 Pull the screen towards the bottom of the phone. You only need to slide it down a few millimeters to release it from the plastic clips at the top.
  11 Open the screen to the right. It should open like a book. You will see the inside of the iPhone, and the screen, still attached to it, will lie face down to the right of the case.
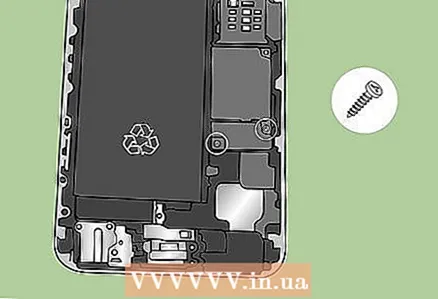
  12 Unscrew the four Y-screws from the bottom shield mount. This silver mount sits inside the iPhone on the bottom right; from it to the screen there is a cable in the form of a ribbon. The mount is secured with four screws, three of which require a 1.2mm screwdriver and one requires a 2.6mm.
  13 Remove the screen mount and set it aside. Underneath you will see two black strips of plastic, one parallel to the battery and the other perpendicular.
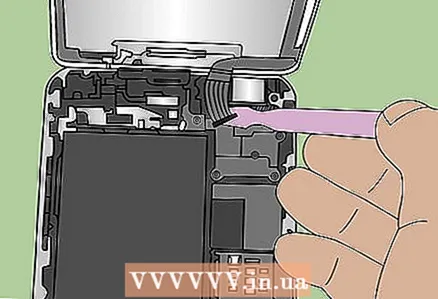
  14 Use a spatula to lift the perpendicular plastic strip. This is the battery connector. Disconnecting it disconnects the screen from the battery.
  15 Use a spatula to lift the parallel plastic strip and the gray strip underneath. This will separate the ribbon cable from the inside of the iPhone, thereby disconnecting one of the two ribbon cables connected to the screen.
 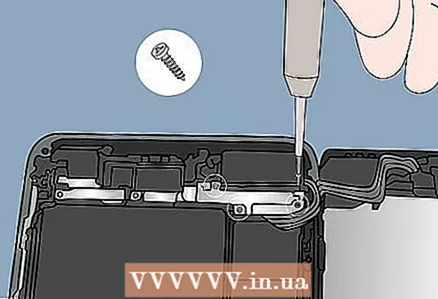 16 Unscrew the fastener above the second ribbon cable. This silver mount is located in the upper right corner inside the phone. It is secured with three Y-screws, one 1.3mm and two 1.0mm.
  17 Remove the mount. You will also see another black plastic piece perpendicular to the battery. This is the connector for the second ribbon cable.
  18 Pry off the connector with a spatula. This will disconnect the second ribbon cable connected to the shield.
  19 Set the screen aside. It should now be completely detached.
 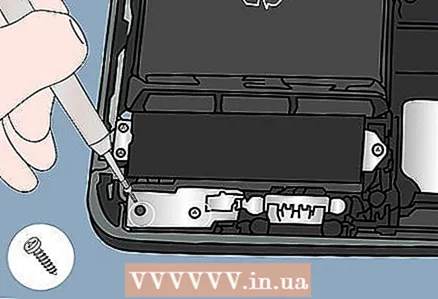 20 Remove the two Phillips screws (+) from the atmospheric pressure sensor. This black mount is located in the lower left corner of the case. It is secured with two screws: 2.9mm and 2.1mm.
  21 Remove pressure transducer. Now you have the Taptic Engine connector - a black plastic piece like the ones you disconnected earlier.
  22 Pry off the Taptic Engine connector with a spatula. This disconnects the Taptic Engine from the iPhone board, allowing you to remove it.
 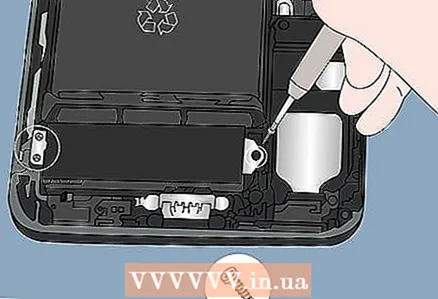 23 Remove the three Phillips screws holding the Taptic Engine. All three screws are 1.5mm.
  24 Remove the Taptic Engine carefully from the case. When you remove the Taptic Engine, the path to the battery will be clear.
 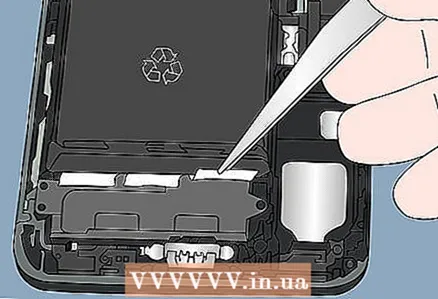 25 Peel back the three adhesive strips at the bottom of the battery. You will need pliers or tweezers.
 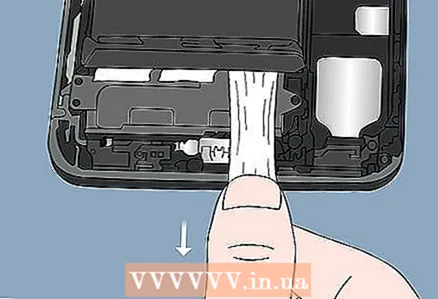 26 Pull one of the adhesive strips towards you. Be careful, if you crush or tear off the adhesive strip, it will be extremely difficult to remove the battery. When you pull the strip out enough, it will slide out from under the battery.
 - If one of the adhesive strips breaks and the battery cannot be removed, place iPhone on a heating mat for a few minutes to loosen the adhesive, then slide a thin plastic card to the left of the battery and pry it open.
 27 Pull out the other two strips. Hold the battery to keep it in place.
  28 Remove the battery. You can now insert a new battery into your iPhone, or let it dry if damaged by water.
Method 2 of 5: iPhone 6, 6s, 6 Plus, 6s Plus
 1 Make sure iPhone is turned off. Make sure the smartphone is completely turned off and not in standby mode. Hold down the power button and then swipe the slider to turn off your iPhone.
 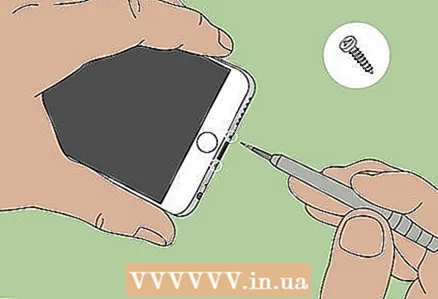 2 Remove the two Pentalobe screws on each side of the Lightning connector. This is the charger connector on the bottom of the iPhone. Use a Pentalobe P2 screwdriver to remove the screws. The size of the screwdriver depends on the model of the device:
 - 6.6P - 3.6mm Pentalobe
- 6s, 6sP - 3.4mm Pentalobe
 3 Attach a suction cup to the front of your iPhone (just above the Home button). Use a strong suction cup to help detach the screen from the case.
 - For 6s and 6sP, attach the suction cup in the lower left corner, not above the Home button.
 4 Pull the suction cup up to detach the screen from the case. It is necessary to create a small gap between the screen and the case. Do not pull the suction cup abruptly to avoid damaging the screen; do it forcefully, but smoothly.
 - While pulling on the suction cup, keep your iPhone on the table with your other hand.
 5 Use a plastic spudger (spudger for disassembling cases; spudger) to detach the shield from the case. This blade has a flat end (like a screwdriver). Insert the spatula into the created gap and gently move it to widen the gap.
 - For 6s or 6sP, insert the spudger into the slot above the headphone jack.
- Rotate the paddle (around its axis) to detach the bottom of the shield from the body.
 6 Sweep the paddle around the body (6s and 6sP). If you are opening 6s or 6sP, move the paddle to the left side of the chassis, pry the shield a little more, and then slide the paddle to the right side of the chassis.
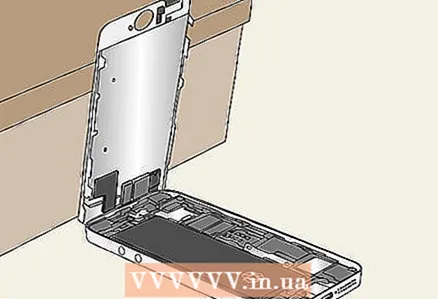
  7 Rotate the screen so that the top of the screen acts like a hinge. With the bottom of the screen detached from the case, rotate the screen so that it is at a 90 ° angle to the case. Lean the screen against a book or box to hold it in the position described.
 - Attention! Not detach the screen completely; otherwise, it will damage the connectors and completely inoperate the smartphone.
 8 Locate the battery connector fastener. When looking at the battery, the connector is on the left, just above the bottom edge of the case.The connector is covered with a rectangular metal piece with two screws.
  9 Remove the two screws that secure the battery connector fastener. To do this, use a small Phillips screwdriver. Remove the fastener to gain access to the connector.
  10 Disconnect the battery connector from the device's motherboard. Do this with a plastic spudger. Be careful not to pull out the connector along with the connector (this will damage the iPhone).
  11 Remove the screws that secure the shield connector fastener. This part is in the upper right corner of the open iPhone. Unscrew the screws and remove the fastener. Remember where the corresponding screws are screwed.
 - The iPhone 6, 6p, and 6sP require five screws to be removed, while the iPhone 6s requires four.
 12 Disconnect the camera cable. It is plugged into a large connector that is near and below the connector for the screen cable. Use a spudger or fingernail to remove the connector from the connector. Be careful not to pull out the connector along with the connector.
  13 Disconnect other connectors near the camera cable connector. There are three such connectors: one is located directly at the connector for connecting the camera cable, and access to the other two will open after disconnecting the camera cable.
  14 Remove the screen. By disconnecting all cables, the shield can be removed completely.
  15 Use tweezers to remove the adhesive strips. These strips hold the battery in place and are located at the bottom of the battery.
 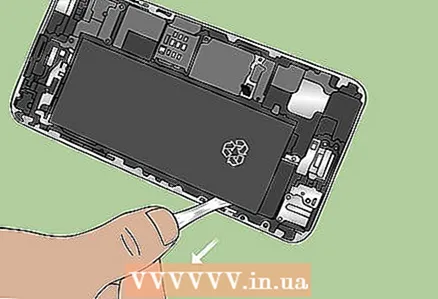 16 Pull the adhesive strip gently up and to the side. It runs along the other surface of the battery. Pull the strip slowly until you pull it out completely.
 - One strip is glued to the right side of the battery and the other to the left.
 17 Use a hair dryer to heat the back of your iPhone. Bring the hair dryer to the back of your smartphone and heat it up for one minute. This will soften the remaining adhesive that holds the battery in place.
 - Do not hold the hair dryer too close to the surface of the device and do not turn on the hair dryer at the maximum temperature; otherwise, the components of the iPhone will overheat and damage the smartphone.
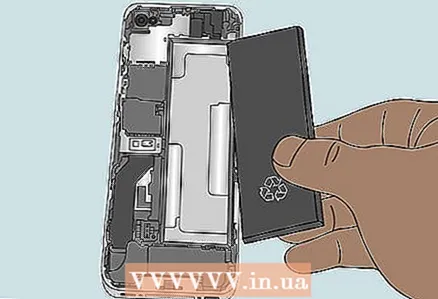
 18 Use a credit card to remove the battery from the case. When you remove the adhesive strips, use your credit card to remove the battery, which is held in place by the remaining adhesive. Insert the card between the left edge of the battery and the bottom of the case, and then gently lift the battery up.
 - Be careful not to bend the battery when removing it to avoid the release of harmful chemicals.
 19 Put in a new battery and assemble your iPhone. Do this after removing the old battery. Make sure all connectors are securely connected to their respective connectors and that the screws are in the correct holes.
 - After assembling your smartphone, perform a full reset of the device. To do this, hold down the Home and Power buttons and hold them until the Apple logo appears on the screen.
- To improve the performance of your battery, let it drain 90% (or more) before fully charging it.
Method 3 of 5: iPhone 5, 5s, 5c
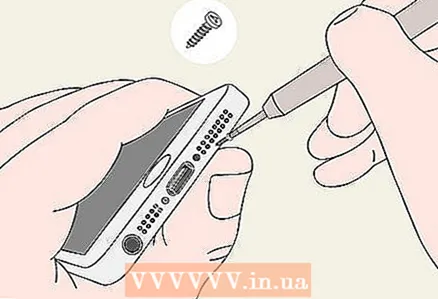 1 Remove the two Pentalobe screws on each side of the Lightning connector. This is the charger connector on the bottom of the iPhone. Use a Pentalobe P2 screwdriver to remove the screws.
  2 Attach a suction cup to the iPhone screen. Do this directly above the Home button. Press down on the suction cup so that it adheres well to the screen.
 - A strong suction cup will lift the screen off the bottom of the case.
 3 Hold the body on the table. Pull the suction cup up with one hand and hold the body with the other hand. There is a small gap between the case and the screen. Insert a plastic spatula into the gap; it will make it easier for you to hold the body.
  4 Turn off the Home button before opening your smartphone completely (iPhone 5s only). In the case of the iPhone 5s, a cable runs from the Home button to the bottom of the device. If you suddenly lift the screen above the case, this cable will break and the Home button will stop working. Therefore, be sure to unplug this cable:
 - Use a spatula to remove the metal fastener that secures the cable.
- Disconnect the cable. Be careful not to pull out the connector itself.
 5 Rotate the screen so that it is at a 90 ° angle to the body. The top of the screen should act as a kind of hinge. Lean the screen against a book or box to hold it in the position described. Do not remove the screen completely to avoid damaging the connected cables.
  6 Remove the two screws that secure the battery connector fastener. This part is located three centimeters from the bottom edge of the case to the right of the battery. Use a screwdriver to remove the screws, and then use your fingers to remove the fastener (it covers the connector on the motherboard, which is located in the smartphone case).
 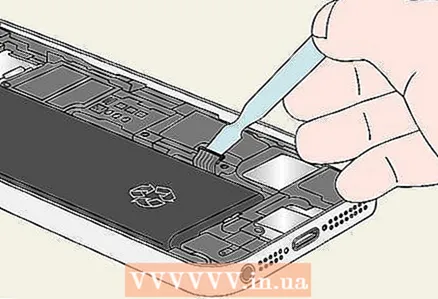 7 Disconnect the battery from the motherboard. Disconnect the battery connector using a spatula or fingernail. Be careful not to pull out the connector itself, which was covered by the removed fastener.
  8 Turn off the screen. The screen can be removed completely and thus all supports can be removed. This will avoid damaging the cables, but this step is optional in order to remove the battery:
 - In the upper right corner, remove the four screws (three on iPhone 5) holding the screen connector fastener. Remember where the corresponding screws are screwed in order to properly assemble the smartphone.
- Disconnect the cables that are under the removed fastener. Be careful not to pull out the connectors. The iPhone 5 has three cables, the 5c has two cables, the 5s has three cables.
- After disconnecting all cables, remove the shield completely.
 9 Remove the adhesive from the bottom edge of the battery. A black plug is attached to the bottom of the battery; dispose of it to access two adhesive strips that are connected by black tape.
 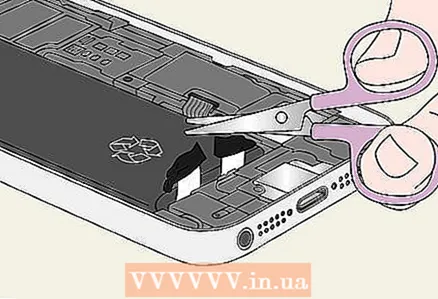 10 Cut the black tape to separate the adhesive strips. There is a gap between these strips. Use scissors to cut the black tape in half to separate the strips.
 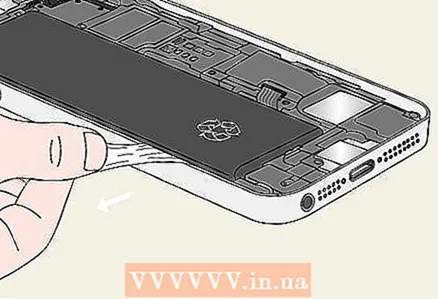 11 Remove each strip that is adhered to the bottom of the battery. Pull the strip up and then out to the side. Pull it at a slight angle towards the back of the battery. Pull on the strip until you pull it out completely. Repeat the above steps with the other strip on the opposite side of the battery.
 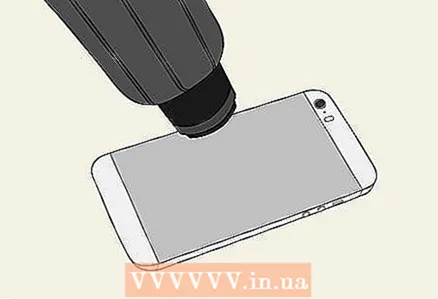 12 If the battery does not come out, heat the back of iPhone. The battery may be trapped in glue residue. Heat the back panel for one minute.
  13 Lift the battery gently with a credit card. Use a bank card (or similar) to remove the battery after the smartphone is heated. Do not bend the battery when removing it.
 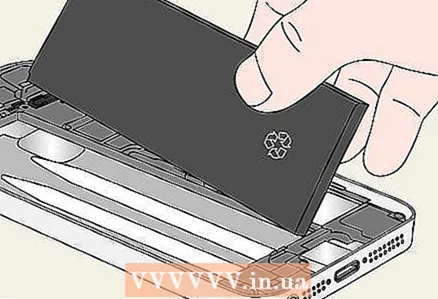 14 Put in a new battery and assemble your iPhone. Do this after removing the old battery. Make sure all connectors are securely connected to their respective connectors and that the screws are in the correct holes.
 - After assembling your smartphone, perform a full reset of the device. To do this, hold down the Home and Power buttons and hold them until the Apple logo appears on the screen.
- To improve the performance of your battery, let it drain 90% (or more) before fully charging it.
Method 4 of 5: IPhone 4 and 4s
 1 Remove the screws at the bottom of the iPhone. They are located on both sides of the charger connector. IPhone 4S uses Pentalobe screws (requires a Pentalobe P2 screwdriver). The iPhone 4 can have either Pentalobe screws or regular Phillips screwdriver screws.
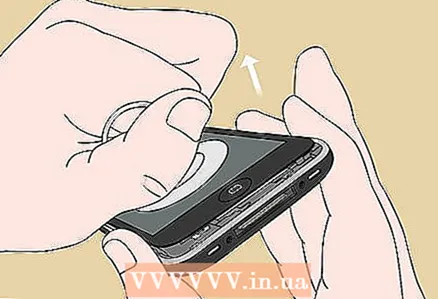
  2 Slide the back cover of the device. Hold your iPhone with your thumbs on the back of the smartphone and rest on the screen.Press down on the panel with your fingers to make it slide up.
 - Press down on the panel hard enough to make it slide up. To avoid damaging the screen, press with your thumbs, which do not put on the middle of the back panel, but on its top or bottom.
- The panel will move up 2 mm.
- After sliding the back cover, lift it up, that is, remove it. If the panel cannot be lifted off (lifted) with your fingers, use the suction cup.
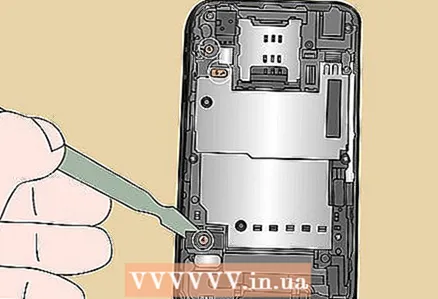
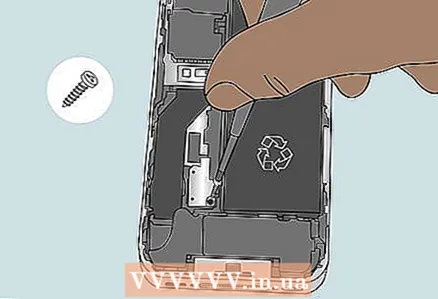 3 Remove the two screws from the battery connector securing part. Use a small Phillips screwdriver to do this. This part is on the left and bottom of the battery. A fastener secures the connector to the connector on the motherboard.
 - Note that the top screw is shorter than the bottom one.
- On some iPhone 4 models, you only need to remove one screw.
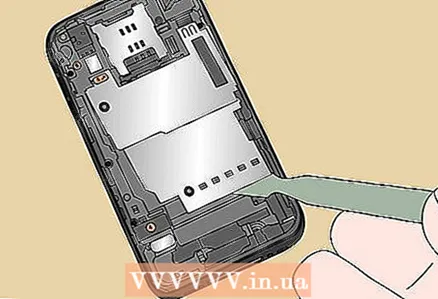
 4 Disconnect the battery connector. Insert a plastic spatula under the metal connector (next to the battery). Lift it up to disconnect the battery from the motherboard.
 - Before disconnecting the connector, disconnect the small grounding clip that is located under the connector itself. Use a plastic spatula to do this as well. If you do not disconnect the grounding clip, it will be damaged if you disconnect the connector.
- Be careful not to pull out the connector along with the connector.
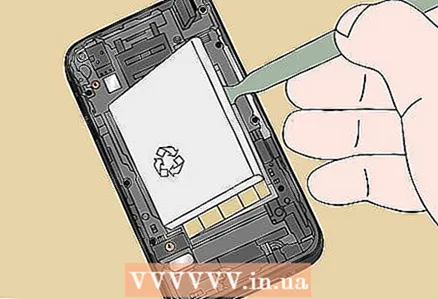
 5 Remove the battery. To do this, pull on the plastic tab that is attached to the back of the battery. You may need to use a credit card to remove the battery.
 - Proceed carefully. The adhesive secures the battery to the back of the case, so apply enough force to peel the battery off.
- Be careful not to hit the top of the iPhone, as this is where the volume up and down button cables are located.
 6 Put in a new battery and assemble your iPhone. Do this after removing the old battery. Make sure all connectors are securely connected to their respective connectors and that the screws are in the correct holes.
 - After assembling your smartphone, perform a full reset of the device. To do this, hold down the Home and Power buttons and hold them until the Apple logo appears on the screen.
- To improve the performance of your battery, let it drain 90% (or more) before fully charging it.
Method 5 of 5: iPhone 3G
 1 Remove the two bottom screws (3.7 mm). Do this with a small Phillips screwdriver. Put the screws in a safe place.
 - The screws are located on either side of the dock connector.
 2 Raise the screen. Attach a suction cup to the screen above the Home button. Then, with one hand, pull the suction cup up, and with the other, hold the smartphone body. The bottom of the screen will be raised.
 - To lift the screen with the suction cup, you need to pull firmly on it. There is a rubber gasket between the screen and the body of the smartphone, so the screen fits quite tightly to the body.
- Move the suction cup back and forth to loosen the grip between the screen and the case.
- If necessary, use a plastic spatula to pry the screen off the case and then lift the bottom of the screen up.
- Do not remove the entire screen as it is connected to the motherboard by multiple cables. Lift and rotate the screen so that it is at a 45 ° angle to the body.
 3 Disconnect the cables. Use one hand to hold the screen while the other unplug the black ribbon cables labeled “1”, “2” and “3”. Disconnect the cables with a spudger.
 - Insert the paddle on the left. Doing this to the right could damage the connector.
- Lift cables "1" and "2" to access the connectors. Cable “3” will swing upward approximately 90 degrees.
- Disconnect the ribbon cables from the connectors. The screen can now be removed completely.
 4 Pull out the SIM tray (sim tray). Insert the SIM eject tool into the hole located near the headphone jack.Press down on the tool until the SIM tray opens, and then use your fingers to pull it out of the smartphone.
 - If you don't have a SIM eject tool, use a paperclip.
- Also, the SIM-tray can be pulled out at the very beginning of the process, if you decide that it is more convenient to open the smartphone this way.
 5 Disconnect the ribbon cables marked "4", "5" and "6". Insert a spudger under the connector of each cable and push down on it to disconnect the cable.
 - The iPhone 3GS has a cable labeled "7" that you need to disconnect as well.
- At the same time, get rid of the “Do not remove” sticker to expose the screw on the bottom of the case.
 6 Remove the screws that are located around the battery. There are eight screws in total: five 2.3 mm screws, two 2.3 mm screws, and one 2.9 mm screw.
 - Five 2.3mm screws are half-threaded and secure the motherboard to the case.
- Two 2.3mm screws are threaded to the head and secure the camera to the motherboard.
- The 2.9mm screw was under the "Do not remove" sticker.
 7 Remove the camera. Insert the spatula under the chamber. Press lightly on the paddle to remove the camera.
 - Note that the camera cannot be completely removed. The bottom of it will still be connected to the motherboard.
 8 Lift up the bottom of the motherboard. Insert the paddle under the motherboard from the dock connector side. Gently lift the motherboard up, and then slide it towards the dock connector to remove the motherboard completely.
 - There is a gold jumper on the motherboard. It is very thin and fragile, so be careful.
 9 Remove the battery. Insert the spatula under the battery. Lift the battery up to remove it.
 - The battery is glued to the body of the smartphone. Therefore, be careful not to damage it when removing the battery.
- You can pull on the plastic tab to remove the battery, but this will likely bend it.
- If necessary, gently heat the back of the case; turn on the hair dryer at medium temperature. This will soften the glue and easily remove the battery.
- This is the final step in this process.
Tips
- Store the screws in a safe place during operation. Separate the screws to quickly remember which holes to screw them into.
Warnings
- Turn off your iPhone before removing the battery. Otherwise, you may get damaged or damage the device.
- Remember: Removing the battery will void your warranty. If the warranty period has not yet expired, take the device to a service center, where the battery will be removed free of charge; otherwise, removing the battery yourself will be much cheaper than in a workshop.
- Use only a plastic spatula. Metal tools can damage your smartphone.
What do you need
- Small Phillips screwdriver
- Pentalobe P2 screwdriver
- Plastic spudger for disassembling cases (spudger)
- Small suction cup
- A paperclip or similar item to remove the SIM card
- Screw storage container


