Author:
Ellen Moore
Date Of Creation:
11 January 2021
Update Date:
1 July 2024
Content
- Steps
- Part 1 of 7: Preparing to uninstall
- Part 2 of 7: Deauthorize Apple ID in iTunes (Windows)
- Part 3 of 7: Deauthorize Apple ID in iTunes (macOS)
- Part 4 of 7: Deauthorize on a mobile device
- Part 5 of 7: Deauthorize on Mac
- Part 6 of 7: Submitting an Account Deletion Request
- Part 7 of 7: Disabling iMessage
In this article, we are going to show you how to delete your Apple ID account. When your Apple ID is removed and you deauthorize your computers and mobile devices, submit a request to delete your account with Apple Support. After deleting your account, it will be impossible to restore or reactivate it.
Steps
Part 1 of 7: Preparing to uninstall
 1 Make sure you really want to remove your Apple ID. In this case, you will lose access to purchases and services associated with your Apple ID. That is, you will no longer be able to use the App Store, Apple Pay, iCloud, iCloud Mail, iMessage, Facetime, your subscriptions and services associated with Apple ID.
 - If you've changed your iPhone to a different phone and are therefore not receiving SMS messages, go to the Disable iMessage section.
- If you don't want to permanently delete your Apple ID, just deactivate it temporarily.
 2 Back up important emails or files. This is necessary because you will no longer be able to use iCloud Mail and iCloud Drive.
 - To back up emails to iCloud Mail, move emails from your iCloud Inbox to your computer's Inbox.
- Download pictures and documents from iCloud Drive to your computer.
Part 2 of 7: Deauthorize Apple ID in iTunes (Windows)
 1 Launch iTunes. Double-click the icon that looks like a multi-colored note on a white background.
 - If you haven't linked iTunes to your Apple ID, click Account in the menu bar at the top of your screen, and then click Sign In. Now log in with your Apple ID email and password.
- 2 Click on Account. You will find this option in the menu bar at the top of the screen.
- 3 Hover your mouse over Authorization. A submenu will open on the right.
- 4 Click on Deauthorize this computer. You will find this option in the submenu to the right of the Account menu.
 5 Enter your Apple ID password when prompted. You need to authenticate your account to de-authorize it. Enter your password in the line below your email address. Make sure the correct email address is displayed to sign in to the correct account.
 - 6 Click on Deauthorize. This option is located in the lower right corner of the login window.
- 7 Click on Ok. A message appears stating that the computer was successfully deauthorized. Click "OK" to close the message.
- 8 Click on Account. It's on the menu bar at the top of the screen.
- 9 Click on Go out. This will deauthorize your Apple ID in iTunes.
Part 3 of 7: Deauthorize Apple ID in iTunes (macOS)
 1 Launch iTunes, Apple Music, Apple TV, or Apple Books. To do this, click on the icon of one of the specified applications.
 - In macOS 10.15 (macOS Catalina) or later, iTunes is replaced by Apple Music, Apple TV, and Apple Books. Therefore, launch one of these applications. You can deauthorize your account using any of these applications by following the steps below.
 2 Click on Account. You will find this option in the menu bar at the top of the screen. A dropdown menu will open.
  3 Hover your mouse over Authorization. A submenu will appear on the right.
 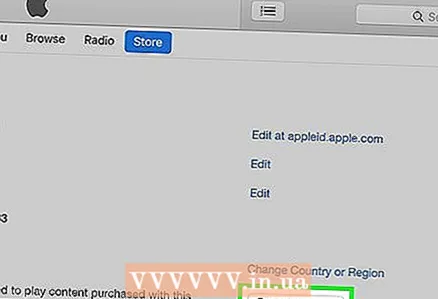 4 Click on Deauthorize this computer. You will find this option in a submenu.
 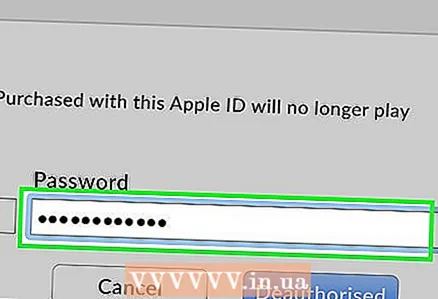 5 Enter your Apple ID password. Enter it as soon as prompted.
  6 Click on Deauthorize. You will find this option in the lower right corner. The Apple ID will be deauthorized in iTunes, Music, Apple TV, and Apple Books on your Mac.
Part 4 of 7: Deauthorize on a mobile device
 1 Launch the Settings app
  . Tap the gear-shaped icon on the gray background.
  2 Click on your name. You will find it at the top of the settings page.
  3 Scroll down the page and tap Go out. You will find this red button at the bottom of the page.
 - If you've activated Find My iPhone, you'll need to enter your passcode and tap Disable.
 4 Tap Go out. You will find this option in the upper right corner.
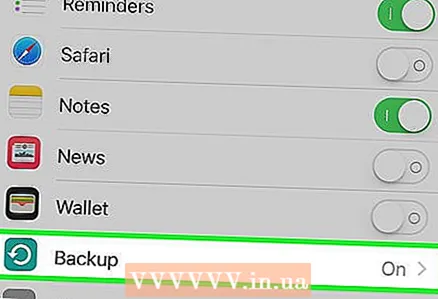
 - If you want to save contacts, calendar entries, news, keychains, and Safari history to iCloud, move the sliders next to the items to be saved.
 5 Tap Go outas soon as prompted. The Apple ID and associated data will be deleted on the device.
Part 5 of 7: Deauthorize on Mac
 1 Open the Apple menu
  . Click on the Apple logo in the upper left corner. A dropdown menu will open.
 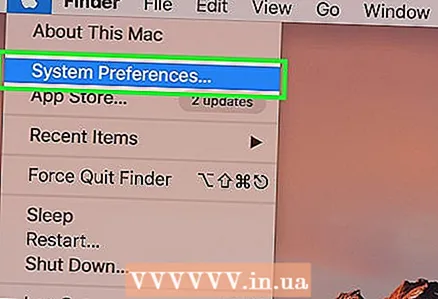 2 Click on System settings. You will find this option at the bottom of the dropdown menu. The System Preferences window will open.
  3 Click on "iCloud"
  or Apple ID. On older versions of macOS, click the blue cloud iCloud icon. On macOS Catalina or later, click the gray Apple logo Apple ID icon.
 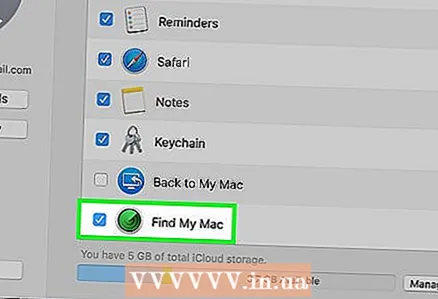 4 Scroll down and uncheck Find a Mac. This option is located at the bottom of the window.
 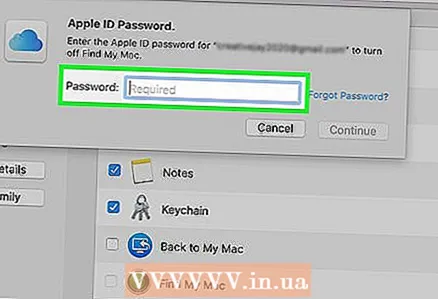 5 Enter your Apple ID password as soon as prompted. Do it on a text line.
  6 Click on Proceed. You will find this option in the lower right corner.
 - 7 Click on View (macOS Catalina only) If you're using the Apple ID app on macOS Catalina, click View in the left sidebar.
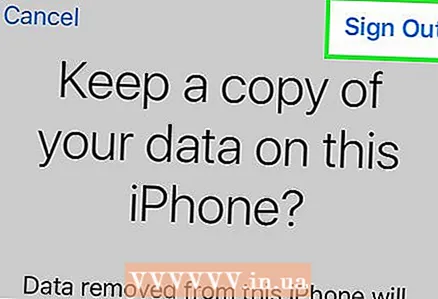
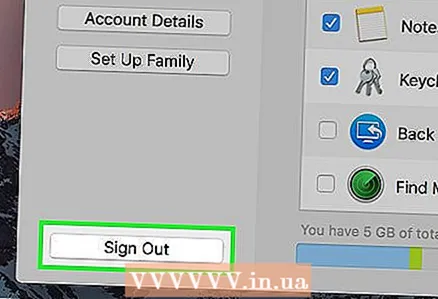 8 Click on Go out. It's in the lower left corner.
 - You may be prompted to keep a copy of the data stored in your iCloud account. In this case, check the box next to the respective data types and click on "Save a copy".
 9 Click on Proceed. You are deauthorized from your Apple ID account on your Mac.
Part 6 of 7: Submitting an Account Deletion Request
- 1 Go to address https://privacy.apple.com/ in your computer's web browser. It can be any browser on Windows or macOS.
- 2 Sign in to your Apple ID account. To do this, enter your email address and password, and then click on the "→" symbol. You will be taken to a page with security questions.
- If you went to the two-factor authentication page, authenticate with your iPhone.
- If you don't have two-factor authentication enabled, answer the security questions or click Get Support PIN. Write down the received PIN and then contact support.
- 3 Scroll down and tap Account deletion request. You will find this option at the bottom of the page under the "Delete Account" section; it is marked with a trash can icon. A page will open with a list of actions you need to take to delete your account.
- If you do not want to permanently delete your account, click on "Account deactivation request" to temporarily deactivate your account. This option is under the Temporarily Disable Account section and is marked with a silhouette of a person icon.
- 4 Select the reason for deleting the account. Open the Select Reason menu at the bottom of the screen.
- If there is no suitable reason in the menu, select "Other" and enter your reason for deleting the account.
- 5 Click on Proceed. This blue button is located below the dropdown menu.
- 6 Read the information on the page, and then click Proceed. The page displays information that you need to review before deleting your account. Read the information and then click the blue Continue button at the bottom of the page.
- 7 Check the box
 and press Proceed. By doing this, you agree to the terms and conditions of account deletion. The conditions are listed in the text box. Click the blue Continue button when you're ready to proceed.
 - 8 Select how you would like to contact support, then tap Proceed. Apple will contact you the way you specify (if your account information is available). Click on the slider next to the alternate email address, or next to the "Use a different email address" option, or next to the "Use phone number" option.
- 9 Enter a phone number or email address, then tap Proceed. In the text box, enter your phone number or email address, and then click Continue.
- 10 Enter the verification code and then press Proceed. This code will be sent to the email address or phone number you provided. Check your email or text messages (on your smartphone) and then enter the verification code to confirm that the email / phone number belongs to you.
- 11 Write down or print the access code, and then press Proceed. You will need this code if you want to contact Apple Support regarding your account. Make a note of the code or click "Print Code" to print it. Click Continue when you're ready to proceed.
- 12 Enter the passcode and press Proceed. Enter the access code obtained on the previous page and then click "Continue".
- 13 Click on Delete your account. This red button is in the lower-right corner of the pop-up window. Click "Remove Account" to submit a request to delete your account.
Part 7 of 7: Disabling iMessage
 1 Go to address https://selfsolve.apple.com/deregister-imessage/ in your computer's web browser. On the specified page, you can end your iMessage subscription.
  2 Scroll down to the section titled “Don't have an iPhone yet?". You will find it at the bottom of the page.
  3 Enter your phone number. Do this in the "Phone number" line.
  4 Click on Send code. You will find this option to the right of the Phone Number line. Apple will send an SMS message with a verification code to the specified number.
  5 Find the verification code. To do this, launch the Messages application on your smartphone, open the SMS message from Apple and find the six-digit code in it.
  6 Enter the verification code. Do it in the line "Enter the verification code".
  7 Click on send. You will confirm that the entered phone number belongs to you. This number will be removed from iMessage.


