Author:
Mark Sanchez
Date Of Creation:
1 January 2021
Update Date:
28 June 2024
Content
- Steps
- Method 1 of 4: Scripting and Storyboarding Animation
- Method 2 of 4: Animating with Acetate Film
- Method 3 of 4: Create Animations Directly on a Digital Device
- Method 4 of 4: Animating with cut-out character figures
- Tips
- Warnings
Before the advent of computers, 2D animation was extremely time consuming and required the work of a whole team of people and a studio. Nowadays, dedicated animation apps and software allow one person to create their own cartoon much faster. You just need a little patience, but you will realize that animation has never been so easy!
Steps
Method 1 of 4: Scripting and Storyboarding Animation
 1 Outline your idea on paper. Come up with a general plot of the story, without thinking about how exactly to translate it into animation. Think over the characters, the place of action and the actions of the heroes.
 - Keep the story short. Animation takes time. If you're taking your first steps in animation, aim to create a cartoon that is a couple of minutes long or less.
- The story should be simple. Set aside epic ideas for times when you have more experience. Start with the usual interaction of a pair of heroes on a single background.
- Watch the Supercafe TV episodes for awesome examples of short and simple cartoons.
 2 Write a script. Take the basics of your overall design and write down exactly what you want to see on the screen. Include dialogue, sound effects, staging, fade in and fade out effects, and so on.
 - Identify the critical elements of the story, especially if you are working as a team. Make sure that all team members clearly understand all the specifics that are present.For example, if at the end of a cartoon one of the characters flattens an empty soda can on his forehead, determine from the beginning that the characters were drinking soda from metal cans, not just “drinking soda.”
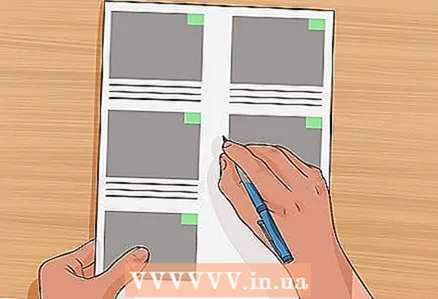 3 Prepare a script storyboard. Visualize your story by drawing frames for each highlight (like comics). Keep it simple at this stage to save time. For example, heroes can be depicted with schematic figures, and simple geometric shapes can be used for objects.
  4 Analyze your storyboard. Figure out which elements should be placed in the background, in the foreground and in between. Think about which elements will be static all the time, and which ones should move.
 - Think in terms of labor intensity. More elements in motion will take longer to animate. Minimize follow-up work by recomposing shots to reduce the number of moving elements. For example, if a fight breaks out between two characters and the others are watching, focus the frame on the reactions of the observers and use sound effects to demonstrate the fight off-camera.
 5 Sketch the characters and other elements. Draw each component of the cartoon until you are happy with the result. When you achieve the desired result, draw this element a few more times so that you can perfectly recreate it already in the cartoon.
 - Draw each element that moves from frame to frame from different angles. For example, depict all the characters from the front, then from the back and in profile. If the character has an asymmetrical appearance (for example, he has a side parting in his hair), draw a profile on both sides.
- Keep it simple. Again, think in terms of labor intensity. Avoid drawing too many details that you have to recreate over and over again.
- For an example, check out The Simpsons for some simple and easy sample images.
 6 Record the dialogues. Either record all line-by-line replicas separately and save them as separate audio files, or first record the entire conversation and then break it down into separate files with replicas.
Method 2 of 4: Animating with Acetate Film
 1 Install an inexpensive animation maker. Popular software used by professionals like Adobe Flash, Photoshop, and Toon Boom Studios costs hundreds of dollars. Save money at this stage and start with a simple application like Animation Creator HD or Animation Desk Cloud, which is easy to use and will only cost you a few dollars. Get to know the features and functionality of the application. Learn to copy frames and adjust the number of frames per second.
  2 Plan the actions of the heroes in time. Decide how many frames will be displayed per second. Then follow the same actions that the heroes should perform and time the time with a stopwatch to find out how many seconds it takes. For each action, multiply the required number of seconds by the number of frames per second to find out how many frames are required to draw for all actions.
 - Also figure out how many frames will be needed to animate each line of recorded dialogue. If the dialogue is at normal speech rate from beginning to end, just check the timing for each line. However, if one or more words are stretched, check how long all the syllables are. For example, let's say a commentator on a soccer game yells "Gooooool!" The image of the mouth at the moment of pronouncing a vowel will be noticeably longer in time than for consonants.
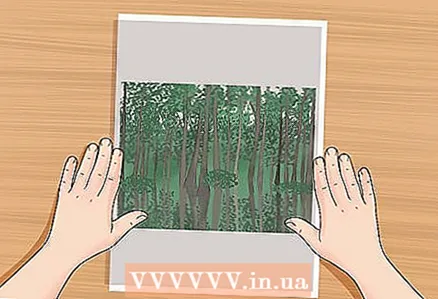
 3 Draw a background image (or images). Use regular drawing paper to depict and color the background items for each scene.
  4 Draw each element of the frame. For each element in the foreground or middle ground of the first frame, take an acetate film, overlay it on the original sketch of the particular element, and transfer its outlines to the film. Break the drawing into separate moving and static elements and draw them on separate sheets of acetate film. For example, draw a static fan base on one sheet of film, and movable blades on another. Then flip the acetate sheet over to the other side and on that side paint the images within the outlines.
  5 Take the first shot. Attach the background image to your work surface with glue paste. In the correct order, stack the images on acetate over the background, starting with the middle ground and ending with the foreground. Place the digital camera directly above the working surface with the lens down and take the first frame.
 - Take one or two test shots to make sure the camera is far enough away from the image to capture the full image.
- Choose a clean room with controlled lighting for photography. Avoid natural light that can vary in quality. Also, avoid dusty and dirty rooms, as dust particles can get stuck between the acetate sheets and can be seen in the frames.
 6 Create the next frame. Reuse those sheets of acetate film on which the elements do not move. Create new sheets for moving (from one frame to another) elements. Arrange the sheets in the correct order on top of the background and take a new frame. Repeat these steps until the very end of filming.
 - Maintain a list of the elements present in the frame for each scene. Double check that all the necessary elements are present in the frame before photographing it.
 7 Download photos to your computer. When you finish shooting, transfer the photos from the camera to your computer. Create a separate folder for each new project in the image library and number the files in chronological order for convenience (for example, "scene 1 frame 1", "scene one frame 2", and so on).
  8 Create animation from photos. For each video frame in your animation application, open a new photo. First, import the first image for the first frame, then import the second, and so on. When finished, export the project to a finished video file.
 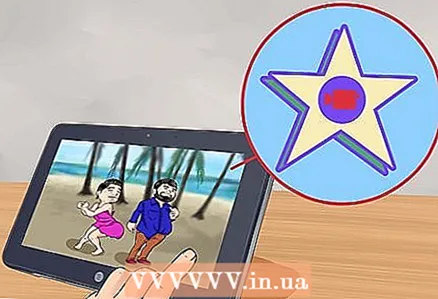 9 Finish your cartoon. Create a new video file in a video processing program (such as iMovie). Import video files with individual animation scenes into it and arrange them in the correct order. Import sound files with dialogs, music and sound effects, and then sync them with the video sequence. Then export the finished voiced cartoon.
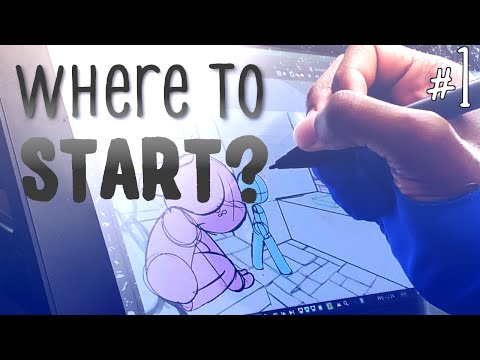
Method 3 of 4: Create Animations Directly on a Digital Device
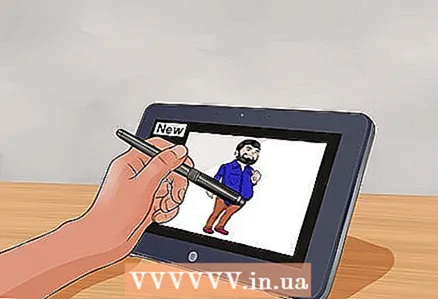
 1 Install inexpensive animation software. Popular software used by professionals like Adobe Flash, Photoshop, and Toon Boom Studios costs hundreds of dollars. Save money at this stage and start with a simple application like Animation Creator HD or Animation Desk Cloud, which is easy to use and will only cost you a few dollars.
 - If you have a tablet, use it to draw directly on the screen, as many artists prefer.
 2 Test the work in the installed application. Get to know the functions and features of the application. Check out the samples of the different types of brushes provided in the app. Learn to copy frames, add more layers to a frame, and change the displayed frames per second.
 - Practice drawing sketchy people running in one place.In the first frame, draw the whole body of the man on one layer. Add a second frame. In most animation applications, a new frame appears with a semi-transparent display of the previous frame, so you can safely circle static elements over it. Circle the man's head and upper torso. Next, draw the arms in such a way that one of them is slightly forward, and the other is back. Do the same with your legs. Add a third blank frame. As before, outline the head and upper half of the body, and then reposition the arms and legs again. Continue working until you have created enough frames for the man to run a few steps, then play the result to watch the animation.
- Next, practice working with layers. Animate another man running, but this time draw only the head and torso on one layer. Add a second layer to the frame to paint the hands. Then add a third layer and paint the legs. Then copy the resulting frame so that you get two identical frames. In the second frame, erase the arms of the second layer and paint them in a new position. Do the same with the legs in the third layer. Then copy the second frame and repeat the whole process in the same way until the little man runs a few steps. This way you don't have to constantly redraw the head and torso, which you only draw once.
 3 Create a new file in your application. Select your preferred screen aspect ratio with which you want to create your cartoon. In the first frame, create separate layers for the background, middle and foreground.
 - Depending on the application you are using, you may be able to create even more layers. For example, Animation Creator HD allows you to create 4 layers per frame. Don't be afraid to create and work with multiple layers at once.
 4 Rate your storyboard. Think over the layers and define the elements that will be in the foreground, middle ground and background. Identify elements that will span more than one layer.
 - Imagine a person sitting at a table, facing the camera, with his hands on the table and holding a can of soda in one hand. To animate him picking up the can and taking a sip, imagine the hand with the can in the foreground, the rest of the person's body in mid-shot, and the space behind the person as the background.
 5 Fill each layer with your own elements. Use the stylus to draw each element of the background, as well as the middle and foreground.
 - Think ahead. Be mindful of which elements will move from frame to frame and possibly expose details that are currently locked to display in the first frame. For example, when a character picks up a drink, the raised hand can reveal more details of his body.
 6 Copy the frame. In the new frame, change the elements of each layer as intended by your storyboard.
  7 Check the result as you work. Play the animation as you add and change more and more frames. To slow down playback, either duplicate each frame without making changes, or reduce the number of displayed frames per second. To speed up playback, increase the number of frames per second.
 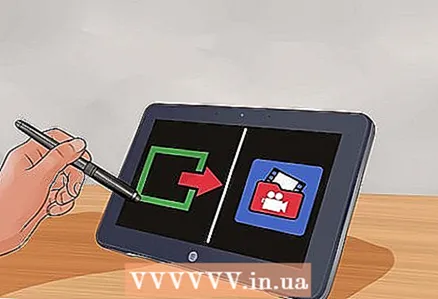 8 Export the video file. Once you've finished working on each scene, export it to your video library. Start a video editing program (such as iMovie) and create a new project for editing. Import the first animated scene from your video library into it.
  9 Import all animated scenes into one video project. Include all prepared video files in the project. Arrange them in the correct order for your cartoon.
  10 Import audio files. Synchronize dialogue, music and sound effects with your footage. Then export the finished voiced cartoon.
Method 4 of 4: Animating with cut-out character figures
 1 Install an inexpensive animation maker. Popular software used by professionals like Adobe Flash, Photoshop, and Toon Boom Studios costs hundreds of dollars. Save money at this stage and start with a simple application like Animation Creator HD or Animation Desk Cloud, which is easy to use and will only cost you a few dollars. Get to know the features and functionality of the application. Learn to copy frames and adjust the number of frames per second.
  2 Schedule the events of the cartoon in time. Decide on a frame rate per second. Then do the same actions yourself as the characters perform and time the time with a stopwatch to find out how many seconds it takes. For each action, multiply its duration by the number of frames per second to find out how many frames it will take to animate a particular action.
 - Also figure out how many frames will be needed to animate each line of recorded dialogue. If the dialogue is at normal speech rate from beginning to end, just check the timing for each line. However, if one or more words are stretched, check how long all the syllables are. For example, a commentator on a soccer match yells the word “Gooooool!”. The image of the mouth at the moment of pronouncing a vowel will be noticeably longer in time than for consonants.
 3 Prepare the background. Use a hard material such as cardboard, wood, or cork as the base for the background. Whatever you choose, make sure the material you use fits well into the camera frame. Cut out all elements of the background image. Glue to the base all the elements that remain static throughout the entire scene. Use an adhesive to temporarily fix anything that will move, such as clouds.
 - For elements with moving parts, create separate parts for the moving parts. For example, at a flagpole, the rod itself can remain stationary, and the flag can be waved or raised and lowered. In this case, the stem should be glued with glue, and the flag should be temporarily fixed with an adhesive mass.
 4 Create character figurines. Think about how mobile your characters will be. Decide how many joints will be detailed on all limbs. For example, will the arm bend at the shoulder joint and elbow, or only at the shoulder? Make separate pieces for all the moving parts, leaving a small protrusion on each limb element so that they can be attached to the character's body either with adhesive paste or with wire hinges.
  5 Create the first frame. Place your characters in the frame against the previously prepared background, along with additional cut-out objects for the foreground. Attach them to the background with adhesive paste. Place the camera directly above the frame with the lens facing down and take a photo.
 - Take one or two test shots beforehand to make sure the camera is at a sufficient distance from the frame to capture the entire image.
 6 Create the next frame. Correct the position of all movable elements that should move in the next frame. Take a picture and then repeat the same steps until you have captured the entire scene.
 - For each new frame, use a checklist of items to place in it so you don't forget anything.
 7 Download photos to your computer. Once you're done shooting, transfer the photos from the camera to your computer. Create a separate folder for each new project in the Image Library and number the image files chronologically for convenience (for example, Scene 1 Frame 1, Scene One Frame 2, and so on).
  8 Create animation from photos. For each video frame in your animation application, open a new photo.First, import the first image for the first frame, then import the second, and so on. When finished, export the project to a finished video file.
  9 Finish your cartoon. Create a new video file in a video processing program (such as iMovie). Import video files with individual animation scenes into it and arrange them in the correct order. Import sound files with dialogs, music and sound effects, and then sync them with the video sequence. Then export the finished voiced cartoon.
Tips
- (For all methods) Save each animated scene as a separate video file, even if your video application allows you to import directly from your animation application. Each second of animation on the screen takes a certain number of minutes and / or hours of work. Save backup files of your work in various programs in case you lose data. Also, write them down to a separate disk or USB flash drive.
- (For method 3) Install a graphics application such as Procreate or Brushes. Dedicated drawing programs offer more options for creating and manipulating images than animation programs. They have more brushes, more layers can be used, there are more ways to move and manipulate objects in different layers of the same image. Use a graphics application to create more detailed backgrounds, and then import the saved background into your animation software to use when creating your cartoon.
- (For all methods) To animate dialogs, use a phonemic table showing the position of the mouth for the various sounds spoken, or speak the necessary words in front of a mirror to reproduce the mouth movements in the animation.
- Watch cartoons. Pay attention to style, movement, and mistakes.
- (For all methods) Try looking for sound effects in your video processing software. Some of the programs, such as iMovie, include a sound library. If what you need is not there, then YouTube is another good source of sounds. Do not forget to provide links to sources when using other people's sound effects.
- (For methods 2 and 4) Keep all your materials organized. Use your signed folders to store your acetate sheets of images or cut out puppets in case you need to re-shoot something. For example, hold together all the sheets of acetate film used to animate one scene, such as moving an arm or leg.
- Create animations before recording dialogs.
Warnings
- Set aside plenty of time to work. Making a two minute animation doesn't seem like an ambitious project at all until you get to work.
- Using the work of other people (music, sound effects, etc.), study the issue of copyright and strictly comply with their requirements. Don't violate the rights of others.


