Author:
Carl Weaver
Date Of Creation:
2 February 2021
Update Date:
1 July 2024

Content
- Steps
- Method 1 of 2: Sculptures that are created by adding material
- Method 2 of 2: Sculptures that are created by removing excess material
- Tips
- Warnings
- What do you need
There are many types of sculpture, but in general they can all be divided into two large groups: sculptures that are created by adding material to give them the final shape (sculptures made of clay, wax, cardboard, papier-mâché, etc.) and sculpture. which are created by removing excess material to give them their final shape (sculptures of stone, wood, ice, etc.) In this article, you will find the basics of creating sculptures of both kinds, so that you can discover the new Michelangelo in yourself! Just get started!
Steps
Method 1 of 2: Sculptures that are created by adding material
 1 Sketch your future sculpture. Always draw a sketch of the sculpture you are going to make. This drawing does not have to be a fine art masterpiece, but it will undoubtedly help you to clearly imagine what will go where and how the shapes and volumes of parts of your sculpture fit together. It is best to draw your future sculpture from multiple angles. For those areas where many small elements are expected, it is worth drawing a separate, detailed sketch.
  2 Create a base. If your sculpture has a base, then it is better to start the entire creative process from it, and then create the sculpture itself already on it. If you are going to add a base to an already finished sculpture, then your creation will be less durable. The base can be made of wood, metal, clay, stone, or any other material of your choice.
 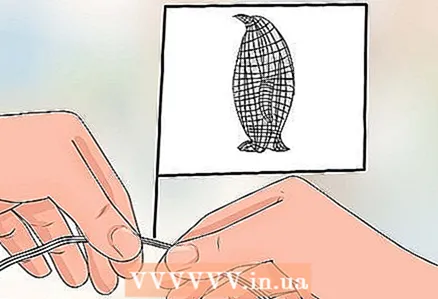 3 Make a wireframe. The sculptors call the frame a supporting structure. This is something like the skeleton of your sculpture. The wireframe will keep pieces of your sculpture from falling off, although not all parts of the sculpture will need a wireframe. It is necessary for parts such as arms or legs that are distant from the body and can easily break off.
 - The frame can be made of thick or thin wire, water pipes, PVC tubing, wood, sticks, pins, or any other material that you feel is right.
- Scaffolding usually starts with the ridge and then branches off for the limbs. Use your own sculpture sketch to create a skeleton, especially if the sketch reproduces your sculpture at life size.
- Secure your frame to or at the base before proceeding.
 4 Fill your frame with material. Depending on what material you are using to create your sculpture, you might want to make the core of the sculpture from a different material. This is usually done when creating sculptures from polymer clay. Such a core will help reduce the cost of materials and the final weight of the sculpture, so be sure to consider this possibility.
 - Materials such as newspapers, aluminum foil, ordinary or masking tape, and cardboard are usually used to fill the frame.
- Secure with tape without attracting this material inside your frame, using it to create only the general outlines of your future sculpture. But don't get carried away, you want to leave room for the main material of your sculpture.
 5 Go from creating large parts of the sculpture to smaller ones. Start adding basic material. Start by building the largest parts (called "large muscle groups") and gradually work your way up to smaller ones (called "small muscle groups"). Move from creating large details to smaller ones. Add or subtract material as needed, but try not to subtract too much of it because you may have difficulty adding it later.
  6 Add small details. Once you're done creating the basic shape of your sculpture, move on to work such as smoothing, cutting, and generally creating small details. This includes parts of your sculpture such as hair, eyes, outlines and curves of muscles, toes and hands, etc. Work on the details of your sculpture until it seems complete enough to you.
  7 Add textures. The last step in sculpting is adding different textures, if that's what you want. This is important for creating a more realistic look, but in principle not necessary if you intend to work in a different style. You can use special tools to create texture or use simple household items for this.
 - With real sculptor tools, the general rule is something like this: the thinner the tip of the tool, the less detail they need to make. Rounded tools are usually used to scrape off excess clay, while cutting tools are used to remove material and cuts.
- You can build your own tools from scrap materials. Use everything that comes to hand for this: balls of foil, black peppercorns, toothbrushes, toothpicks, chains, bearings, combs, knives, sewing and embroidery needles, etc.
 8 Bake your sculpture. You will need to bake your sculpture or let it dry well, depending on the material you use. Follow the material manufacturer's instructions for best results.
  9 Color your sculpture. If you want to paint or paint your creation, then do it after firing / baking / drying. You may need special paints, again, depending on the material used. To paint polymer clay, for example, you need a special enamel paint.
  10 Use a variety of tools. You can make your sculpture more interesting by using different materials for it, which will help your work look more original and add color and texture to it. Consider using real fabric to create your clothes, or sticking pieces of real or fake hair to your sculpture instead of trying to sculpt it.
Method 2 of 2: Sculptures that are created by removing excess material
 1 Start by sketching your sculpture. First you need to create a clay, wax, or any other version of your sculpture. This will be your sketch. You can take all the necessary measurements from it and use them later for cutting stone or any other material.
  2 Cut out the base shape. You can take measurements from the sketch of your sculpture and mark the parts of the stone or wood that you will need to cut. For example, if you already know for sure that your sculpture will not exceed 35 cm in height, you can safely cut all the material above the 37 cm mark.Leave some room for maneuver, but still cut off all unnecessary so that the basic shape your sculpture was already visible.
  3 Use a sharpener. Using this or other measuring tools, start measuring your sculptural sketch and making cuts in your wood or stone in the same places and at the same depth as in the sketch.
 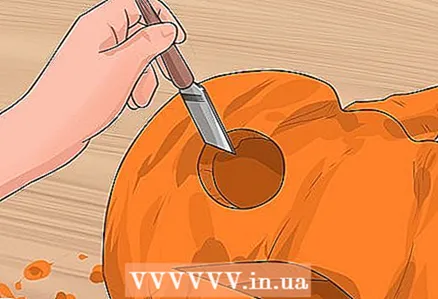 4 Cut out small details. Using the tools that are appropriate for your material, start slowly cutting out pieces of it according to the marks you made before.
  5 Sand your sculpture. Using ever finer sandpaper, sand your sculpture until it is as smooth as you would like it to be.
  6 Ready! Add some extra elements if you like and start admiring your creation!
Tips
- Old iron is not the best material option if you intend to exhibit your sculpture outdoors. It can simply blend in with the surrounding objects.
Warnings
- Handle all tools with care.
- Many materials have a strong odor or even toxic fumes. Be careful.
What do you need
- Clay, cardboard, sheet metal, stone, or other sculptural material
- Suitable tools for the selected material
- One or more sketches of your sculpture


