Author:
Joan Hall
Date Of Creation:
6 July 2021
Update Date:
1 July 2024
Content
- Steps
- Method 1 of 3: On the Apple ID website
- Method 2 of 3: On iPhone
- Method 3 of 3: In iTunes
- Tips
- Warnings
This article will show you how to create an Apple ID account without having to enter any payment method information. You can do this on the Apple ID website or iTunes, or on your iPhone / iPad. Apple ID accounts are used to sign in to Apple apps, smartphones, tablets, and computers.
Steps
Method 1 of 3: On the Apple ID website
 1 Open the Apple ID website. Go to https://appleid.apple.com/. The authorization page will open.
 - If you're on your current Apple ID account page, sign out.
 2 Click on Create Apple ID. It's a link in the upper right corner of the page. The Create Apple ID page opens.
  3 Enter your Apple ID information. Fill in the following fields:
 - "First name" and "last name": enter your first and last name;
- Date of birth: Enter your date of birth in the format dd.mm.yyyy.
- "[email protected]": Enter the email address you want to use for your Apple ID. You cannot use an email address that is associated with your other Apple ID.
- Password and Confirm Password: Enter the password you want to use for your Apple ID twice.
 4 Select security questions. Open the Security Question menu, select a question from it, and then enter your answer in the Answer text box.
 - Repeat these steps for the two remaining security questions.
 5 Scroll down and enter the security code. Enter the characters shown with a gray background in the text box to the right of them.
 - If you are unable to read the code, click New Code to generate a different security code.
 6 Click on Proceed. This button is at the bottom of the page.
  7 Receive a verification code for your email address. Open your inbox associated with the email address you provided when you created your Apple ID, open the email with the subject line “Verify your Apple ID email address” and look for the six-digit code in the email.
  8 Enter a code. Enter the six-digit code into the corresponding field on the Apple ID website.
 - Do not enter spaces.
 9 Click on Proceed. It's in the lower-right corner of the window. If you entered the correct code, an Apple ID account will be created.
Method 2 of 3: On iPhone
 1 Sign out of your current Apple ID. If you don't have an Apple ID yet, skip this step. To leave:
 - launch the "Settings" app
 ;
; - click on your name at the top of the page;
- scroll down and click "Sign out";
- Enter your Apple ID password to verify your actions.
- launch the "Settings" app
 2 Open the App Store
  . Click on the blue icon with a white "A". You can now create a new Apple ID.
  3 Tap Applications. This tab is at the bottom of the screen.
  4 Click on Download any free application. A pop-up window will appear.
  5 Tap Create a new Apple ID. This option is in the pop-up window. A form for creating an Apple ID will open.
  6 Enter your Apple ID information. Fill in the following fields:
 - Email Address: Enter the email address you want to use for your Apple ID;
- Password: enter the password for your Apple ID account;
- Confirmation: Enter the password again.
- Move the slider next to "I Agree" to the "Enable" position
 .
. - Click Next in the upper right corner of the screen.
 7 Enter your personal information. Fill in the following fields:
 - "Appeal": choose "Master" or "Mistress";
- "Name": enter your name;
- Last name: enter your last name;
- Date of birth: Enter your date of birth in the format dd.mm.yyyy.
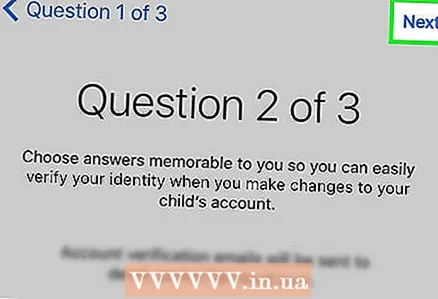
 8 Select security questions. Tap the Question field, tap the question you want to use, then tap Answer and enter your answer.
 - This must be done for all three security questions.
 9 Click on Further. It's in the upper right corner of the screen.
 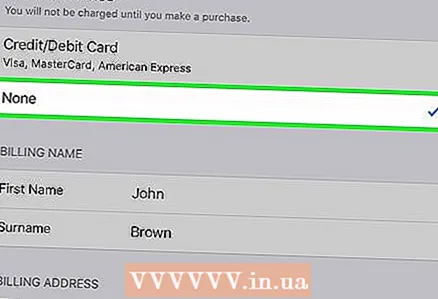 10 Tap No. This option is in the Payment Methods group of options. This way, you don't have to enter information about payment methods.
  11 Enter your billing information. Enter first and last name, address, country and phone number.
 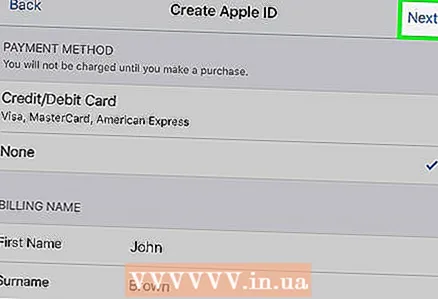 12 Tap Further.
 13 Receive a verification code for your email address. Open your inbox associated with the email address you provided when you created your Apple ID, open the email with the subject line “Verify your Apple ID email address” and look for the five-digit code in the email.
 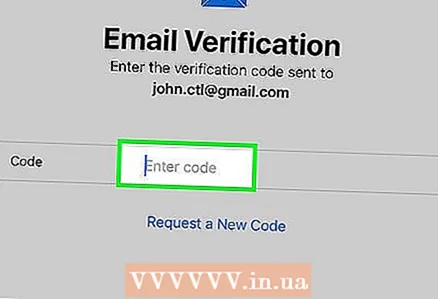 14 Enter a code. Click the Code text box and then enter the five-digit code.
  15 Tap Confirm. This button is in the upper right corner of the screen.
  16 Click on Proceedwhen prompted. If you entered the correct code, an Apple ID will be generated.
Method 3 of 3: In iTunes
 1 Open iTunes on your computer. Click on the white icon with a multicolored musical note.
 - If prompted to update, click Update iTunes, wait for the update to complete, and then restart your computer (if prompted).
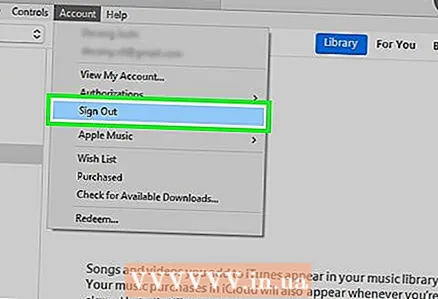 2 Sign out of your current Apple ID. Skip this step if you are not signed in to your Apple ID in iTunes. To leave:
 - click "Account" at the top of the screen;
- click "Exit" in the drop-down menu.
 3 Click on the tab Shop. It's at the top of the iTunes window.
  4 Open the menu Music. This menu, with a note icon, is in the upper-left side of the iTunes window.
 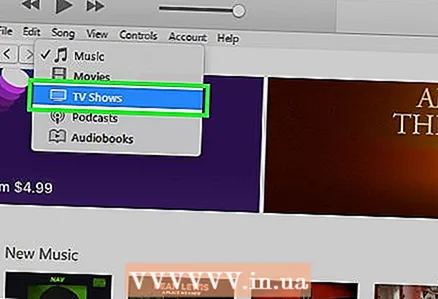 5 Click on TV show. It's in the Music menu. A list of movies and TV shows will be displayed.
  6 Click on Free TV Show episodes. It's a gray link on the right side of the iTunes page. A list of TV shows with free episodes will open.
  7 Select a TV show. Click on TV shows with free episodes. You can choose any TV show from the list, because each of them has at least one free episode.
  8 Click on Download. This button is to the right of the title of the free episode. A pop-up window will open.
  9 Click on Create a new Apple ID. You will find this option in the lower left corner of the popup.
  10 Enter your Apple ID information. Fill in the following fields:
 - Email Address: Enter the email address you want to use for your Apple ID; you cannot use an email address that is associated with your other Apple ID;
- Password: enter the password for your Apple ID account;
- Confirmation: Enter the password again.
 11 Check the box next to "Continue". It's near the bottom of the page.
  12 Click on Proceed. You will find this button at the bottom of the page.
 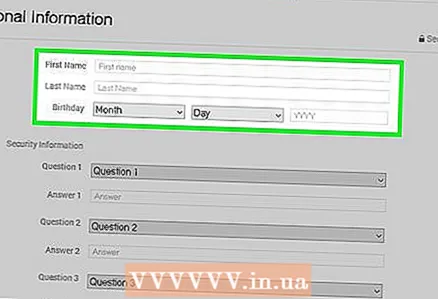 13 Enter your personal information. Enter the following information:
 - "Appeal";
- "Name";
- "Surname";
- "Date of Birth".
 14 Select security questions. Open the Security Question menu, select a question, and then enter your answer in the text box.
 - This must be done for all three security questions.
 15 Click on Proceed. It's near the bottom of the page.
 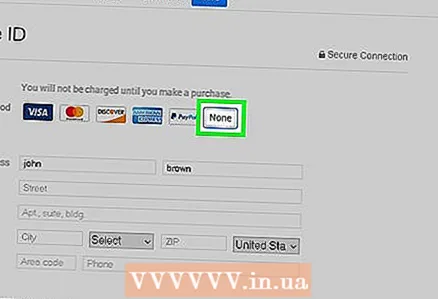 16 Click on No. It's on the right side of the list of payment methods at the top of the page.If you don't have this option, you won't be able to create an Apple ID without specifying a payment method for one of the following reasons:
 - You are in the wrong country: If you are located in a country other than the one in which your iTunes program is registered, you will not see the “No” option;
- You are not signed out of iTunes: If you forget to sign out of your current Apple ID, you will not be able to select the "No" option;
- You have an unpaid item in iTunes: you must specify a payment method if you purchased the item but haven't paid for it yet.
 17 Enter your billing information. Enter the following details:
 - "Name";
- "The address";
- "Phone number".
 18 Click on Proceed. This button is at the bottom of the page.
 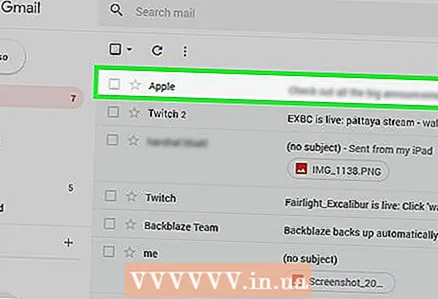 19 Receive a verification code for your email address. Open your inbox associated with the email address you provided when you created your Apple ID, open the email with the subject line “Verify your Apple ID email address” and look for the five-digit code in the email.
  20 Enter a code. Enter the five-digit code in the line in the middle of the iTunes window.
  21 Tap Confirm. This button is at the bottom of the window. A pop-up window will appear.
  22 Enter your Apple ID password when prompted. If you entered the correct code, you will be prompted for your Apple ID password. You will be signed in to your Apple ID account.
Tips
- You can use PayPal as your Apple ID payment method.
Warnings
- You can't download a paid app or music file without the payment method listed on your Apple ID.


