Author:
Virginia Floyd
Date Of Creation:
11 August 2021
Update Date:
1 July 2024
Content
- Steps
- Method 1 of 3: Selecting a bending tool
- Method 2 of 3: Bending to the Right Angle
- Method 3 of 3: Getting multiple kinks
- Tips
- Warnings
- What do you need
You can bend pipes using one of several methods, depending on what you plan to use them for. The problem with pipe bending is figuring out where and to what extent it needs to be bent. While many tools come with a set of instructions to help you understand things like tolerances and flexural elongations, these are often complex language and math skills that are intimidating to many people. Despite the fact that it is impossible to completely exclude the use of mathematics, it is possible to plan the bend of a piece of pipe so that finding the bend angle is simple, and the only necessary section of mathematics is simple arithmetic. The method described below is not easy, but you can master it.
Steps
Method 1 of 3: Selecting a bending tool
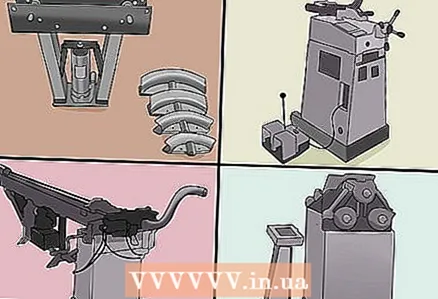 1 Choose the tool that's right for your purpose. There are 6 main bending methods. Each of them is suitable for a specific type of pipe.
 - Plunger bending, also called differential bending, is commonly used to create strong bends in thin-walled metal, such as for electrical conduit pipes. In accordance with this method, the pipe is fixed at two external points, and the plunger presses on the pipe at its central axis and bends it. On the outside and inside of the bend, the pipe usually deforms into an oval shape.
- Wire drawing is used to bend pipes used for railings or decorative iron, vehicle chassis parts, roll cages and trailer frames, and durable piping. When drawing, 2 types of bending dies are used: fixed bending in the opposite direction, and a stamp with a fixed radius to form a bend. The method is used when the pipe must have a good surface and a constant diameter along the length.
- Mandrel bending is used to produce standard and custom exhaust pipes, milk lines and heat exchanger pipes. In addition to the pipes used in drawing, when bending on the bend, flexible supports are used that bend the pipe so that the inner part of the pipe does not deform.
- In induction bending, the bent section is heated by means of an electric coil and the pipes are bent with rolls identical to the rolls intended for drawing. The metal is immediately quenched with water. Tighter bends can be obtained with this method than with conventional drawing.
- Roll bending, also called cold bending, is used when large pipe bends are required, such as for canopy supports, grill grates and in construction. For roll bending, 3 rolls are used in separate casings to roll the tube while the upper one pushes it down to bend. (Because the rollers are arranged in a triangle, this method is sometimes called pyramidal flex.)
- In contrast, hot bending is used to a large extent for pipe repair. The metal heats up where it is in order to soften it.
Method 2 of 3: Bending to the Right Angle
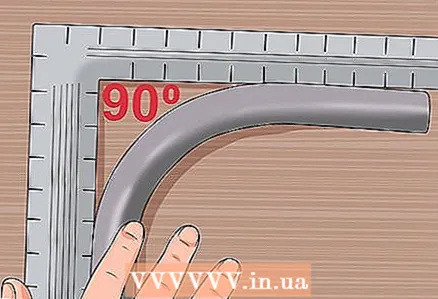 1 Bend the test tube 90 degrees. This will not only give you an idea of how much force you need to apply in order to use the bend, but it will also provide a template for future bends.
 - To check the bend angle of the pipe, attach it to a carpenter's square so that the outside of the bend points towards its corner. Both ends of the pipe should lightly touch the sides of the square and run parallel to them.
 2 Find the place where the pipe bend begins. You should see or feel a small flat point or deformation at the beginning and end of the bend.
 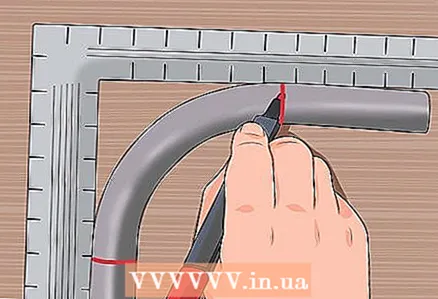 3 Mark the ends of the bend with a permanent marker. Draw the pipe in these places with solid lines.
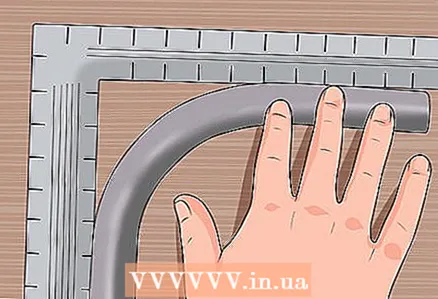
 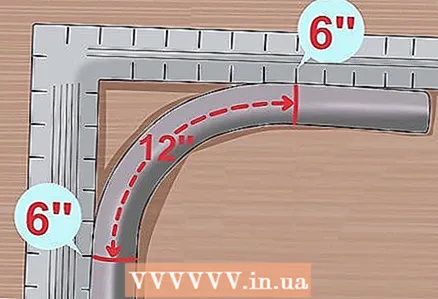 4 Attach the pipe to the elbow again to find the length of the pipe at the bend. Notice the locations on each side of the square where the pipe mark touches it. They should be the same distance from the inner corner of the square. Add up these distances.
 - If the marks at each end of the pipe bend touch the square at a distance of 15 cm from its inner corner, then the total length of the bend section is 30 cm.
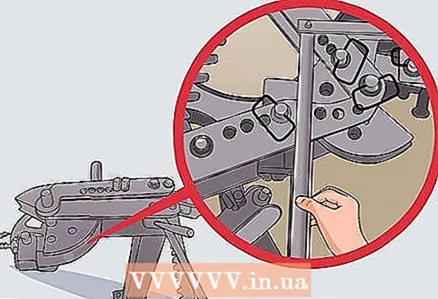
 5 Find the spot on the bending die where the bend starts. Put the pipe back into the bending machine with the die you used to bend that pipe and mark where the mark you left on the pipe touches. Mark this spot with paint or leave a mark with a file.
 - If you have more than one die (for pipes of different diameters), then make a test bend for each, as each diameter will require a different amount of metal to obtain a straight bend.
- Once you know how much pipe length is required to form a bend, you can calculate how much pipe length you need by adding this number (called bend elongation) to the vertical and horizontal pipe lengths.
Method 3 of 3: Getting multiple kinks
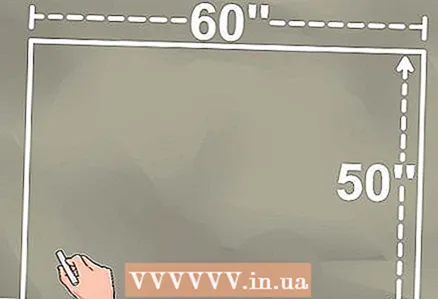 1 Measure the space that your curved pipe will occupy. If you are making a roll bar for a buggy that will take up a space of 150 cm wide and 125 cm high, then draw a rectangle of these dimensions with a piece of chalk on a clean concrete floor.
 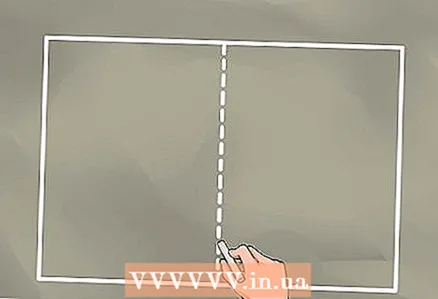 2 Divide the rectangle with a median line. The median line should bisect the long sides of the rectangle.
 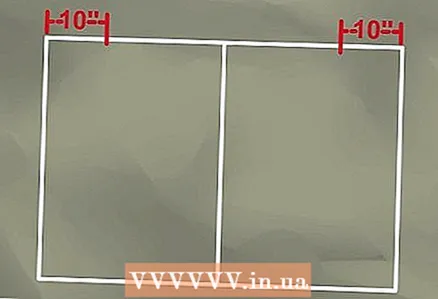 3 Measure from the top corners of the rectangle to where the horizontal section of the curved pipe begins. If the top of the roll bar is only 100 cm long, subtract that length from the width of the bottom, and then measure half that distance from each of the top corners. The result is a difference of 50 cm, half of which, 25 cm, is the measured distance. Mark this distance from each of the top corners.
 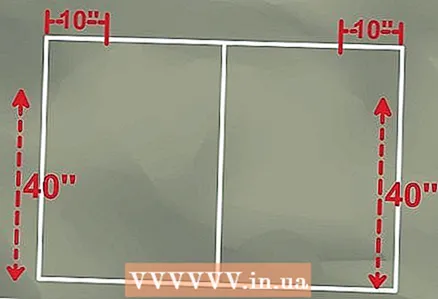 4 Measure from the bottom corners to where the bend begins. If the distance from the bottom of the roll bar is 100 cm, measure and mark this distance from each side of the bottom corners.
 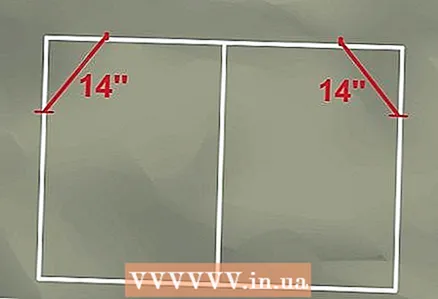 5 Connect the marks where the bend will be using a square or ruler. You can measure the connecting lines with a ruler.
 - In this example, the diagonal line connecting the marks on the horizontal and vertical lines is about 70 cm long.
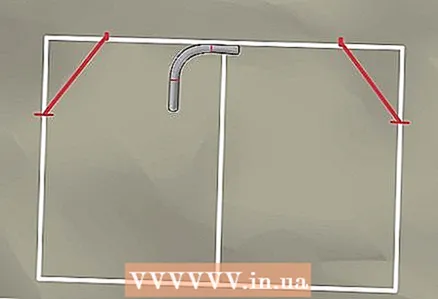 6 Place the 90 degree curved tube on the top line of your frame. Lay it so that the horizontal straight end touches the inside of the upper horizontal line.
 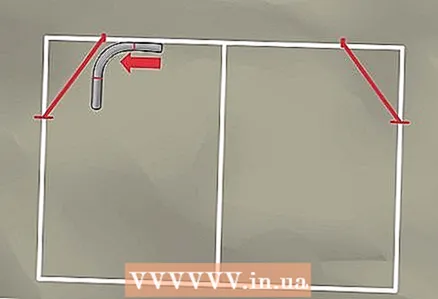 7 Move the pipe so that it touches the diagonal you have drawn.
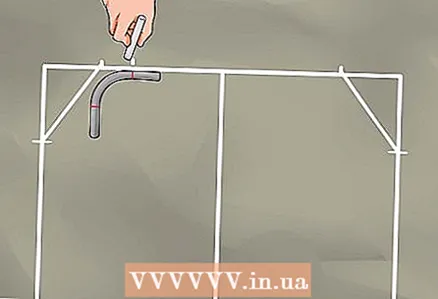 8 Mark the location where the bend mark on the pipe meets the frame line.
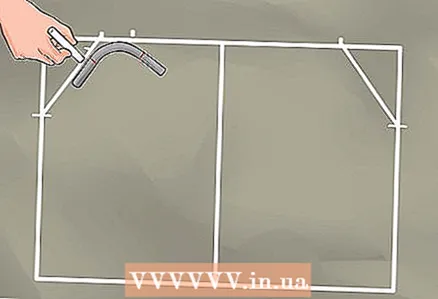 9 Rotate the pipe so that the other bend mark intersects the diagonal. Mark this spot on the diagonal.
 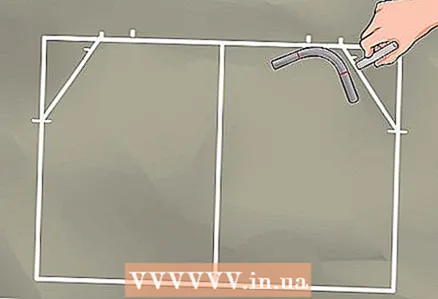 10 Repeat the last 4 steps for the top right corner.
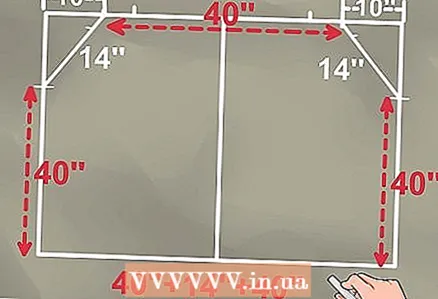 11 Calculate the total pipe length required. Add all the distances from the bottom corners to the first marks, the lengths of the pipes between the bottom bends and the first marks, the lengths of the pipes between the bottom bends, and the lengths between the top bends.
 - In this example, the vertical sections of the tubular frame will be 100 cm long, the diagonal sections will be 70 cm, and the horizontal sections will be 100 cm.The total minimum pipe length will be 100 + 70 + 100 + 70 + 100 cm, or 440 cm.
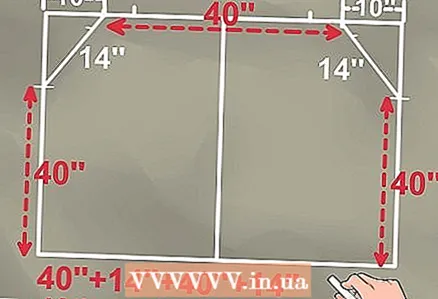 12 Cut the pipe. Although the minimum required pipe length is 440 cm, it would be nice to take into account the possible error and add 10 cm to it, which ultimately gives 450 cm.
 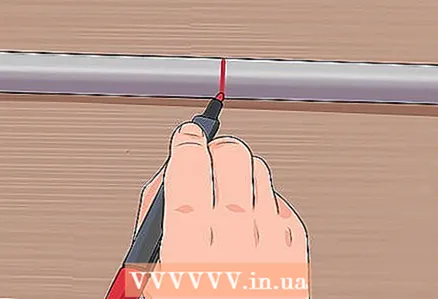 13 Find and mark the center of the pipe. You will be working in the direction from this point.
 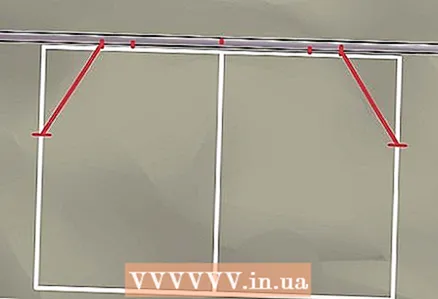 14 Lay the pipe to the top line of the schematic frame, aligning the center of the pipe with the midline. Make a mark on the pipe where the top bends begin and end using the marks on the frame.
 - You can also mark the direction of the bends by drawing outward arrows on the pipe.
 15 Make all the top bends with a bending tool. Make sure the seam is on the inside when bending; this prevents twisting and deformation during bending.
 - To ensure that your bending tool is at the correct angle, you can prepare a template from two flat pieces of metal with the ends secured. Bend this template to the angle provided on the frame and adjust the angle of the bending tool with it.
- After you have marked each bend, attach the tube to the frame to check that the bend angles are correct.
 16 Make all the bottom bends with a bending tool. Follow the same procedure as in the previous step.
 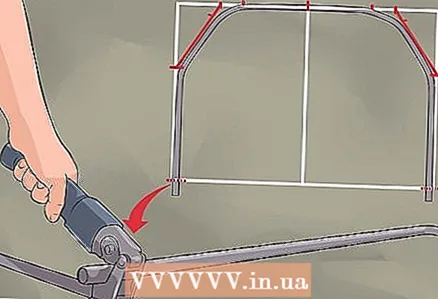 17 Cut off any excess at both ends of the bent pipe.
Tips
- Before tackling anything complex, start with simple tube bending projects.You may need to do a few test bends to get used to this method.
- Sufficient space should be allocated for your equipment. The pipe will spring a little after bending, so you need to leave enough room for you to run back when needed. You need at least 3 m of space, and preferably 6 m.
- Spray the floor near the bending tool with an aerosol adhesive to create extra grip on the sole when handling the tool.
Warnings
- Inspect the bending tool and dies regularly after bending pipes. Even studs and bolts with a diameter of 1/2 to 5/8 inches (1.25 - 1.56 cm) will bend and break over time.
- Bending pipes with a diameter of more than 2 inches (5 cm) is best left to a professional.
What do you need
- Pipe length
- Bending tools and dies
- Flat clean floor or large table
- Chalk (or a sheet of thick parchment and pencil if using a desk)
- Carpenter's square
- Pipe cutter
- Assistant (in case of a long heavy pipe)


