Author:
Sara Rhodes
Date Of Creation:
11 February 2021
Update Date:
28 June 2024

Content
- Steps
- Part 1 of 3: Preparing for Downgrade
- Part 2 of 3: Downgrade to Windows 7
- Part 3 of 3: Activating the system
- Warnings
To downgrade Windows 8 to Windows 7, you can use two similar and different ways at the same time. If you have a key for Windows 8 Professional and can meet a number of other conditions, download Windows 7 Professional for free. Otherwise, you will need an unused Windows 7 key. The downgrade process is the same whether you need an unused key or not.
Steps
Part 1 of 3: Preparing for Downgrade
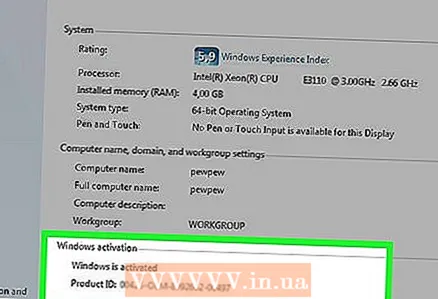
 1 Determine your Windows 8 version to make sure it can be downgraded. The right to use previous versions of products (Downgrade right) will allow you to downgrade to Windows 7 for free; legal entities have this right. But in order to exercise this right, you need to meet certain requirements. The first requirement is that Windows 8 Professional must be installed on the computer, that is, the computer must be purchased with Windows 8 Professional preinstalled.
 - Click on ⊞ Win and enter winverto check your Windows version. If you are running any version of Windows 8 other than Professional, you do not have the Downgrade right.In this case, you will need an unused Windows 7 key to downgrade.
- If Windows 8 has been upgraded to Windows 8 Pro, you do not have the Downgrade right. In this case, you will need an unused Windows 7 key to downgrade.
- If Windows 8 was installed from a disc or any other media on a computer running Windows 7 (or earlier), you do not have the Downgrade right. In this case, you will need an unused Windows 7 key to downgrade.
 2 Get (buy) a valid key for Windows 7 Professional. Such a key must be unused or can be used (depending on whether you have Downgrade rights):
 - If you do not have Downgrade rights, you will need a valid Windows 7 key that was not used to activate the system on any computer. If you've upgraded from Windows 7 to Windows 8 and now want to go back to Windows 7, use your original Windows 7 key. If you bought your computer with Windows 8 preinstalled, buy an inexpensive Windows 7 key from one of the many online resources.
- If you have the Downgrade right, you will need a valid key for Windows 7 Professional, but it can be used (that is, they activated the system on any computer) or a non-original key for the system installed on the computer. This key will be used on the activation screen.
 3 Make sure your computer has drivers for Windows 7. If you bought your computer with Windows 8 preinstalled, some hardware and accessories may not work with Windows 7. Therefore, download the drivers for all components for Windows 7 in advance to ensure that your computer works after a system downgrade.
 - If the computer is built by a reputable manufacturer (HP, Dell, Acer, etc.), open the company's website and find the model of the computer on it. Typically, the model is indicated on the laptop keyboard or on a sticker on the back or bottom of the computer. Go to the Drivers or Downloads page and find the drivers for Windows 7; if there are no such drivers, some hardware will malfunction after downgrading the system.
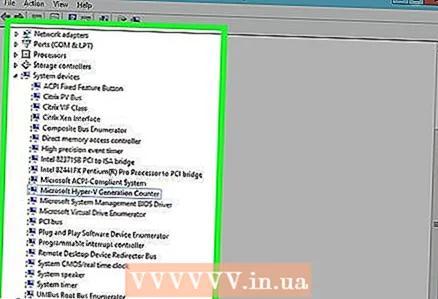
- If your computer is built by you or someone else, find the correct driver for each component. Click on ⊞ Win and enter devmgmt.mscto open Device Manager. Find the model of each component, open the manufacturer's website and check for a driver for Windows 7. If there is no such driver, the hardware will malfunction after the system downgrade.
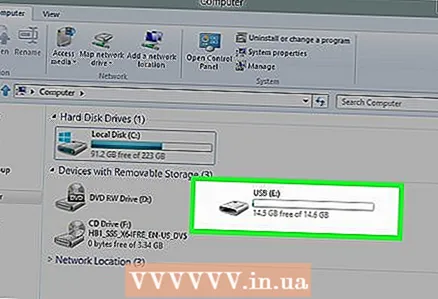 4 Copy the drivers to an external storage medium (if desired). To save time after downgrading, write all drivers to a USB flash drive (flash drive) or DVD. This will allow you to quickly install the required drivers. The most important thing is to get the network adapter working in order to connect to the Internet and download any other drivers.
  5 Create a Windows 7 Professional installation disc. This disk is required to downgrade to Windows 7. Remember that any installation disk with Windows 7 Professional will work. If there is no such disk, create it using the free software that can be downloaded from the Microsoft website:
 - Open this page and enter your product key to download the ISO file.
- After downloading the ISO file, connect a USB flash drive to your computer or insert a blank DVD.
- Download and install the Windows USB / DVD Download Tool.
- Launch the program and select the downloaded Windows 7 Professional ISO file from the Source menu. From the “Destination” menu, select a DVD or USB flash drive. The program will burn the ISO file to a DVD / flash drive and create an installation disc.
 6 Back up important files. Downgrading a system is similar to reinstalling it, which deletes all data stored on the hard drive. Therefore, before downgrading the system, copy important files to an external storage medium or cloud storage. For more information on backing up your data, read this article.
Part 2 of 3: Downgrade to Windows 7
 1 In the UEFI settings, select the Legacy boot mode. Do this if the computer was purchased with Windows 8 preinstalled (if the system was upgraded to Windows 8, Legacy mode is not needed). UEFI is the interface that controls computer components and is the current version of the BIOS. Windows 7 does not support UEFI, so BIOS compatibility must be enabled in the UEFI settings. The process varies depending on your computer model, but in most cases, do the following:
 - Click on ⊞ Win+C or swipe from right to left to open the Charms bar.
- Click "Settings" - "Change computer settings".
- Click Update & Recovery - Recovery. In the Download section, click Restart Now.
- When the computer restarts, select "Troubleshoot" - "Advanced options".
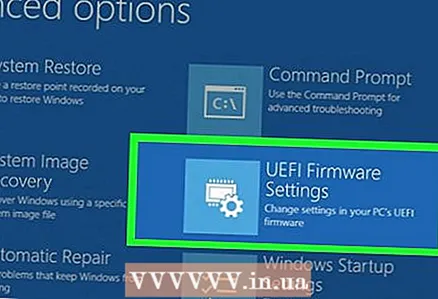
- Click "UEFI Settings" - "Restart".
- In the UEFI settings, find the "Legacy boot" or "BIOS mode" option and enable it. The location of this option depends on the manufacturer of the computer or motherboard.
 2 Insert your Windows 7 installation disc or USB flash drive and restart your computer. The standard BIOS startup screen will be displayed (because it was activated in the UEFI settings).
 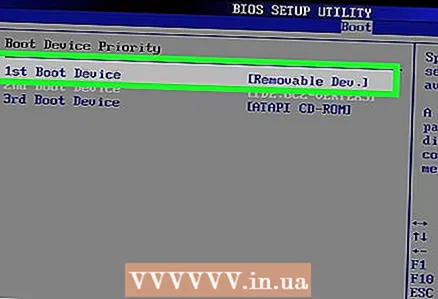 3 Boot from disk or flash drive. This process depends on your computer model. In most cases, the screen will display a key that you need to press to boot from a disk or flash drive. If such a key is not displayed, press the corresponding key to enter the BIOS. BIOS / UEFI settings will open. Find the Boot menu and select DVD or USB as the first boot device.
 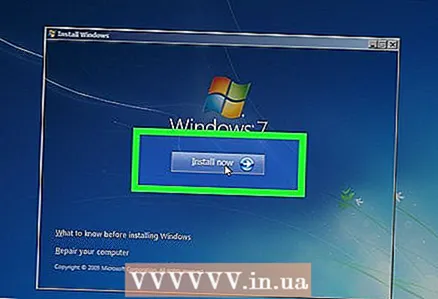 4 Start the Windows 7 setup process. To do this, press any key on your keyboard (when prompted). It will take some time to download the installation files.
  5 Install Windows 7. First, select the appropriate language and regional settings.
  6 Select the drive where Windows 8 is installed. During the installation of Windows 7, you need to specify the target drive; select the drive where Windows 8 is installed. Note that all information on the selected drive will be deleted.
  7 Enter the key for Windows 7 Professional. This must be done in the final stages of the system installation process. Enter the key that you found or bought (read the previous section). If you have Downgrade privilege, this key can be used.
  8 Wait for the installation process to complete. After entering the key, the installation process will be completed and the desktop will appear on the screen. If you have used the Downgrade right, most likely, an activation error message will be displayed on the screen.
Part 3 of 3: Activating the system
 1 Open the activation window (if it did not open automatically). If your computer is connected to the Internet and you first booted Windows 7, the system will try to activate automatically. If an unused key was entered during the installation of Windows 7, automatic activation will succeed. If you used the Downgrade right, most likely, the automatic activation will fail.
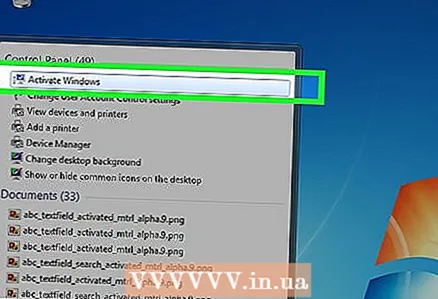
 - If the activation window does not open, click "Start", type "activation" (without the quotes), and then click "Activate Windows".
 2 If activation fails, call the indicated phone number. If you want to exercise your Downgrade rights, you must call the Microsoft Hotline and dictate the Windows 8 Professional key to prove that you are eligible for a free downgrade.
  3 Enter the code provided by Microsoft to activate Windows. If Microsoft has verified that you have the Downgrade entitlement, it will provide a special code to enter the activation window and activate Windows 7.
 - If the system is downgraded on multiple computers, you can use the same key, but you need to call Microsoft each time you activate the next system.
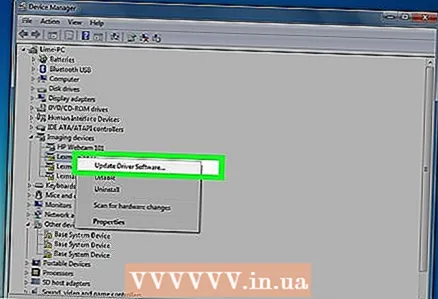 4 Install the drivers. Do this after activating the system. If a disc (or flash drive) with drivers was previously created, connect it and install the drivers; otherwise, run Windows Update and let it check and download any available updates.Then open Device Manager and install the missing drivers manually; to do this, right-click on the appropriate hardware and select Update Driver from the menu.
Warnings
- Don't downgrade to Windows 7 for a simple whim. Please be aware that some hardware features are based solely on Windows 8 drivers.


