Author:
Marcus Baldwin
Date Of Creation:
16 June 2021
Update Date:
1 July 2024
Content
- Steps
- Method 1 of 4: Regular Square
- Method 2 of 4: Regular rectangle
- Method 3 of 4: Arrow note
- Method 4 of 4: The Diamond Note
- What do you need
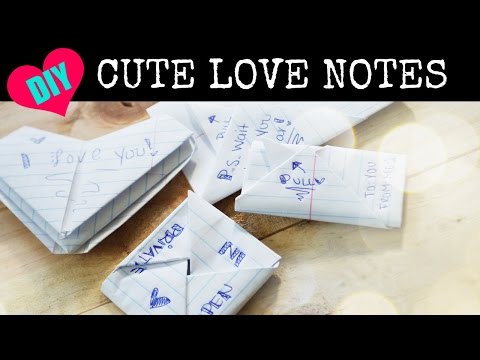
Secret notes, passed on to friends during class and destroyed after reading, are a ubiquitous old school tradition among children. The next time you send such a message to someone, try one of the following note-folding techniques to keep the message private and secure.
Steps
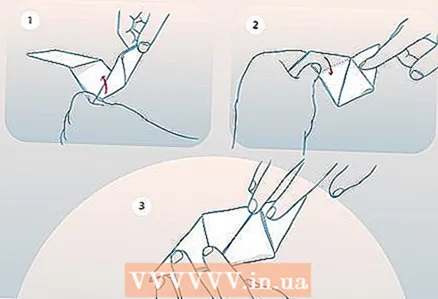
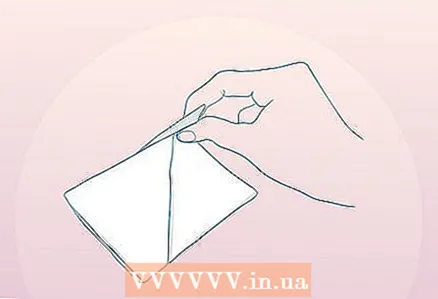
Method 1 of 4: Regular Square
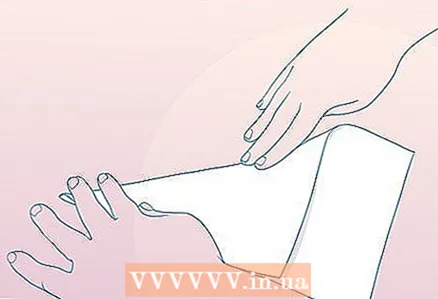
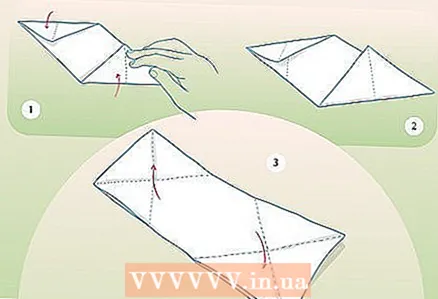
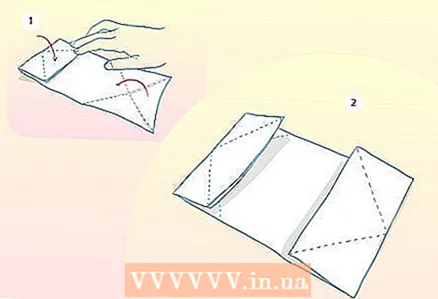
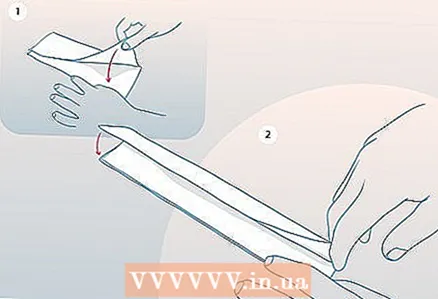 1 Fold the paper vertically in four layers. Fold the paper vertically in half. Fold the paper vertically in half again, leaving ¼ of its original width.
 - Note that the height or length of the sheet must remain unchanged.
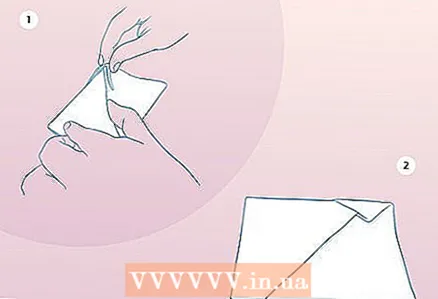
 2 Fold both ends of the paper inward. The upper left corner should be folded diagonally towards the right side, and the lower right corner should be folded diagonally towards the left side.
 - Bend the corners so that they lie flat along the edge of the strip.
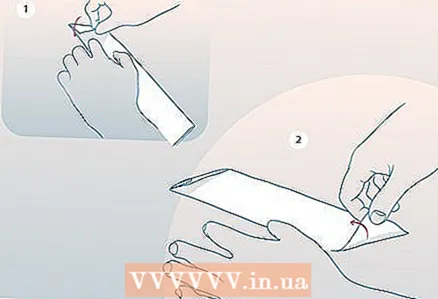
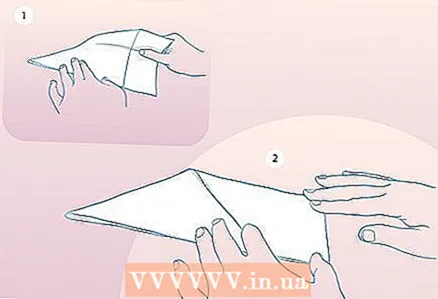
 3 Make further diagonal folds at both edges. The upper triangle must be wrapped down to the right, and the lower one up to the left.
 - It should be a beveled parallelogram at both ends, with the original triangles protruding beyond the edges of the paper.
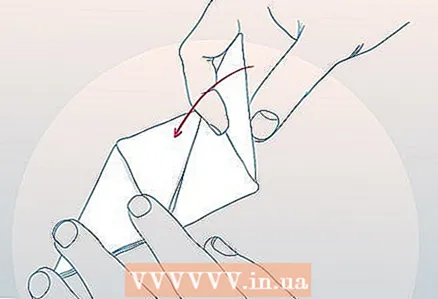
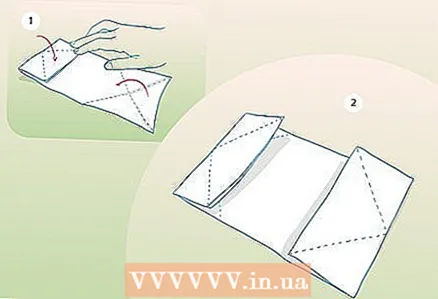
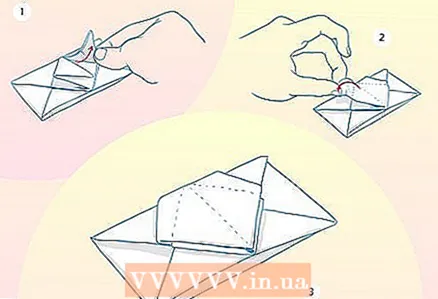
 4 Flip the paper over and fold each end horizontally. Turn the paper over again. Fold the top triangle to the right and the bottom triangle to the left.
 - You should be left with two triangles that protrude beyond the edges of the main body of the paper and are attached to it.
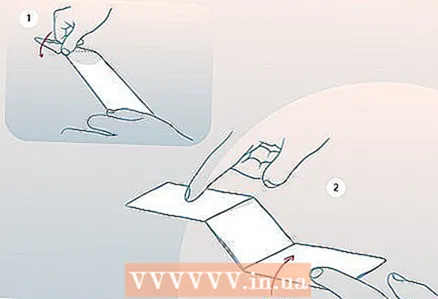
- At this step, you can select two obvious triangles in the front and back.
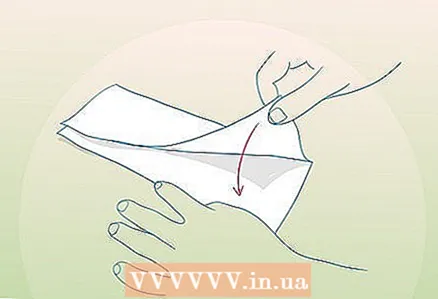
 5 Flip the note face down and fold the bottom edge of the back side triangle to the bottom edge of the front side triangle.
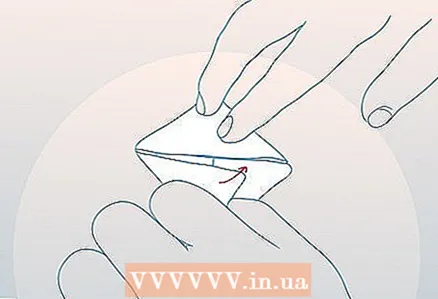 6 Fold down the top. The top edge of the back side triangle must be folded over to the front so that it meets the bottom edge of the note.
 - At this stage, your note should already be in the shape of a square. All that remains is to perform the final maneuver, which will secure the note.
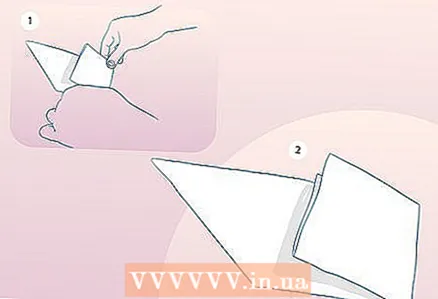
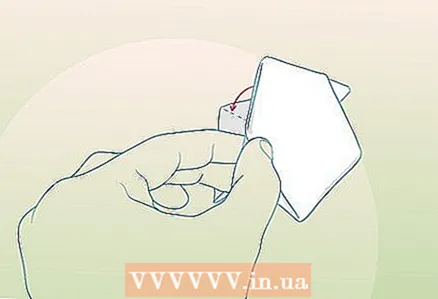
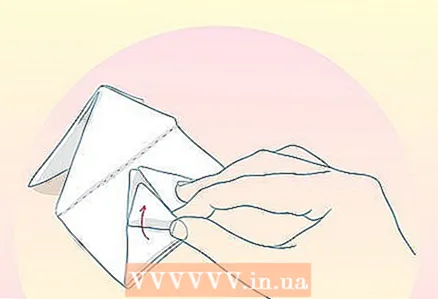
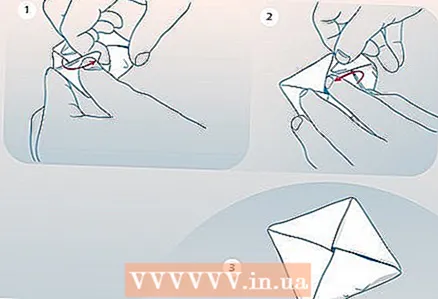 7 Slip the outermost triangle into the lowest pocket. Tuck the tip of the triangle closest to you into the pocket at the base of the note.
 - You should have a square divided into 4 separate triangular sections.
- All is ready.
Method 2 of 4: Regular rectangle
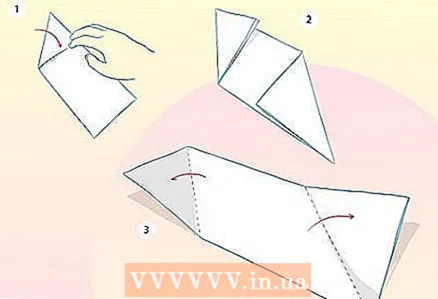
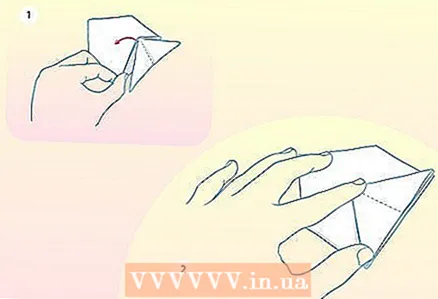
 1 Fold the top-right corner down diagonally. Fold the top right corner down diagonally towards the left side.
 - The left side of the fold should line up with the left side of the note.
 2 Align the right and left edges. Fold the right edge towards the left.
 - The bottom edge of the part folded in the previous step should be hidden by a new fold.
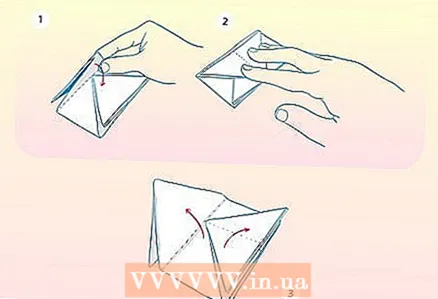
 3 Flip the paper over to the other side and fold the bottom up. Flip the paper over to the other side and fold the bottom up about 1/4 of the total paper height.
 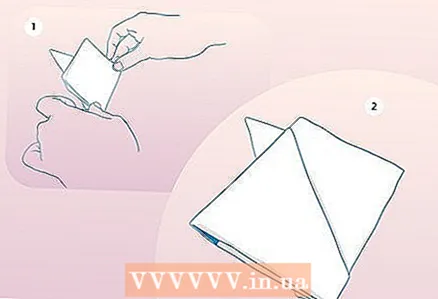 4 Repeat the fold again. You must use another 1/4 of the paper.
 - The result is a triangle sitting on a rectangle. The bottom sharp corner of the triangle should be slightly farther than the middle of the top edge of the rectangle.
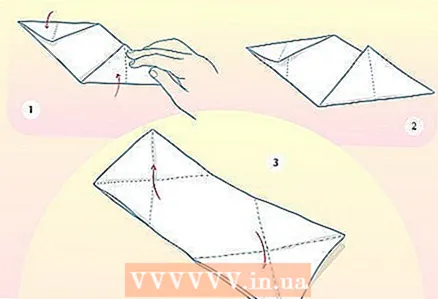
 5 Fold the top triangle down to the front. The top tip of the triangle should be folded towards the bottom edge of the rectangle.
 - Don't worry if the tip of the triangle doesn't touch the bottom of the rectangle. Even then, you can finish folding the note.
 6 Slip the tip of the triangle into the pocket. Fold the tip of the triangle along the diagonal on the rectangle and tuck inward. Rinse the fold well for security.
 - This step completes the folding of the regular rectangle.
Method 3 of 4: Arrow note
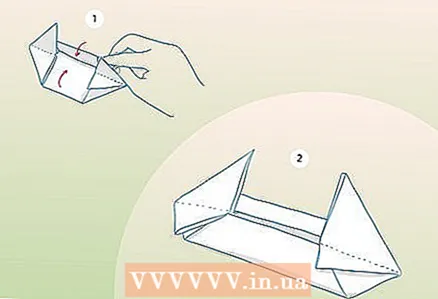
 1 Fold the paper in half vertically. Fold the paper in half lengthwise.
 - Note that the width of the paper will be cut in half, but the height will not change.
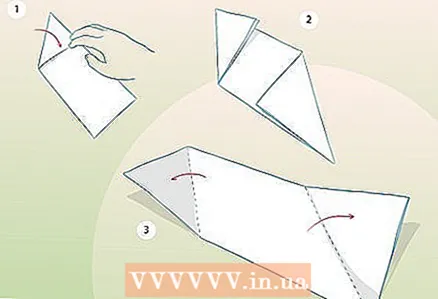 2 Fold up the top and bottom to form triangles. Fold the top left corner down diagonally to the right side. Fold the bottom right corner up towards the left side. Then unbend.
 - When folding, the sides should be laid out evenly.
- Brush the folds well so that there are marks.
 3 Fold the top and bottom to mirror the previous step. Fold the top-right corner down towards the left side and the bottom-left corner up towards the right side. Unbend.
 - Again, fold the sides flat.
- Brush the folds well before unrolling.
 4 Tuck the top and bottom inward. Fold the top edge down so that it meets the bottom-most marks from the previous folds at that end. Fold the bottom edge up to the matching marks at the bottom.
 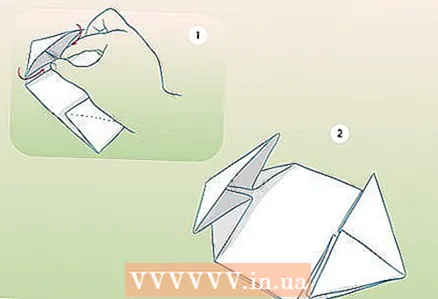 5 Fold the creased triangles inward along the existing folds. Push the corners of the shape inward between the front and back layers of paper with gentle pressure.
 - After that, you should have a triangle at the top and bottom. If you look at the top triangle from below, then each folded corner will be in the shape of the letter "M".
 6 Fold both vertical sides inward towards the center. Raise the left edges of the triangles slightly to expose the underside of the note. Fold the left edge of the note vertically towards the center. Repeat on the right side.
 - You should now have a double-headed arrow.
- The edges when folded up should meet exactly in the center.
 7 Fold the note in half horizontally. Fold the bottom arrow up so that it overlaps the top one.
 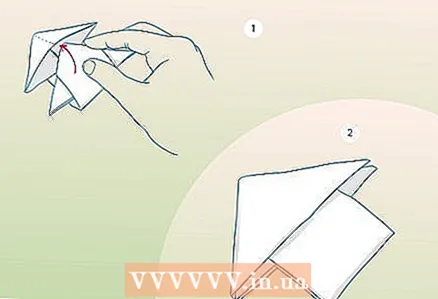 8 Insert the top arrow into the bottom one. Unfold the note slightly and slide the top arrow into the bottom one.
 - You should have a securely folded unidirectional arrow.
- The folding of the note is complete.
Method 4 of 4: The Diamond Note
 1 Fold the note in half vertically. Fold the right edge towards the left.
 - The width should be halved, but the height should remain unchanged.
 2 Fold one top corner and one bottom corner to form triangles. Fold the top left corner diagonally to the right side so that the resulting triangle has a side aligned with the edge of the paper. Fold the lower-right corner up diagonally to the left in the same way.
 - Rinse the folds well and straighten.
 3 Mirror these folds with the other two corners. Fold the top-right corner diagonally towards the left and the bottom-left corner diagonally towards the right.
 - The edges of both triangles should rest against the sides of the paper.
- Rinse the folds well before unrolling.
 4 Fold the top and bottom inward. Fold the top edge down to the bottom edge of the fold marks at the top of the paper. Do the same with the bottom edge of the paper, tucking it up to the corresponding marks.
 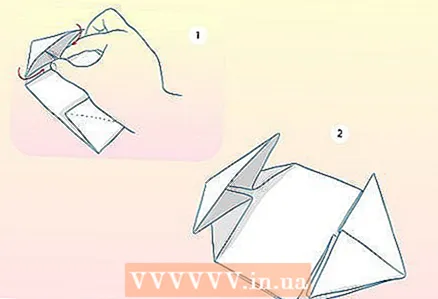 5 Gently press the corners inward. Press in every corner between the top and bottom layers of the paper.
 - Seen from above, you should have a short rectangle shape with triangles at the top and bottom.
- When looking at the top of the figure from below, each depressed corner should form the outline of the letter "M".
 6 Flip the paper over to the other side and fold the bottom triangle up.
- The wide side of the triangle should be the new bottom edge of the paper.
 7 Fold the top triangle down. Pull the top of the upper triangle down to the base of the lower triangle.
 - Rinse the fold well, unfold temporarily.
- Note that the base of the top triangle does not have to line up with the resulting top edge of the paper. The more important task is to align the top of the upper triangle with the base of the lower one.
 8 Form a small diamond from the bottom corners. Take the top layer of the bottom right corner and fold it up towards the top of the bottom triangle. Repeat with the left corner.
 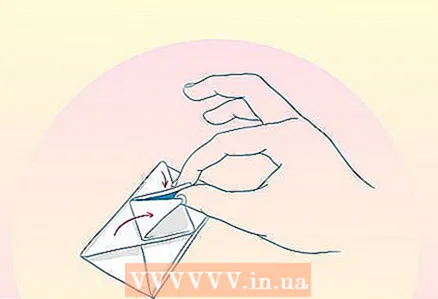 9 Fold the top triangle again and form a rhombus from its corners. Repeat the fold required to overlap the bottom and top triangles. Fold the top layer of the right and left corners of the top triangle to its apex.
 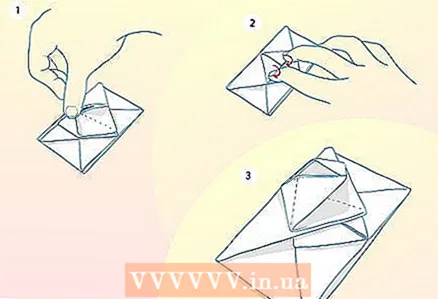 10 Temporarily fold up the corners of the lower vertices of the small triangles. You will need to make horizontal folds on the left and right sides of the newly formed rhombus.
 - Take the bottom tip of the left half of the diamond and fold it towards the top. Fold the bottom corner up and rinse well before turning it back.
- Repeat with the right half.
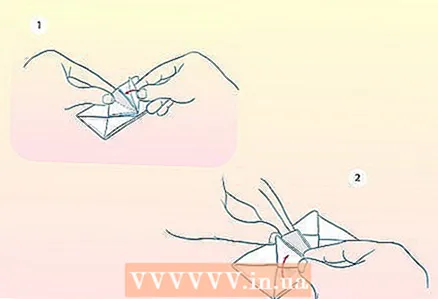 11 Slip the flaps of the lower diamond into the upper diamond. Bring out the right half of the lower diamond so that it overlaps the main layer of paper, but hides under the right half of the upper diamond.
 - Repeat the procedure with the left side of the lower diamond so that it goes under the left side of the upper diamond.
 12 Tuck the top diamond cuffs into the pockets you just created. The result of this action will be the formation of a securely folded diamond in front.
 - Carefully unfold the right half of the diamond and tuck the lapel back into the top pocket.
- Repeat the procedure with the left lapel.
 13 Flip the paper over and fold the vertical right edge to the left. Fold the left vertical edge to the right.
 - Fold the edges as far as you can fold without tearing the paper.
- The left edge should overlap slightly with the right edge.
 14 Slip the left side to the right and flip the note over to the other side again. Slide the top of the left side into the pockets on the right side to secure the note. Flip it over to the right side.
 - The diamond note is ready.
What do you need
- 1 standard sheet of notepad paper


