Author:
Ellen Moore
Date Of Creation:
14 January 2021
Update Date:
1 July 2024
Content
- Steps
- Part 1 of 3: Learning to Canter
- Part 2 of 3: Improving Your Riding Technique
- Part 3 of 3: Avoiding Common Mistakes
- Tips
- Warnings
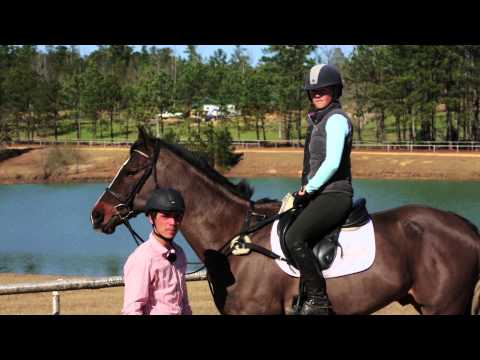
Canter, one of the other riding methods, is a comfortable medium speed technique, somewhere between a trot and a fast canter. However, the ability to gallop does not always come naturally - it is a skill that both horse and rider must practice to improve. Fortunately, almost all horses, with the right approach (and a lot of patience), can be taught the perfect canter.
Steps
Part 1 of 3: Learning to Canter
 1 Before starting, teach your horse to trot and walk. As some horse experts say, “You cannot train to gallop from gallop ". To properly learn canter, horses need a good basic knowledge of trotting and walking (plus the muscle strength they gain from training these commands). Without it, the horse may have difficulty maintaining a safe canter shape, which can be bad for you and (especially) for the horse.
 - This is true for young, inexperienced (or "green") horses. Since the canter is a so-called "three-stroke gait", when the horse starts to move, all of its body weight is transferred to the outside of the hind leg. Generally, without good fundamental training, horses are not strong enough to do it safely.
 2 Start by trotting in a wide circle. The gallop should be trained in a level, open area at least 20 meters wide. Start by trotting at a calm, moderate pace (in whichever direction is easier for you to control).
 - Horses need a lot of space to balance properly as they learn to gallop, so don't be stingy and don't use too little space. In some cases, alas, insufficient space can even cause the horse to panic and become agitated.
- Note that at this stage the horse must be in bridle, saddled, restrained by the reins and boots.
 3 Follow a few basic transitions to get the horse's attention. Before you begin canter training for the first time, you need the horse to be alert and responsive to you. To do this, give her a few commands that she is already familiar with.For example, try switching between trotting and walking stride and back several times until the horse responds clearly and instantly to your commands.
  4 Ask your horse to go into a light canter. You are now ready for the gallop command. Let her trot again in a wide circle. When you are ready, say "gal-LOP" in a harsh (but not angry) voice. The goal here is to associate the vocal command with the action you intend to facilitate - ultimately your voice alone should be enough to get the horse into the correct canter.
 - When you do this command, simultaneously you will perform several commands with your body (described in the next step.) For details on these body signals, see the section below.
 5 Promote the canter with your lower body. Once you have given the command "gal-LOP", move your "inner" thigh (from the side pointing inward of the circle you are trotting) forward and your "outer" thigh backward. Once you do this, squeeze your inside leg and move your outside leg back. Ideally, a horse should interpret your actions as a command to go faster. See section below for details and getting information about correct posture and posture as soon as you start canter.
 - Note, however, that if the horse does not seem to notice your command, you can use a whip or other appropriate method (carefully) to get his attention. However, this works well if the horse is already familiar and comfortable with the use of these remedies - otherwise they can confuse him.
 6 Repeat your command if the horse starts to trot faster. If, after the command "canter" has been given, the horse is still in a two-stroke trot and does not go into a three-stroke canter, give the command again (along with body movements). The horse must run even faster. Repeat the command again if necessary. After a certain point, the horse will need to move from trot to gallop in order to move even faster.
 - As soon as the horse goes into gallop, be sure to reward him with praise with enthusiasm in your voice. You can stroke the horse's neck if you like. Over time, in the horse's mind, these rewards should be associated with positive emotions.
 7 Return back to trot if the horse is tired. Believe it or not, a rudimentary canter can be quite tiring for a young horse that does not yet have the strong muscles needed to ride. Pay attention to your horse's movements as it gallops beneath you. As soon as you feel the canter begin to out of balance or out of bar, move back to trot and immediately give the half halt command to regain control of the horse's movement. See section below for more details on how to execute the half-halt command.
 - Note that the horse may be able to complete less than one full canter circle at a time. This is quite normal - by practicing more often the horse will become stronger and more confident.
- Engaging an experienced rider as an observer can help a lot.
 8 Repeat the commands at a gallop. Have the horse run around the circle again at a trot and repeat the steps above to start another round at a canter. Repeat this a few more times, constantly being aware of how tired your horse is. You may find that the horse has become more responsive to your commands in one training session. If this is not the case, be patient - over time it will come.
 - Try to keep the sessions short at first so that the horse does not get too tired or lose interest. For the first month of training, a workout of about 20 minutes will be sufficient.
 9 Diversify your practice over the next few months. When riding your horse "in reality", you will not be limited to just a canter in a circle. To give your horse the kind of versatility you need to gallop in practical situations, try changing your normal training routine as soon as the horse begins to feel normal about the above. Here are some good ideas:
 - Practice at trot and canter in eights to help the horse get used to turning in both directions.
- Trot in tight circles at the corners of the training space, forcing the horse to gallop from one to the next in order.
- Walk at a trot and gallop along a long, winding line of your own form.
- After a month of training, try a canter half halt.
Part 2 of 3: Improving Your Riding Technique
 1 Start with an open, upright pose. While the professionals do it effortlessly, a good canter depends as much on the effort of the rider as it does on the horse. In canter, your body should be positioned to open up the front (leading) shoulder of the horse and signal behind the girth, all the while adding forward movement. Imagine the subsequent position of the body, while you are trottingto get ready for the gallop.
 - Keep your back straight.
- Keep your chest forward and up.
- "Open" your chest by gently pulling your shoulders back.
- Use the core muscles of your thighs and abdomen for balance. Ideally, you should be able to gallop without pulling on the reins or saddle horn to maintain your own balance.
 2 Open the horse's shoulders with the reins. As you move into the canter, maintain contact with the reins, but open the inside of the rein at the same time while keeping a firm grip on the outside of the rein. This will give the horse important support on the diagonal bars. Note, however, that the goal is not to support the horse too much, as it needs to develop its own sense of balance when galloping.
  3 Apply body cues. As described in the section above, signaling the horse to gallop includes several simultaneous movements of the rider's body. Follow the instructions below to get started with your gallop:
 - Rotate your torso and shoulders (keeping your hips straight in front) so that your outer shoulder is slightly further behind your inner shoulder.
- Move your outside leg back. Once you've done that, press down with your inner leg and push your inner thigh forward a little.
- Use the inner bridle to find the right direction. It also opens up the horse's leading shoulder, helping him understand your intentions while keeping his movements “collected”.
- Using the hind leg, squeeze the horse's belly and ask for an increase in speed. Note that some horses are also trained to gallop when you signal them with a “kiss” sound (as opposed to snorting to increase speed), so you should probably do this at the same time.
- Make sure you signal your horse behind the girth - that is, with their feet, behind, a few centimeters from where they usually hang. Also, try not to move your arms forward. These mistakes can lead you to a fast trot or side pass.
 4 Sit while galloping. One of the best things about galloping riding is that it is actually quite easy to do. Unlike the trot, the canter is very soft for the rider, giving the rider a "hover" sensation rather than the "shaking" sensation of trotting. However, there is chances of galloping incorrectly, so use the guidelines below to ensure a proper landing:
 - Hold the reins, but don't pull them. Just as you signaled the transition to canter, you should increase contact on the outside of the reins and maintain weaker contact on the inside of the reins.If you feel yourself losing control and pulling on the reins for balance, then you are going too fast and you should slow down your horse.
- Maintain balance in an upright, upright position. Do not lean forward or inward. While you may be feeling the very opposite, your horse does his best to maintain balance depending on what you do on his back. If you lose your balance and bend forward and inward (as many inexperienced riders tend to do), your horse will have to work hard to maintain balance too.
- Avoid clinging to your feet. As with trotting, you may feel instinctive to "hold" the horse with your feet. However, this will give the horse mixed commands, as this is usually a signal to accelerate. Likewise with pulling on the reins - if you feel like you cannot hold onto the saddle without grabbing your feet, slow down until you are comfortable.
 5 Get ready for the half-halt signal. A half stop is essentially a partial stop, as its name suggests. The half stop can be performed at any speed and is done in the same way as you give the normal stop signal. This technique allows the horse to place his hind legs on the ground, which gives him the necessary strength and balance to either initiate a collected canter or to control his movement. You shouldn't give the half halt command to go into a canter, but this will give the horse better ground to move to a faster stride. Use the instructions below to give the half-halt command:
 - While galloping, maintain a soft supporting leg as you sit down and strain your back to prepare for a halt.
- With your elbows back, press down on the reins lightly as you would for a trot.
- As soon as you feel your horse reacting, add legs, soften your toes on the reins, and resume canter. It might feel like you are asking your horse to "gallop in place" for a short time.
Part 3 of 3: Avoiding Common Mistakes
 1 Try not to swing your shoulders. In old films about the Wild West, images of cowboys galloping on their horses were popularized so that their entire bodies moved in sync with the horse. While it is correct for your hips to move, your torso and shoulders should not swing at the same time as the horse. This can throw both you and the horse off balance and make it difficult for you to sit at a canter.
 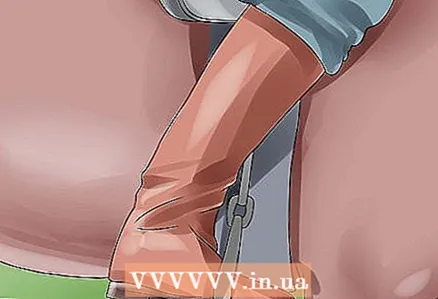 2 Keep your heels down. For novice riders, this is often problematic when driving faster. Your foot should be placed on the stirrup with all your weight on the ball of your foot, with your toes pointing slightly upward and your heel pointing downward. This will allow you to maintain balance, not lean forward or wrap your legs around the horse.
 - If you are unable to do this, then the stirrup may be too short. The English stirrup should be at ankle height, while the Western stirrup should be long enough to allow the knee to be slightly bent.
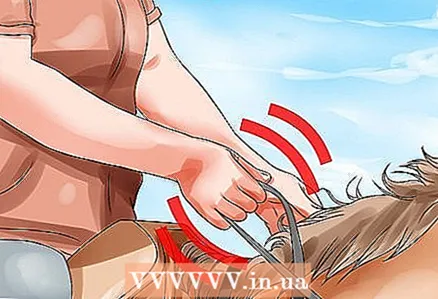 3 Watch the movement of your hands. It can be difficult to keep your arms still when the horse below you is trotting or galloping. However, if you move your arms a lot, you can jerk the reins, which can be very confusing for the horse. Try to move your arms only to the extent that it is natural from the horse's movement - this will be easier to control with experience.
 - If you need help keeping your hands still, try gently squeeze the horse's mane with your little fingers. Pulling the mane will help keep the arms centered and synchronized with the horse's natural movement.
 4 Avoid swinging your legs. Since your hips move naturally with each step of the horse, it may be easy to let the movement carry your legs.This is, however, a bad idea, as excess leg movement can confuse the horse. For maximum control and responsiveness, try to keep your feet in the correct “behind the girth” riding position.
 - If you need help, try to keep your heels down in the stirrup (as mentioned above). This will tend to naturally push your legs back into the correct position.
 5 Do not assume the fetal position. The so-called embryo pose is a riding error that involves leaning forward (sometimes to grab a handrail on a mane, horn, saddlebow, or reins) by gripping with your feet, pointing your toes down and raising your heels. It is usually a nervous reaction in the hope of maintaining balance and preventing the rider from falling, but unfortunately causing the opposite: it throws the horse off balance and speeds it up.
 - To avoid this, good self-control while riding is important. When you start to worry, slow down your horse a little, relax your legs, and lean back. Even if you feel that you are leaning too far back, it is likely that you are in a perfectly upright position (which is a good canter position). Resist the urge to "squat" and grab tight - remember, this will bring the "opposite" result to what you expect.
 6 Don't slouch. Slouching your shoulders and arching your back while riding is not a good habit in general, and it is a particularly bad idea when galloping. Make sure your shoulders are always straight and above your hips. This allows you to better balance and prevents the horse from accidentally jumping faster (see above).
 - If you need help maintaining your posture, try using a long whip inserted behind your back in the crook of your elbows while riding. This will prevent you from slouching and will also help your arms stay in the correct position while riding.
 7 Train your abdominals to keep them strong. Abdominal strength is essential for galloping because horseback riding (especially at high speeds) is a physical exercise that actively uses the abdominal muscles. Even if you do everything else right (shoulders back, heels down, upright, and so on), if you find yourself soft in the middle, it can lead to a loss of your center of gravity. By keeping your central position with a firm abdomen, you will help your horse walk in a collected canter and make the whole process easier and more comfortable for you in the future as you teach your horse new skills.
 - If you feel that your abdominal muscles are not at the proper level, you can do an elbow stand in your spare time. Get into a push-up position, but keep balance on your elbows, while resting your forearms on the floor. Maintain this position for as long as possible, take a minute break and repeat three times. If you do this every day, then when riding, you should notice a significant difference in how you are able to maintain balance.
Tips
- Go canter in corners (if practicing in an equestrian school). This will help the horse roll off the correct leg.
- Do not scream or scream when galloping on a horse, even if you are glad that you have finally it worked... This can lead to the fact that the horse "freaks out" and can even panic and start a real run.
- If you are a beginner when teaching your horse to gallop, have an experienced rider by your side. It will be a good idea, even if you have enough experience.
- If possible, it may be wise to have an experienced rider or instructor who will hold the horse on the line while you are riding it (in other words, the horse should walk in a circle around the other person at the end of the line).This way, the person on the ground controls the speed and direction of the horse, and you can concentrate on the canter itself.
- Use reliable aids to help the horse learn to gallop and not just start a fast and uneven trot. If the horse does not pick up the canter, slow down at the trot before using the aids again so that it is stable and level again.
Warnings
- Never try this if you have no experience with horses! Always wear a helmet and have a mentor or qualified coach by your side.
- All riders must wear an approved helmet and suitable footwear (heeled and hard-soled boots).


