Author:
Mark Sanchez
Date Of Creation:
7 January 2021
Update Date:
1 July 2024

Content
- Steps
- Method 1 of 3: Making Schaeffer's Fast Kite (or Bumblebee Kite)
- Method 2 of 3: Making a Fast Deltoid Kite
- Method 3 of 3: Launching the kite
- Tips
- Warnings
Making a paper kite is easier and faster than you might think. All you need is one sheet of paper and a few additional materials that you probably already have at home. The best thing about flying a kite is that you have an unforgettable experience and enjoy outdoor activities. The kite projects proposed in this article are quite interesting and perfect for children of any age.
Steps
Method 1 of 3: Making Schaeffer's Fast Kite (or Bumblebee Kite)
 1 Gather all the materials you need. It is best to immediately place all the necessary materials on the table or on the work surface on which you are going to make the snake. Below is a list of what you need to get started:
 - a sheet of A4 paper (paper for printers or design paper);
- light thread;
- pencil;
- stapler;
- ruler;
- scissors;
- hole punch (optional);
- pleasant breeze or light wind (speed 2.5–6.5 m / s).
 2 Start creating your snake. Place a sheet of paper in front of you vertically with its long sides to the left and right. Then fold the paper in half so that the fold is at the bottom.
  3 Mark out the wings of the serpent. Take a pencil and mark a point directly on the fold of the paper, about 5 cm from the left edge. Then, with the same pencil, put another point on the fold of the paper, about 5 cm from the first point. In this place, the thread will then be attached.
 - The Schaeffer kite (or bumblebee kite) was invented by William Schaeffer in 1973 and is probably the easiest kite to make, designed to be launched in light winds.
 4 Lock the wings of the kite. Fold the top-left corner of the paper to the first point. Do not crease. Do the same with the bottom layer of paper so that both halves of the kite are symmetrical. Fix the corners of the paper that are brought together with a stapler (the paper clip should be where you marked the first point with a pencil).
  5 Prepare the thread attachment point. Tape the thread attachment point, where the second point is, while making sure that the taken piece of tape is enough to cover both sides of the attachment. Use a hole punch to punch a hole in the snake just above the pencil mark. This hole is for thread attachment.
 - If you do not have a hole punch, the hole can be carefully punctured with scissors.
- The tape is designed to strengthen the paper in the area of the hole so that it does not tear later.
 6 Attach the string to the kite. Thread the string through the hole of the kite and carefully tie it in a secure knot. If you are in a particularly good mood for making crafts, you can additionally make yourself a snake handle from a thick stick or tube, to which you will tie the other end of the string. With such a handle, it will be easier for you to attract or release the snake; besides, it will not let you accidentally miss it.
 - The string for launching a kite is also called a rope.
Method 2 of 3: Making a Fast Deltoid Kite
 1 Prepare all the materials you need. It is best to immediately place everything you need on a table or on the work surface on which you are going to make a snake. Below is a list of what you need to get started:
 - a sheet of A4 paper (paper for printers, design paper or cardboard);
- a thin wooden or bamboo stick (skewer);
- Scotch;
- lightweight thread;
- lightweight tape;
- pencil;
- scissors;
- hole punch (optional);
- pleasant breeze or light wind (speed 2.5–6.5 m / s).
 2 Start making a kite. Lay the paper horizontally in front of you with the long sides at the top and bottom. Fold the paper in half so that the fold is on the left.
  3 Mark the position of the kite's wings. Using a pencil, mark the top edge of the paper about 4–5 cm from the fold, depending on the size of the kite's wings you want. Place another dot along the bottom edge of the paper, about 4–5 cm from the right side. Imagine or draw a line connecting two points.
 - Deltoid kites were first invented by Wilbur Green in the 40s of the last century, having specially designed their wings so that they fly well in light winds.
 4 Assemble and secure the wings. Fold the paper (its top layer) along an imaginary or drawn line. Flip the kite over and fold the other side in the same way. Make sure both sides of the kite are perfectly symmetrical. Use duct tape to attach the folded sides to a friend along the fold line. Already, your kite is beginning to take shape.
  5 Reinforce the snake frame. Place a thin stick of wood or bamboo horizontally across the widest part of the kite's wings (across its longitudinal axis). This part of the kite is also called the sail. Fix the stick in place with tape. Make sure the stick does not protrude beyond the edges of the kite. Otherwise, carefully shorten it with scissors.
  6 Prepare the thread attachment point. Place a mark on the longitudinal ridge of the kite, back about one third from its nose and about 2.5 cm from the fold of the paper. Cover this area with tape. In this case, the piece of scotch tape should be large enough to paste over the place of attachment of the thread on both sides of the snake. Take a hole punch and punch a hole in the provided mark. The thread will be attached to the hole.
 - Please note that the hole should be located in the narrower part of the kite's ridge, which is its nose.
- If you do not have a hole punch, the hole can be carefully punctured with scissors.
- Scotch tape is needed to strengthen the hole so that it does not break later.
 7 Tie a thread. Thread the thread through the hole you made and carefully tie it in a secure knot. You can additionally make yourself a snake handle from a thick stick or tube, to which you will tie the other end of the thread.With this handle it will be easier for you to pull or release the snake, and it will also prevent you from accidentally letting go.
 - The thread for launching a kite is also called a rope.
 8 Make a tail. Tape a lightweight tape to the tail of the kite on the same side as the wooden stick. The tail can be as long as you like. You can start with a long tail and shorten it if the kite cannot take off.
 - The tail is very important, as it allows you to balance the kite in flight, does not allow it to roll over in the air and dive with its nose to the ground.
- In some cases, a tail about 90 cm long is sufficient, and in others 4.5 m or more.
- The length of the tail will be dictated by the weight of the tape used.
Method 3 of 3: Launching the kite
 1 Find an open space. Now that you've finished creating your kite, it's time to fly it. First, find a suitable location where there is enough open space without trees, such as a park, lakeside, or beach. Although your kite may not climb very high, it is best to avoid any obstacles.
 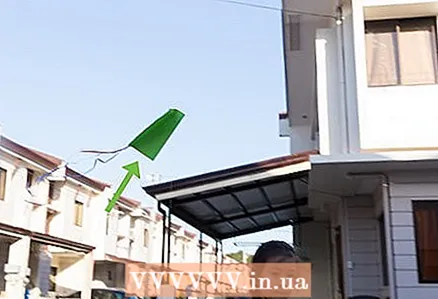 2 Fly the snake. To fly the kite, start walking with the kite in one hand and the string from it in the other. Increase your stride speed to take advantage of the aerodynamic properties of the kite. Remember that when launching the kite, your back should be facing the wind, and the kite itself should be facing you.
 - Aerodynamics are the features of the movement of a certain object in the layers of air.
- The wind blowing in the right direction will keep your kite in the air.
 3 Control the flight of the kite. If you feel that the kite is torn up, you can slightly release its thread, and if the kite begins to fall, start shortening the thread.
Tips
- If you use cardboard for work, then your kite will be stronger. On the other hand, a colored paper kite will look fantastic. If you decide to color or decorate your kite, you can make it special.
- Bamboo skewers about 2mm thick are ideal for a deltoid kite. However, any other thin but tough wooden sticks can be used.
- For a kite, you can take any strong, but lightweight thread, twine or fishing line.
- To make the tail of a kite, you can use regular wide tape, decorative tape, and measuring or protective tape.
- Spread out the back of the deltoid snake before launching it.
Warnings
- Never fly a kite under power lines or in a thunderstorm.
- Paper kites tear easily, so be careful when decorating these kites and avoid strong winds.


