Author:
Clyde Lopez
Date Of Creation:
23 June 2021
Update Date:
1 July 2024
Content
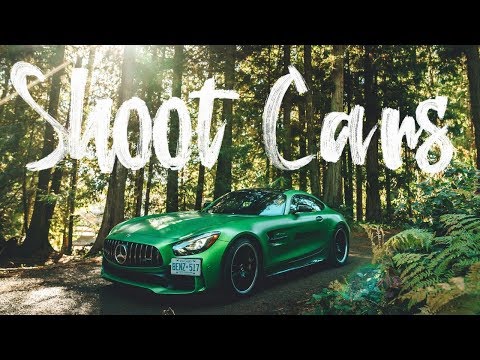
Do you want to turn boring shots of your car into crisp photos that look great on the wall? Read a few guidelines.
(If you want to take pictures of your car in motion, see How to photograph car races or How to photograph a moving car).
Steps
- 1 Understand the basic settings well. You can read more about this in the How to get good shots guide, and it is important to understand the main points correctly:
- Make sure the white balance matches the ambient light. Or just shoot the raw material and install it on your computer later; as you wish.
 Here is an example of a "wrong" installation; the photo was taken with the settings left over from last night, which were adjusted for halogen lighting. Because of this, the entire image came out with a blue tint. Do not do that! By locking the white balance, you can dramatically improve any shot.
 - Set to the lowest setting for the sensitivity of the camera to light. If there are no moving objects, and you have the option to photograph using a tripod, you do not need it.
- Shoot in aperture priority mode; in this way, you can obtain optimal image clarity and control the depth of field. (Don't worry if your camera does not have such a mode, or if you are lazy, just take pictures in the programming mode).
 Aperture Priority Mode allows you to control the depth of field, and therefore allows you to take pictures in the sharpest phase of the aperture.)
- Make sure the white balance matches the ambient light. Or just shoot the raw material and install it on your computer later; as you wish.
- 2 Choose a focal length. Cars, like people, have individual photographic characteristics.Different cars in the photo look better at different zoom settings, just like people do: some look better when shot at a distance with a telephoto lens, others when they are shot up close or take an individual shot. Imagine if the car were human: would you like to over-emphasize or weaken your facial features?
- The wide-angle lens unnecessarily emphasizes the characteristic features of the car. Does the car in the picture look rough or brutal, like a professional competitor? In this case, zoom out and move closer to the vehicle. This increases the perspective of the image. Do not widen the focal length range until you know what to do; the equivalent focal length of 28mm (18mm on a DSLR) is generally wide enough. If you zoom in even more, you get a photo of a headlight attached to a very small car (you might want to get one, of course; but keep reading the instructions anyway!).
 If your car looks more like a pro boxer like this Range Rover than a super model, then you may want to use a wider angle to emphasize the features of the car.
 - A normal focal length will have the opposite effect: it will give your vehicle a smoother, more elegant look. This mode is best used for open cars, while the long focal distance mode will emphasize the external parameters of people. It's free to experiment on a digital camera, so try two options without thinking.
 A longer focal length is sometimes more suitable for a car, as it is for most people. This shot was taken with a 50mm lens, which is an effective short telephoto lens on a crop sensor DSLR.
- The wide-angle lens unnecessarily emphasizes the characteristic features of the car. Does the car in the picture look rough or brutal, like a professional competitor? In this case, zoom out and move closer to the vehicle. This increases the perspective of the image. Do not widen the focal length range until you know what to do; the equivalent focal length of 28mm (18mm on a DSLR) is generally wide enough. If you zoom in even more, you get a photo of a headlight attached to a very small car (you might want to get one, of course; but keep reading the instructions anyway!).
 Notice how the sky reflection spoiled the exposure; the rest of the car looks good, but the bonnet is almost entirely bright white. 3 Beware of the reflection! Sometimes it can be difficult to get the same image of the whole car. The coloration (thankfully shiny) will partially reflect the sky. The same goes for the windshield, the brightest part of the car compared to any other. There are several ways to avoid glare in your photo:
 - Use a polarizing filter, if available. It will reduce the reflection. If you do not have such a filter, purchase; it's inexpensive (cheap filters do a great job) and is one of two filters that are essential for digital photography.
- Use exposure bracketing. To do this, you will need a tripod to properly position the image. Take one shot at normal exposure, then underexpose the next (too slow). This can be done using the exposure compensation settings in your camera or using the automatic exposure control, if available. You can then use layer masks in your favorite image editing software to color the highlights of an underexposed photo compared to a normal exposure photo. (If you wish, you can take a third long exposure shot, which can be used in a similar way to fill in the blurred outlines with colors.)
 Exposure Bracketing: Normal, underexposed, and overexposed photography. Parts of a darker photo can easily be digitally painted over in overexposed areas of normal photography. In particular, look at the headlamp, which is a defective part in a normally exposed photograph.
 Wait for all passers-by to leave before taking the picture. 4 Remove all unnecessary components in the photo that distract the viewer's attention from the vehicle, just as you would with a photograph of a person. If you are at a car show, wait for people to step out of the lens's field of view before taking a picture. Remove trash around. Try not to photograph against the background of a telephone pole, otherwise you will get a picture in which this pole seems to be sticking out of the body of the car. Also, try not to capture too much of the firmament; you will most likely end up with distracting bright blues or whites if you don't use a ND filter (if you have an exterior choice, it's best to shoot with buildings and other structures blocking out the sky).
  A technically competent but boring shot of a Toyota Celica GT. It's boring because it was made at eye level. five Do not photograph the subject at eye level. Try to kneel or stand on a hill to be taller, or think of something else so as not to get the same type of photographs taken at eye level. Instead, try this:
Try this instead:- Kneel down in front of the vehicle. This will give him a more aggressive look, as if he is riding at you.
- Set up your camera on the ground. Taking pictures of a car from a low angle (and tilting the lens slightly) can create a unique view that is not seen in normal photography.
- Take accurate close-up shots. Find the most interesting and unique elements and curves of the car and shoot them in close-ups from different angles.
- Take a picture from above. Try to take a shot from a height, or simply hold the camera high above your head. It is also an interesting and unique angle that allows you to capture the different planes of the subject (side, front, top).
 Toyota Celica GT-Four, shot with Nikon D2H and 18-70mm DX, using Android phone's camera for flash to fill in the shadows on the front of the car. Also notice the stars emerging from bright points of light due to the fact that the photo was taken at f / 11. 6 Try taking a photo at night under artificial lighting. This will also require a tripod, and the use of either a distance trigger or a self-timer.
 - Choose an aperture value of f / 8 or f / 11. This will turn the bright points of light into pointed stars.
- Make sure auto ISO sensitivity is off and shoot at low settings.
- Look at the lighting in your car. Artificial lighting will cast a harsh shadow on the parts of the car, which will need to be supplemented with their own lighting. You will get addicted to it as soon as you remember that you can see dark tones better than your camera.
- Disable flash. If your camera has a built-in flash, then use a compact camera, camera phone, or an old 80s flash lamp, quickly run around the car with the flash on, and fill in any shadow. (A slower shutter speed will give you enough time to do this, which is another reason to choose f / 8 or f / 11.)
- When you're done, you might want to take the photo in black and white. Artificial outdoor lighting (especially sodium lamps) is fairly monochrome; you will likely find that your image is already virtually black and white as soon as you remove the unnatural color tones from the photo (this means you don't have to worry about having to install a color filter above the flash to blend in with artificial outdoor lighting).
 Highlighting one distinctive feature of the car. You can you name the brand of this car? 7 Try to frame the image clearly and highlight the individual, quickly recognizable feature of the vehicle. These can be taillights, curvatures of the body structure, or the radiator grille and headlight of a car.
  8 Adjust your shots in an image editor. If you don't have one, buy; the GIMP graphics editor can be purchased for free. Here are some of the ways you might want to try:
 - Use layer masks on an underexposed image to colorize highlights in comparison to normal exposure photography (see information above).
- Set the contrast. You will most likely want to increase it. One way that usually gives a great effect when photographing cars is to copy the image, set it to Soft Color, de-saturate the color, and adjust the layer's opacity. This method has the side effect of producing unnatural shades.
 The contrast has been increased in GIMP by duplicating the bottom layer, lowering the saturation of the new layer, and setting the mode to "Soft Light". (Some distracting objects in the background have been removed)
 - Darken the corners a little and tone down the surrounding colors to draw the viewer's attention to the car image. Don't get carried away like an amateur wedding photographer; this effect should be subtle, but at the same time noticeable. Read How to Create a Vignette Effect on an Image Using GIMP (These instructions are also adapted for Photoshop).
 Darkening the edges draws attention to objects. Here it is deliberately exaggerated; actually effect should be almost invisible.
 - Remove other distractions in your photo that you forgot about. This may concern, for example, garbage. This is where the Clone Brush tool comes in handy.
Warnings
- Many car owners will feel embarrassed if photos of their vehicles with unedited license plates appear on the Internet. It doesn't make much sense, but a few tricks in Photoshop (or GIMP) will fix the situation and calm them down.
- Very often the law does not provide for asking permission from the owner of the car to take pictures if it is parked in a public place, however, it is not a bad idea to go up and politely ask him about it.
What do you need
What do you need
- Camera. Any camera and lens will do.
- A tripod that must be used for long exposure shots or for night photography. Purchasing a tripod is desirable, but not required.
- Polarizing filter (optional)
- A ND filter to avoid distracting bright blues or whites in your photo.
- Some advanced graphic image editors. The GIMP is free to purchase. The graphics editor Photoshop needs to be bought.


