Author:
Eric Farmer
Date Of Creation:
8 March 2021
Update Date:
1 July 2024

Content
A hidden blade is a knife located in a body that unfolds and folds from moving backward or forward, becoming visible and invisible. Sometimes it is attached to the wrist to hide it. This method is popularized by the video game "Assassin's Creed". You can create a real hidden blade yourself, using things at home or things that you can find in any hardware store. Follow these instructions for making a hidden blade at home.
Steps
 1 Disassemble the 2 folding knives with double action (unfolding and folding).
- Remove all screws from the case and put them in a safe place for later use.
- Remove the surface of the housing to expose the inside of the folding knife.
- Remove the trigger (the part used to unfold and fold), the spring (be careful not to bend or damage it) the mechanism, the blade rivet, and the blade from the body.
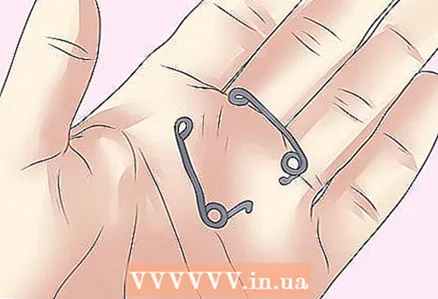
- Use pliers to pull the flaps and small springs out of the narrow holes inside the housing.
- Set all of these pieces aside for later use. They will come in handy for creating your real hidden blade.
 2 Disconnect the end of the body of one of the knives.
- Hold the body horizontally and find the side with the spring closest to the base blade mount.
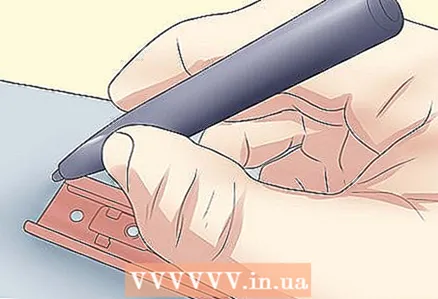
- Use a permanent marker to draw a line that will vertically bisect the shell at the (closest side of the shell) outer edge of the hole.
- Saw off the end (where the blade starts) along the line marked with a marker using a sander or hacksaw.
- Place the file in the blade housing and cut off any metal debris. A real hidden blade must move freely within the body.
 3 Remove the notch at the end of the clamshell body tip that you did not cut. Use an angle grinder to remove the groove leading to the continuous straight edge of the bottom wall of the blade body. Clean any remaining metal debris from the case using a file.
 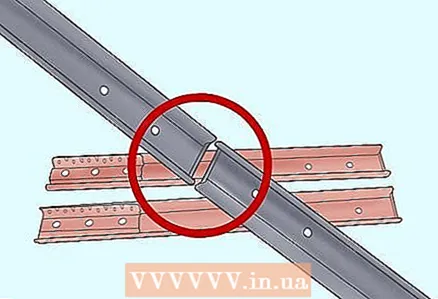 4 Weld the two folding knife bodies together to form one long hidden blade body.
- Position the cut and uncut ram-knife bodies lengthwise so that the blade is inserted into the end of the cut body and reaches the end of the uncut body. The end of the clipped knife's trimmed body must meet the exit end of the uncut body's blade.
- Cut a thick piece of aluminum to the length of the combined clamshell knife bodies, saving extra space at each end to attach bracelets if you want to create a hidden blade like in Assassins Creed.
- Spread the cold weld over the entire length of the cut aluminum bar.
- Place the continuous folding knife bodies on the aluminum block.
- Test for proper body alignment by inserting the blade into the body and pulling it all the way to the end.
- Allow the cold welding process to proceed according to the manufacturer's instructions.
 5 Remake the surface of the second folding knife body to match the other folding knife body.
- Cut off the end of the surface of the first body at the same place where the corresponding body was cut. Hold the surface close to the body to mark the cutting line with a permanent marker before cutting.
- Use an angle grinder to cut the metal stopper at the end of the blade cavity on the other longer surface of the body. As a result, the blade cavity will extend along the entire surface of the housing in a uniform width.
 6 Create your blade.
- Clamp the end of the clamshell blade against the end of the other piece of the aluminum flat bar. Use a folding knife blade as a template for a real hidden blade. The blade and aluminum block must be the same width and thickness.
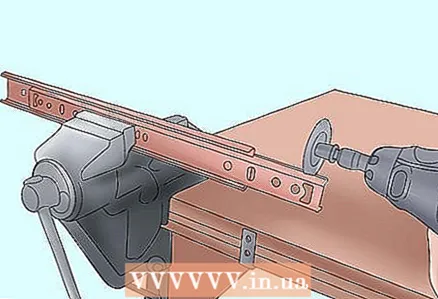
- Select a drill the same size as the rivet hole in the folding knife blade and drill through the blade hole that is attached to the aluminum flat bar to make a matching hole in the aluminum bar.
- Fix the working edge of the blade to an aluminum bar, then use an angle grinder to cut the aluminum bar into a blade shape.
 7 Change one of the knife mechanisms.
- Locate the tab on one of the long sides of the mechanism. There will be another irregular, step-like protrusion on the opposite side, at the end of the mechanism, which does not need to be touched.
- Cut off the overhang so that the entire corresponding edge of the side is a smooth, straight line.
- Place the uncut mechanism in its appropriate position in the modified case, then place the severed mechanism in the appropriate location on the other end of the case, and mark the location on the end of the cut mechanism where it overlaps with the uncut portion.
- Cut off the end of the section of the trimmed mechanism that overlaps the uncut mechanism so that the parts of the mechanism fit together and lie flush against the body for the hidden blade.
 8 Replace the inside of the case.
- Use pliers or fingers to push the flaps and small springs back into the holes on the same side of the surface as they were previously. Just place them in the holes closest to both ends, and make sure the cutouts in the damper face the edges of the body.
- Insert a real hidden blade into the body. Place the rivet of the blade in its hole, once the blade is in the middle of the axis of the body, leave it in this position.
- Reinstall the mechanism.
- Place the long spring in the housing where it should be. Attach its hook to the base of the end of the case.
- Insert the switch in its place.
- Install a body surface that will cover the spring hook location. The free end of the spring should be exposed. Return the body surface to the body.
- Pull the other end of the spring, holding only the hook, to the other end of the hidden blade body and attach in the appropriate location.
- Cover the exposed body with the surface of the other body and screw the two pieces together.
 9 Create your hidden blade's trigger of the day.
- Drill a hole through one end of the aluminum block wide enough for the key fob.
- Hold the aluminum block so that the opposite end of the keyring is aligned with the folding knife trigger farthest from the blade opening.
- Mark where both triggers are on the line of the aluminum bar.
- Bend the aluminum block where the folding knife ends so that the block meets your hand, where the keychain will fit over your finger.
- Drill holes in both triggers, from the top of the outside to the inside (side connecting to the body).
- Align the aluminum block with the folding knife body where it will be attached to the triggers. Drill holes through the aluminum bar at both trigger marks, from top to bottom (leading to the trigger hole).
 10 Connect the escapement hole to the body of the hidden blade using self-tapping screws.
Tips
- If you decide to make a hidden blade, like in Assassins Creed, you can use any type of belt that will fit snugly around your wrist. Some examples of wrist straps include nylon weight lifting straps, medical wrist support straps, and watch straps.
- Be sure to take appropriate safety precautions when working with power tools. Always wear safety glasses and ear protection. When using an angle grinder, you must also wear suitable long sleeves and leather gloves and stand this way. So that the disc is not in front of your body.
What do you need
- Pliers
- Grab handle
- Screwdriver
- Angle grinder (or hacksaw)
- File
- Permanent marker
- Drill
- Vise
- Trinket
- Aluminum bar
- Two aluminum rods with the thickness of the folding knife blade
- Two folding knives, double action
- Cold welding device
- Self-tapping screws
- Clamp


