Author:
Sara Rhodes
Date Of Creation:
10 February 2021
Update Date:
3 July 2024

Content
- Steps
- Part 1 of 2: Build an Incubator
- Part 2 of 2: Place the eggs in the incubator
- Additional articles
In recent years, raising chickens at home has become quite a popular phenomenon. Chickens are often bred not for sale, but for themselves. Unfortunately, all the necessary equipment (including the incubator) costs a lot of money. But making an incubator yourself is not such a difficult task. Chances are, you already have all the materials you need.
Steps
Part 1 of 2: Build an Incubator
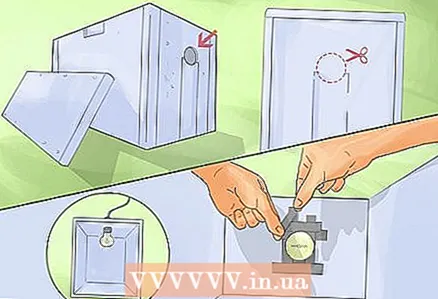 1 Take a Styrofoam container and cut a hole at one end. This hole will contain the incubator lamp. Insert there a connector from any lamp and a 25 watt light bulb. Place duct tape around the opening on the inside and outside of the container to reduce the risk of fire.
 - You can use a small box instead, which will work too, but the Styrofoam container itself is insulated and insulated, so it works better.
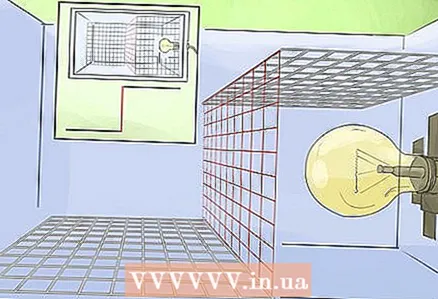 2 Divide the container in two and place a chicken net or other wire divider to line off the side of the container where the light is located. If this is not done, the chicks may burn themselves.
 - You can make an extra bottom by placing chicken net (or other wire mesh) just above the bottom of the container. This makes it much easier to clean the feed and faeces container.
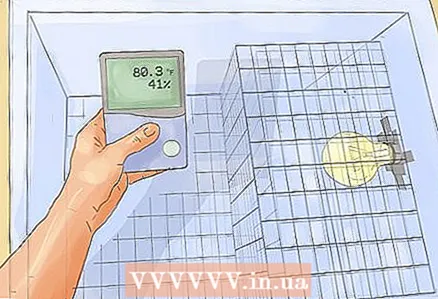 3 Now place a thermometer and a humidity gauge in the container. They need to be placed on the side of the container where the eggs will lie. The main function of the incubator is to maintain the temperature and humidity that are optimal for the eggs, so the thermometer and pressure gauge must be accurate.
 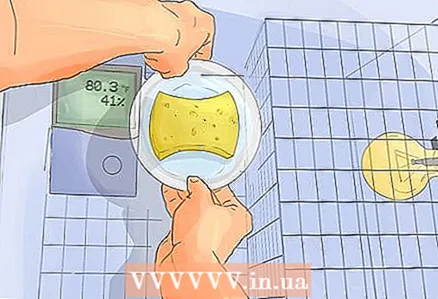 4 Place a bowl of water in a container to maintain proper moisture. Place a sponge nearby so you can control the moisture level and the amount of water in the bowl.
 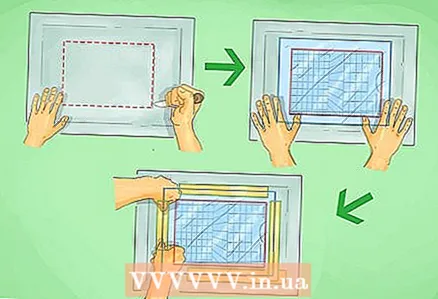 5 Cut a small hole in the lid of the container through which you will observe what is happening inside the container. Cover this hole with the photo frame glass. Of course, the hole must be smaller than this glass. Secure the glass to the lid with tape.
 - For convenience, you can make a handle for the container lid, so that it is convenient to remove it. The handle can be made from regular tape.
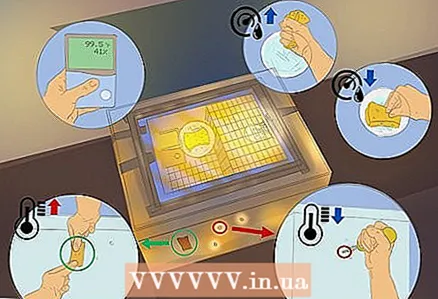 6 Now is the time to test the incubator. Before placing eggs in it, turn on the lamp and check the temperature and humidity throughout the day. If the temperature and humidity are higher or lower than normal, make some changes, position the lamp differently, pour more water into the bowl. The temperature should be around 37.5 degrees Celsius. The optimum humidity is considered to be 40-50% during the first 18 days and about 65-75% during the last four days.
 - To lower the temperature slightly and to cool the container, punch small holes in the sides of the container. Once the temperature has dropped to optimum, seal these holes with tape.
- To reduce moisture, pour some water out of the bowl or place a sponge in it.
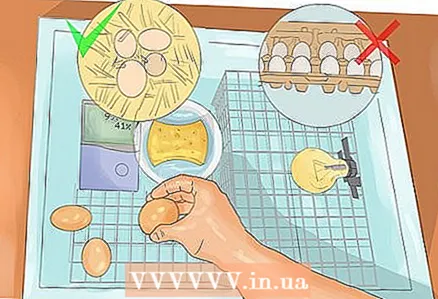 7 Now place some chicken eggs in the container. The eggs must be fertilized (for this reason, store-bought eggs will not work for you). If you do not have laying hens or roosters, contact a farmer or acquaintance who can give you some eggs. Place the eggs close to each other in the container.
 - The quality of the eggs and the health of future chickens largely depends on where they come from. Therefore, before purchasing eggs, ask the farmer for permission to inspect the farm. Free-range chickens are generally much healthier than paddock chickens.
- The optimal hatching rate is 50-85%.
- Laying hens are usually smaller in size and are bred specifically for egg production. Chickens that are bred for meat are usually larger and grow rather quickly. There are chickens that are bred for both meat and eggs. Ask the farmer for details. they breed.
Part 2 of 2: Place the eggs in the incubator
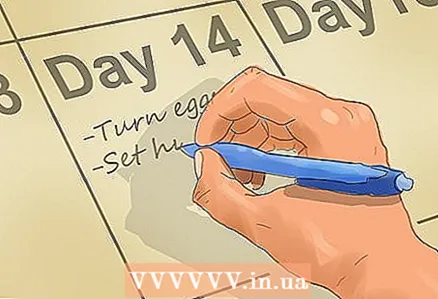 1 Keep track of the hatching time of the chicks. Chicken eggs are usually kept in an incubator for 21 days, so it is important to know the exact day you placed them there. Of course, it is important to regularly monitor your humidity and temperature readings.
 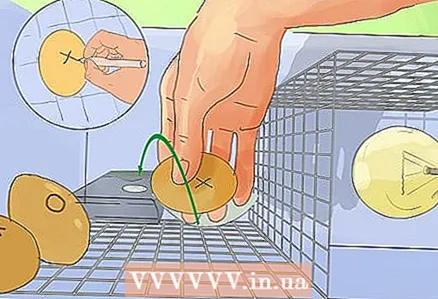 2 Turn eggs periodically. For the first 18 days, turn the eggs clockwise a few degrees three times a day. To avoid confusion, mark one side of the egg with a cross (x) and the other with a zero (o).
 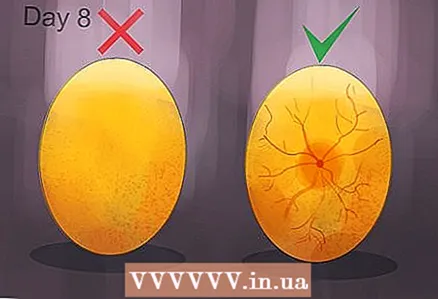 3 After the first week, try enlightening the eggs to see which ones are spoiled and sterile. To do this, turn on a bright lamp and in a dark room hold an egg against this bright light. It will light up and you will be able to see the outline of what is happening inside the egg. For the same purpose, you can buy a translucent device or a small bright flashlight. If you find unfertilized or spoiled eggs, remove them from the incubator.
 - If you are using a flashlight, it should be very small so that the light from it shines directly at the egg.
- There is another way to make a homemade translucent device: insert a table lamp inside a cardboard box, first cut a small hole in it the size of an egg. Hold the egg in front of this hole as you see through it.
- To better see the contents of the egg, gently rotate it in different directions.
- If the embryo is alive, you will see a dark spot with blood vessels.
- If the embryo is dead, you will see a ring or streak of blood inside the egg.
- The sterile eggs will be completely bright as there is no embryo inside them.
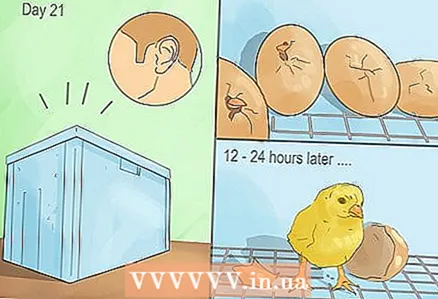 4 Listen for the sounds from the incubator. On day 21, you can hear a subtle squeak of chicks that will begin to hatch from the eggs. Keep an eye on this event. Chicks can hatch from eggs for 12 hours.
 - If the chick has been trying to get out of the shell for 12 hours, but it does not work, help him.
Additional articles
 How to heal a chicken with a tied egg
  How to act if your hamster doesn't move
  How to tame a pet rat
  How to determine if a hamster is pregnant
  How to care for a hedgehog
 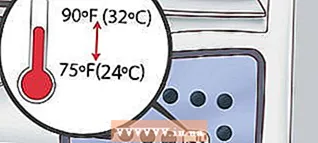 How to care for newborn mice
  How to remove fleas from a decorative rat
  How to help an injured hamster
  How to heal stuck eyes in a hamster
  How to train your rat to use the litter box
  How to keep your hamster cool in hot weather
  How to build your hamster's trust
  How to tame your hamster
  How to convince your parents to buy you a hamster


