Author:
Joan Hall
Date Of Creation:
6 July 2021
Update Date:
1 July 2024

Content
- Steps
- Method 1 of 3: Making a Simple Pencil Holder
- Method 2 of 3: Making a stationery organizer
- Method 3 of 3: Decorating the bottle in other ways
- Tips
- Warnings
- What do you need
- Making a simple pencil holder
- Making an organizer for stationery
- Decorating the bottle in other ways
Pencil holders are great for organizing and tidying up your desk, but sometimes it's hard to find the one that's perfect for you. Fortunately, a pencil holder is easy to make from a regular plastic bottle. For such a stand, you just need a cut bottle, materials for creativity, some free time and imagination.
Steps
Method 1 of 3: Making a Simple Pencil Holder
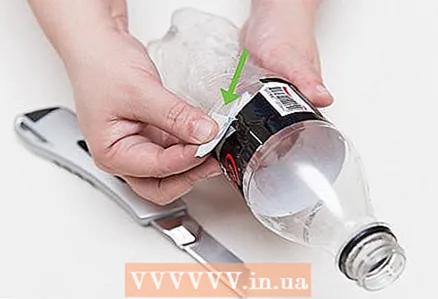 1 Remove the label from the plastic bottle. The bottle can be of any size, shape or color. For this purpose, both a water bottle and a bottle of carbonated or any other drink are suitable.
 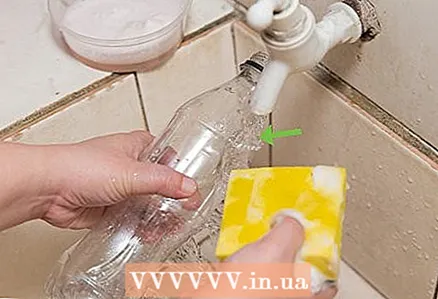 2 Wash the bottle with soap and water. Use a dishwashing brush to scrub off any glue residue. When the bottle is clean, pat it dry with a towel.
 - If glue remains on the bottle after removing the label, wipe it off with a cotton pad dipped in rubbing alcohol.
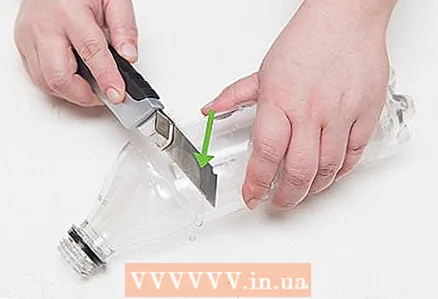 3 Cut off the top of the bottle with a utility knife. Don't worry if it doesn't work out very smoothly; in the next step, you will learn how to align the cut line. Cut the bottle a little higher than you think is necessary.
 - If you are a child, ask an adult to help you with this step.
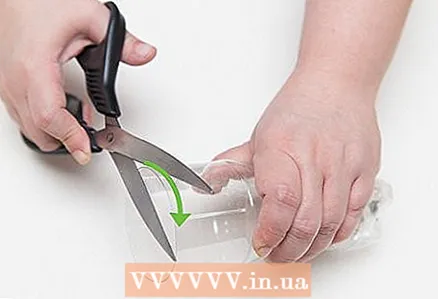 4 Use scissors to make the cut line straight. Trim the edges until the bottle is at the height you want and there are no irregularities in the cut line. Try to keep the bottle no shorter than half the length of a pencil or pen.
 - If the bottle has horizontal indentation stripes, these will help you cut the bottle evenly.
 5 Tear paper towels into small pieces. Each piece should be about 2.5 centimeters in size. Don't cut the towels. If the pieces have uneven edges, the work, oddly enough, will turn out neater. Also, the uneven pieces will be easier to stick to the bottle.
 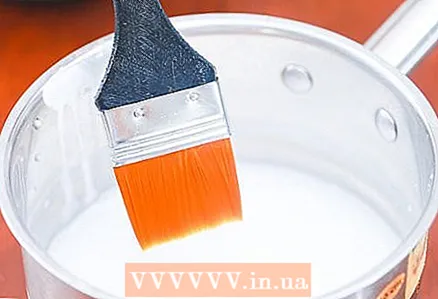 6 Apply PVA glue to the bottle with a brush. A flat brush works best for this purpose. To prevent the bottle from rolling, stick your hand inside it. This will prevent your hands from getting glue on.
 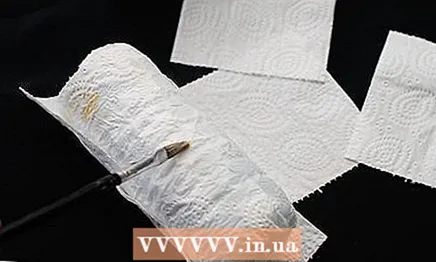 7 Cover the bottle with pieces of paper towels. Put them on top of each other a little so that there are no gaps. Press on the pieces with your fingers or a paintbrush to remove bubbles.
 - When you get to the top, bend the edges of the pieces so that they are inside the bottle. This will make your stand look tidier.
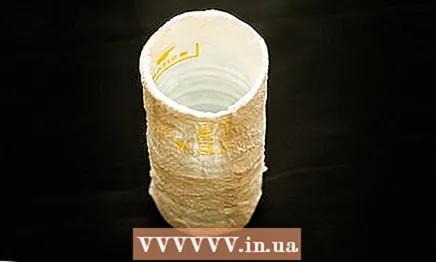 8 Let the glue dry and add a second layer of towels if desired. Once the bottle is dry, you can start decorating it or add a second layer of paper towels. It can be the same color as the previous one, or a different color to create a color mixing effect.
 - Once you've added a second coat and dried it, you can solidify your work by adding another coat of glue.
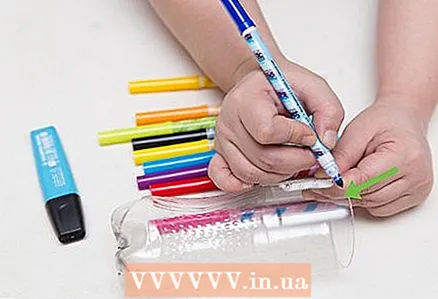
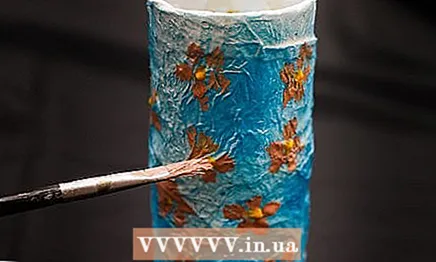 9 Decorate the bottle with paints, felt-tip pens, or stickers. When the bottle is completely dry, make it bright and colorful using stickers, felt-tip pens, or paints. You can even paint it with gel pens!
 - If you want to use lighter colors (like yellow), try painting the bottle with art markers. They paint much brighter than conventional felt-tip pens.
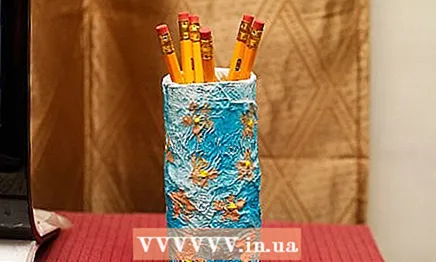 10 Ready!
Method 2 of 3: Making a stationery organizer
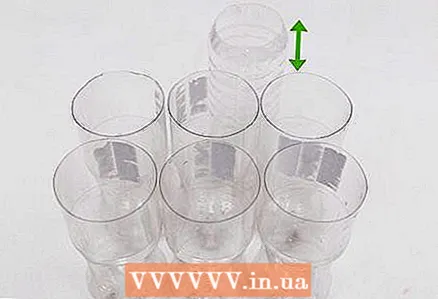 1 Cut seven bottles so that one is taller than the others. The first six bottles must be the same height. Make the seventh one 2.5 centimeters higher than the rest.
 - Initially, all seven bottles must be the same size and shape.
- The stationery organizer is ideal for those who have a lot of different pencils and stationery, and for those who like to keep their desk tidy.It is also convenient to store simple and colored pencils, crayons and pens in such an organizer so that there is a separate place for each type of stationery.
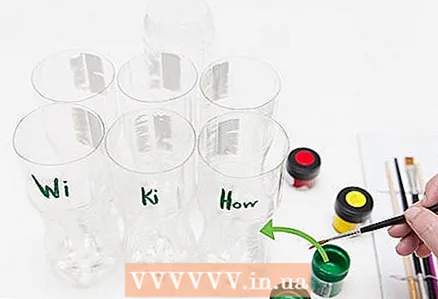 2 Decorate the bottles. You can decorate them however you like, just don't add anything bulky like buttons or large sequins. If you want to add bulky embellishments, do so later when you glue the organizer together.
 - An easy and quick way to decorate bottles is to paint them in different colors and stick stickers on them.
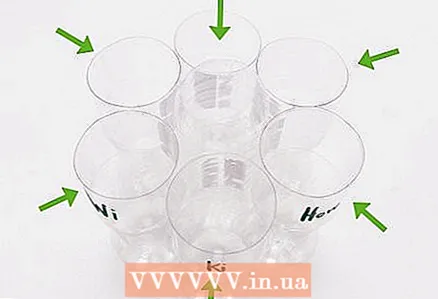 3 Place the shorter bottles around the bottle higher. All shorter bottles should touch the higher bottle. If you look at the bottles from above, you get something that resembles a flower.
 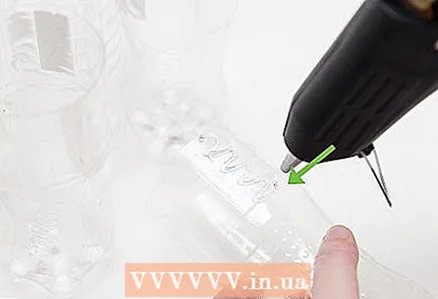 4 Take one of the shorter bottles and draw a vertical line of glue on it with your glue gun. The line should go from the cut line to the very bottom of the bottle. To make the bottle stick better and stronger, make the line not straight, but wavy.
 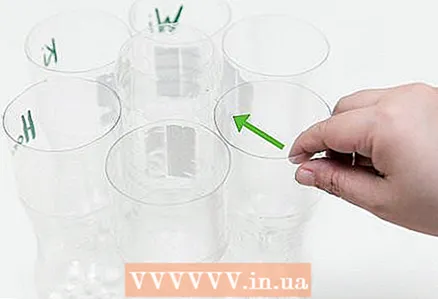 5 Quickly replace the bottle and press it lightly against the center of the bottle. Make sure to press the glue portion onto the bottle. Repeat with all other bottles. All six bottles should be glued to the center of the bottle.
 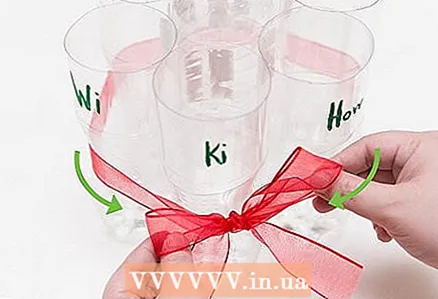 6 Wrap ribbon or decorative tape around your organizer. The edges can be neatly glued or tied into a nice bow.
 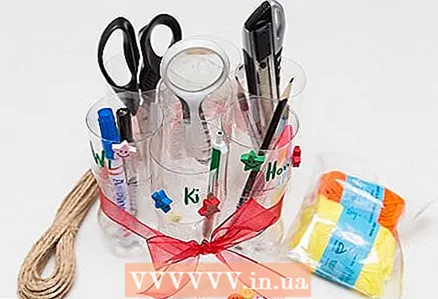 7 You can continue to decorate the organizer if you like. You can glue large plastic sequins, buttons on it, or paint something on it with glitter glue. If you want to make an organizer stand, glue it to a cut out cardboard circle or cake stand.
Method 3 of 3: Decorating the bottle in other ways
 1 Color a regular bottle with permanent markers for something quick and easy. If you don't want to use paper towels, you can simply draw something on the bottle with permanent markers. The pencil will turn out to be translucent, and the plastic will look like colored glass.
 - If you make a mistake, erase the line with a cotton swab dipped in rubbing alcohol. Wipe dry the area you washed it off and continue painting.
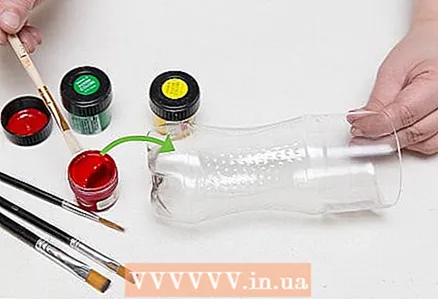 2 Paint the bottle with acrylics or paint cans (available at art stores) to keep the pencil bright. To help the paint adhere better to the bottle, try sanding it with fine-grained emery paper. First paint the entire bottle with one color, wait for the paint to dry, and paint something like flowers.
 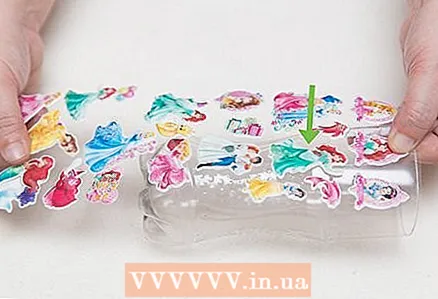 3 Decorate the clear or painted bottle with stickers for something easy. If you don't have a lot of creative materials on hand, you can always glue the bottle with stickers. For example, you can paint a bottle dark blue or black, wait for the paint to dry, and tape it with silver or gold star stickers.
  4 Wrap the bottle with regular tape, colored tape, or decorative tape to create a continuous pattern. Peel off the end of the tape, approximately 1 inch (2.5 cm) long, and press it against the bottle as close to the bottom as possible. Hold the tape close to the bottle and gently wrap it around it to create a closed loop of tape. When you get back to where you started, glue about 1.5 centimeters of duct tape over the beginning of the strip and cut it off. Start the next circle right above the previous one, or make it overlap the previous one a bit.
 - If the tape is outside the cut line of the bottle, bend it so that it is inside the bottle and glue it.
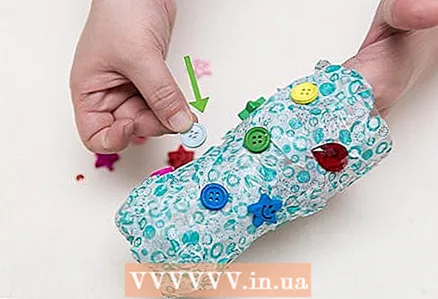 5 Make your pencil holder even more beautiful by gluing buttons or large glitter to it with a glue gun. You can glue them over the whole bottle or just small parts of it. However, it is better to glue the buttons and sequins at the bottom of the pencil holder. If there are many such decorations closer to the cut line of the bottle, the stand will turn out to be unstable.
 - To make the pencil stand brighter, color it in or paper towels over it using papier-mâché before gluing on the buttons or glitter.
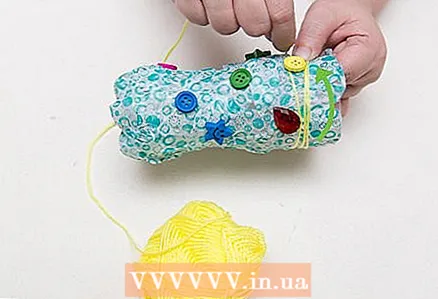 6 Wrap the yarn or twine around the bottle. Run a bead of glue around the cutting line and press the thread against it. Start wrapping the string around the bottle, adding a bead of glue every few centimeters. When you reach the bottom of the bottle, run another bead of glue and press the end of the string against it.
 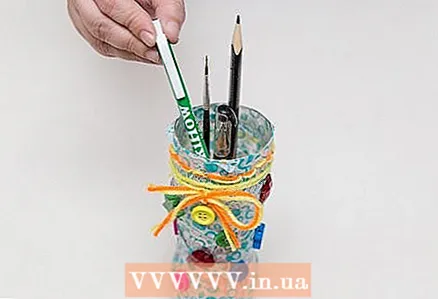 7 Punch holes near the cut line of the bottle and thread the colored yarn through them. Use a hole punch to punch holes around the cut line about 1.5 centimeters apart. Thread some yarn into a suitable needle and use the needle to pull the yarn through the holes. This will make the top of your stand look more beautiful.
 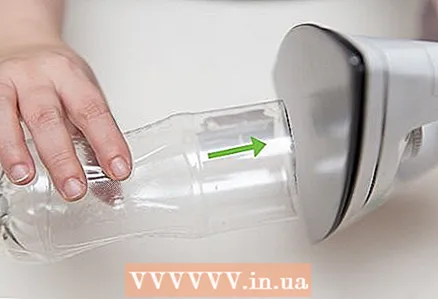 8 If your bottle is made of PET or PETE plastic, use an iron to line up the cut line. This should be done after you cut the bottle, but before you start decorating it. To find out what kind of plastic your bottle is made of, turn it over and look at the bottom and around the bottom. If there is a recycling sign with a number inside, then the bottle is made of PET / PETE plastic. Sometimes this sign is hard to see, so watch carefully.
 - Turn on the iron and check that the steam is off. Wrap a cloth or aluminum foil over the heating surface of your iron to keep it clean.
- Press the cut side down of the bottle to the bottom of the iron.
- Raise the bottle every few seconds to check the condition of the cut line. When the plastic heats up, it will start to melt, making the cut line straight.
- Turn off the iron and let the bottle cool before you start decorating it.
Tips
- Make a pencil holder that matches the style and color of the other items in your room.
- If your pencil holder falls, add about 1 inch (2.5 cm) decorative stones or balls to the bottom. This will make your pencil holder more stable.
- Decorate your pencil box to look like your favorite animal or character.
Warnings
- Stationery knives are sharp. It is not safe for children to use them, so they should ask an adult to help them cut the bottle.
What do you need
Making a simple pencil holder
- Plastic bottle
- Stationery knife
- Scissors
- PVA glue
- Paper towels
- Flat brush
- Decoration materials (paints, glue, paper towels, stickers, etc.)
Making an organizer for stationery
- Plastic bottle
- Stationery knife
- Scissors
- Decoration materials (paints, glue, paper towels, stickers, etc.)
- Glue gun
- Ribbon
Decorating the bottle in other ways
- Depending on the project


