Author:
Janice Evans
Date Of Creation:
1 July 2021
Update Date:
1 July 2024

Content
- Steps
- Method 1 of 3: Build the frame of the aquarium stand
- Method 2 of 3: Cover the aquarium stand
- Method 3 of 3: Painting and finishing the aquarium stand
- Tips
- What do you need
The aquarium stand will take your fish to a whole new level, both in height and beauty. A well-equipped, store-bought stand costs a lot of money, but you can learn how to make a stand that looks like a store-bought stand at a fraction of the price.
Steps
Method 1 of 3: Build the frame of the aquarium stand
 1 Build the base of the frame in the shape of a rectangle. To do this, use # 2 wood beams measuring 0.5x1cm. Use a circular saw to cut the boards to the desired length and width to fit your aquarium. Add another 1.3 cm to make sure that the aquarium does not fall as soon as you place it. Knock down the beams with decorative nails.
  2 Cut additional 0.5x1cm beams to use as lintels along the top of the frame. Place the beams 0.6m apart. They will help distribute the weight of the aquarium and water. Cut the beams to fit the length of the rectangular frame and knock them down with decorative nails.
 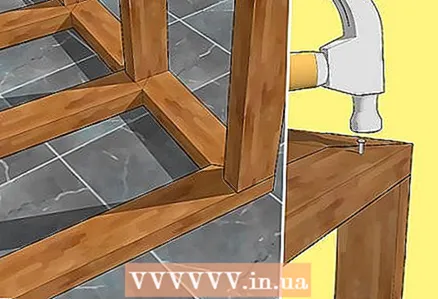 3 Place the beams vertically at each corner and where the lintels are attached. Use # 2 beams 0.5x1cm, the length of the legs is up to you. Attach them with decorative nails.
  4 Use a punch to twist the corners of the frame. To do this, use 2x3cm wood nails.You can also use wood glue to hold the pieces together.
 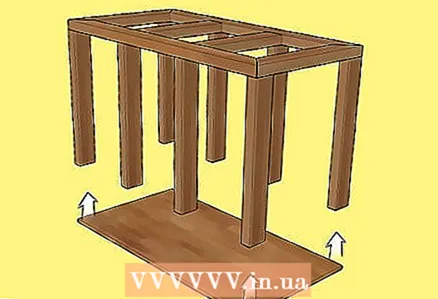 5 Measure the bottom of the constructed structure. Draw with a pencil the exact shape and size of the rectangle on a 1x2cm piece of wood and cut out the resulting shape using a jigsaw. Attach the panel to the bottom of the frame using wood glue. You can also use decorative nails to secure the structure.
Method 2 of 3: Cover the aquarium stand
 1 Measure the sides of your stand and draw outlines with a pencil on a piece of wood. Cut out the shapes with a jigsaw.
  2 Using wood glue, attach each panel to the corresponding side and secure the structure with decorative nails.
 3 Measure and cut shaped tiles at each corner of the stand with a jigsaw. Attach the cut pieces to each corner using wood glue.
Method 3 of 3: Painting and finishing the aquarium stand
 1 Lacquer or paint your stand in any color. Apply with a brush at least one greasy coat of paint, then let it dry completely.
  2 Attach the cabinet doors you have chosen as described in the instructions for them.
Tips
- Remember that you are building a stand specifically for your aquarium. Therefore, change the design according to the size of your aquarium.
- Replace the trim panel with cladding to save time. This will remove the stage of painting the stand from the project and thus, you will cope a few days faster. If you use this option, make sure the frame and frame fit together.
What do you need
- 8-10 beams # 2 0.5x1cm, length 2.5m
- Roulette
- A circular saw
- Decorative nails
- A hammer
- Wood screws
- Perforator
- Wood glue
- Pencil
- Wooden sheet 1x2cm
- Jigsaw
- 4 shaped tiles 2.5x10cm
- 2 cabinet doors
- Brush for painting
- Dye


