Author:
Bobbie Johnson
Date Of Creation:
1 April 2021
Update Date:
26 June 2024
Content
- Steps
- Part 1 of 4: Preparing the Table and Cloth
- Part 2 of 4: Securing the felt with a stapler
- Part 3 of 4: Bonding the felt to the playing surface
- Part 4 of 4: Removing the felt from the boards
- Tips
- You will need
Removing the cloth, or more precisely, the fabric from the billiard table, is often provided to professionals, however, the tools that are used in this procedure are not expensive and not complicated. The reason why some people find this procedure difficult is due to the requirements for placing the new tissue on the table. Stretching in the wrong direction or a little dust left on the surface can make the playing surface uneven or unpredictable. You can minimize the chances of error by working slowly and carefully with the help of a person who will stretch the fabric while you secure it.
Steps
Part 1 of 4: Preparing the Table and Cloth
 1 Begin parsing the table. First remove the bags from each pocket, if any. Next, find the bolts on the underside of the table that hold the boards in place and remove them. Move the beads carefully to a safe storage location where they will not wrinkle or break or get caught in your path as you walk around the table.
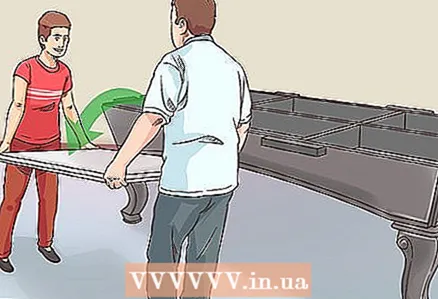
 - The sides can be made in one, two or four pieces. If the sides are not four-piece, you may need someone to help you move them carefully to a safe place.
- The pockets of some billiard tables are bolted or bolted separately from the sides.
 2 Remove the old cloth. The felt can be attached in more than one way. Use a staple extender if a stapler has been used for fastening. If it is glued, you can simply tear it off, but be careful not to damage the cloth in the pockets, unless you are going to change it too.
 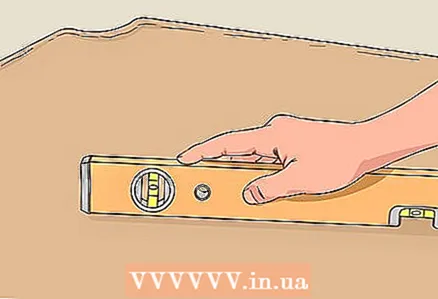 3 Using the level (optional). You might want to use the level to find a spot where the pool table is level. If the table is not level, place a small pad under the lower leg.
 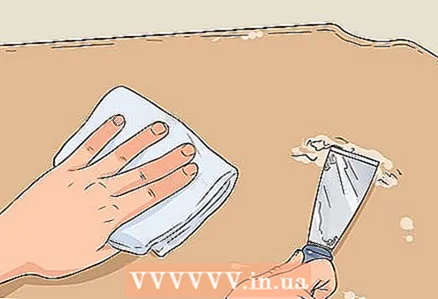 4 Clean the table surface. Remove dust with a dry, clean cloth. Do not use water or cleaning solutions. If old glue or other residues have accumulated, remove them with a putty knife or other flat blade, especially in areas where dirt can block the pocket.
 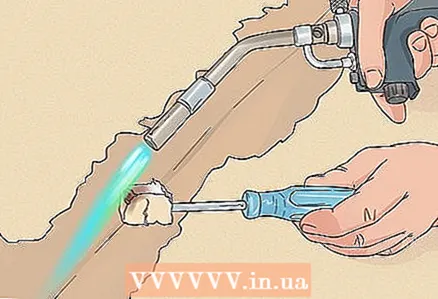 5 Cover the seams with beeswax if necessary. Most billiard tables are made of three parts. On older tables, the seams between the pieces may lose some of the wax filling them to create an even surface. If wax needs to be refreshed, heat the joints with a hand held propane torch, then add the wax to the joints. Spread it over the seam line, allow to cool for no more than thirty seconds, then scrape off excess wax to table level with a trowel. It is better to remove more wax than less, as dried excess wax is more difficult to remove.
 - If your pool table is located in a warm room, you should use a putty specially made for such tables.There is a huge debate over which of these synthetic products is of the highest quality, so you should consult with a local expert familiar with your climate.
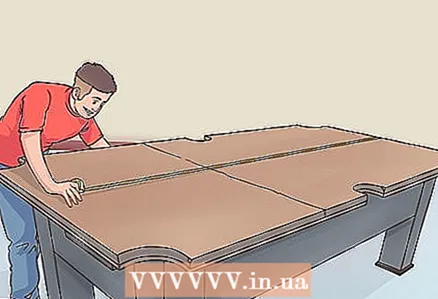 6 Measure the table before buying the felt. Measurement will eliminate guesswork when choosing a fabric, speeding up the process and making the result cleaner. When purchasing a cloth or, technically speaking, "pool table cloth" for your table, make sure it is (at least) 30.5 cm longer than the table on all sides. This will definitely let you know that you have enough fabric on both the surface of the table and the sides.
 - Note that billiard cloth is a special type of fabric, albeit called “broadcloth”, most often sold as “billiard table cloth”, “billiard cloth”. You cannot use ordinary cloth to cover the table.
- Woolen cloth is a cloth that all billiard players are familiar with. Worsted cloth gives the best speed, but is rarely used outside professional tournaments due to its short lifespan and cost. Other varieties such as snooker, carom or polyester are only suitable for certain purposes.
Part 2 of 4: Securing the felt with a stapler
 1 Use this method only when the surface is wood or chipboard. Many desks have a chipboard or wood backing underneath the surface to allow for the use of staples. You can check for the presence of such a backing by examining the perimeter of the vertical edge of the table. If there is only a tabletop, then follow the gluing instructions.
 - ”Note:” You will need a stapler or hand stapler or a staple gun.
 2 Cut the cloth into pieces for the table and sides. Usually, the cloth comes in one huge piece, includes instructions for removing the pieces in order to fit it to the sides. Follow these instructions very carefully, otherwise, the pieces may not fit the table.
 - With one felt, you can make a 2.5 cm cut and then tear the cloth with your hands in a straight line. Other cloths may require a razor blade or cardboard cutter.
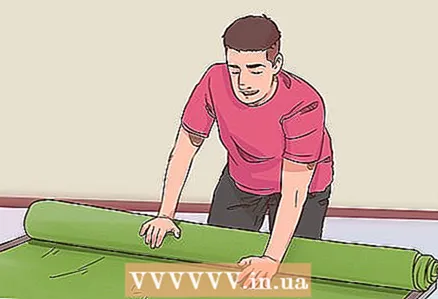 3 Unfold the cloth on the table with the playing surface facing up. Look for a sticker or tag that tells you which surface is playable. If there are no markings on the felt and you cannot understand which surface is needed, then consult a specialist. Different types of cloth differ in how they feel when touched, so it's best not to guess if you're not familiar with the feel of each type.
 - Hang more of the excess cloth off the back of the table and a little off the front where you will start the fasteners.
- Check the felt for scratches, cuts, or other defects that may require a refund or exchange.
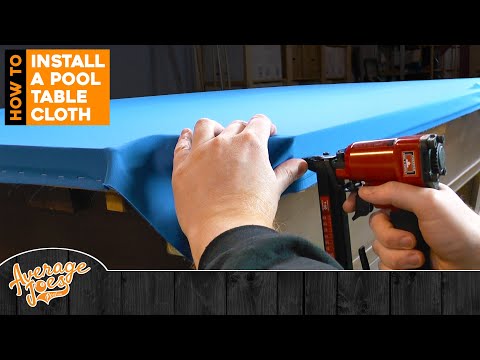
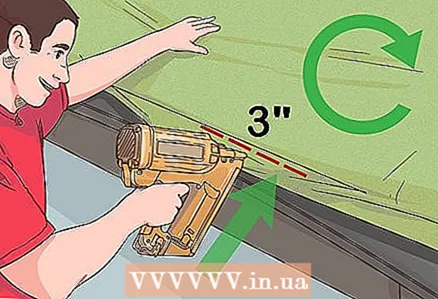
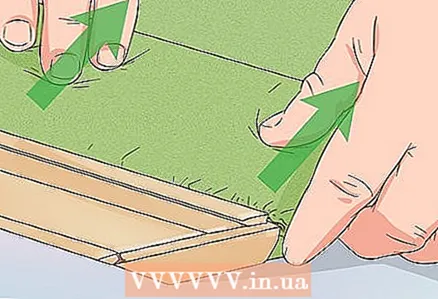
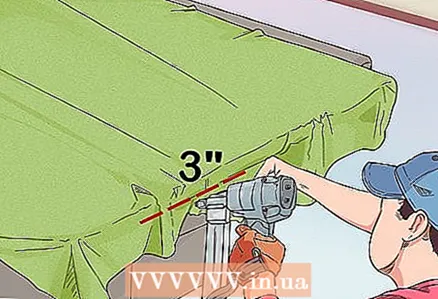 4 Stretch the felt over the front and secure with staples at several locations on the vertical edge. Using a staple gun or staple gun, clip the felt to a wood or chipboard surface at one corner of the front edge of the table. The assistant should stretch the felt so that there are no wrinkles, keeping the overhang parallel to the edge of the table. Attach the canvas every 7.5 cm along the stretched edge, ending at the second corner.
 - Pros play on an extremely stretched surface that gives the best speed. However, this is not necessary for most players who can enjoy the game at low speeds, however pull the fabric so that all wrinkles are removed.
 5 Repeat the process on the left side. Move to one of the long sides of the table with an assistant stretching the blade lengthwise. Drive in the staple after about 7.5 cm, be sure to secure the fabric on either side of the pockets.
 - Pulling the fabric over the pockets while fastening on each side will give you more material when working on cutting the fabric into the pockets.
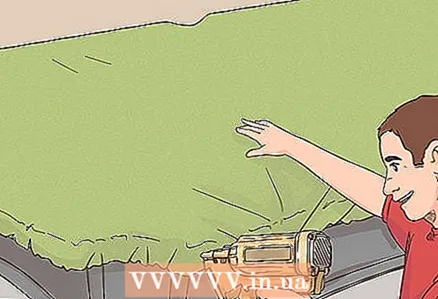 6 Drive in the staples on the back of the table and then on the right. Pull the blade as hard as possible from the last unsecured corner.Pay special attention to this, as not too much tension on the fabric when fastening will create wrinkles on the playing surface. If the previous staples make it impossible to create a smooth surface, you will need a staple extender to remove several of them and try re-fastening. Once the staples are removed and the fabric is stretched to the desired extent, hammer the staples into the back of the table and the rest of the pieces along their lengths.
 - Remember to hammer in staples on each side of the pockets on the long sides of the table.
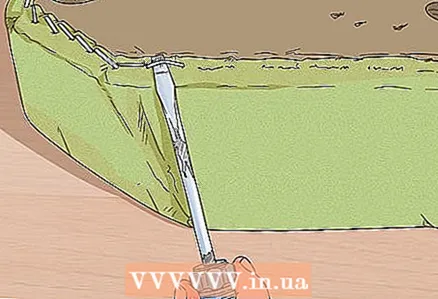
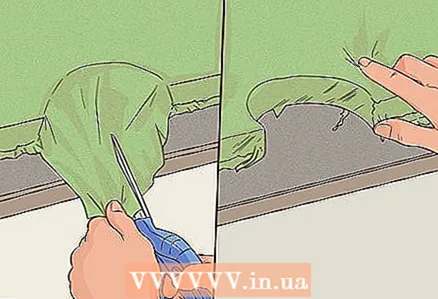 7 Trim the material on the pockets and secure with staples from the inside. Make three cuts just above each of the pockets, then pull the loose ends of the fabric down and staple inside the pockets. Once you're done with this step, grab a pair of scissors or a razor blade and cut off the excess blade.
Part 3 of 4: Bonding the felt to the playing surface
 1 Use a special adhesive spray if stapling is not possible. If the table does not have a wooden or chipboard board below the surface, you will need special glue to hold the felt to the table surface. If a plank base is present, follow the instructions for stapling.
 - 3M Super 77 multi-functional adhesive is a popular choice.
 2 Cover the edges of the table with newspapers. Protect the edges of the table from spilled glue with a layer of newspaper hanging around the edges. Remove newspapers before applying the greased felt.
 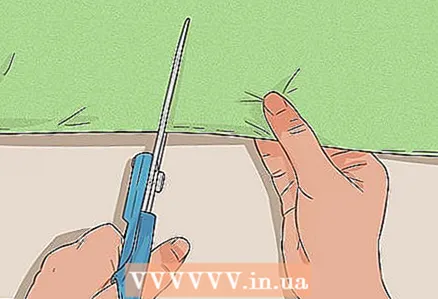 3 Cut the felt following the manufacturer's instructions. The felt usually comes in one large piece along with instructions for cutting strips on each side. Follow these instructions to get the right felt size.
  4 Define a work surface and place the felt on the table. If the side is not labeled, try to identify it by touch or consult a specialist. The playing surface of your cloth can be smooth or have a "fleece" in one direction, it all depends on the type; It may take a professional to determine the work surface if you are unfamiliar with the materials. Place the cloth on the table, leaving only a few centimeters hanging from the back. Make sure each overhang is as parallel to the table as possible.
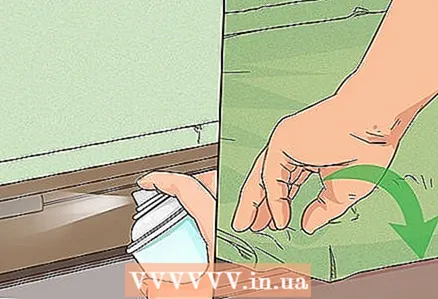
 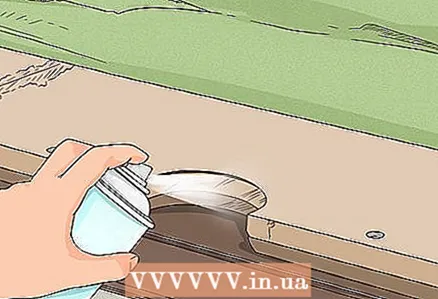 5 Roll the felt up from the front and apply the glue. Roll the front end of the cloth over the table, exposing the bottom of the cloth that will hang over the edge of the table. Apply glue liberally to the bottom, spray it onto the table surface where the canvas will be attached, and hold until the sheet is tacky according to the manufacturer's instructions.
 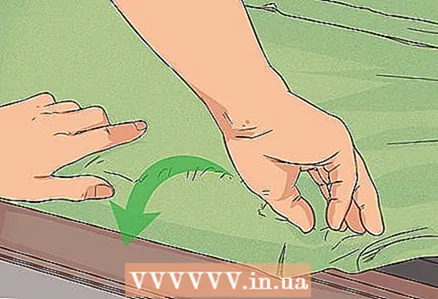 6 Place the canvas gently on the table. Start at one end and work your way to the other, positioning the glue-coated canvas against the surface of the table, pressing it down, then work along the glue-coated edge, stretching it. You may need someone to help make sure the material is tight, especially at the beginning of the process.
 - The tension should be strong enough to prevent wrinkling, but an extremely tight surface is not required unless you want to practice for professional tournaments. Most importantly, you must apply the same pressure throughout the entire process.
 7 Repeat the process with the back edge and side edges. The gluing is identical for all remaining sides. Wait a few minutes after each side, or as long as recommended by the adhesive manufacturer to create a strong bond. Tighten the fabric gently before applying the adhesive to ensure that the fabric does not wrinkle and the tension is the same on each side.
 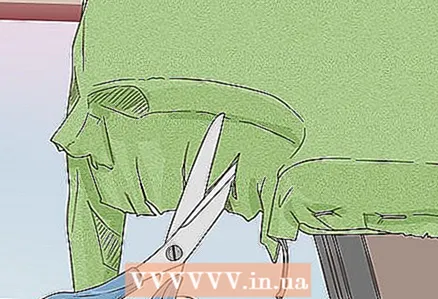 8 Cut the linen and use the excess to glue the pockets. Trim off excess fabric from each side. On one, cut a strip 2.5 cm wide for use in pockets. Cut off the material hanging from the pockets, then cut them into smaller pieces, glue them over the vertical rounded surfaces of the edge of the table to protect them from balls.
Part 4 of 4: Removing the felt from the boards
 1 Remove the old cloth from the boards. Using a staple extender or a flat screwdriver, remove the staples. Cut the cloth off the underside of the boards if it won't fall off.
 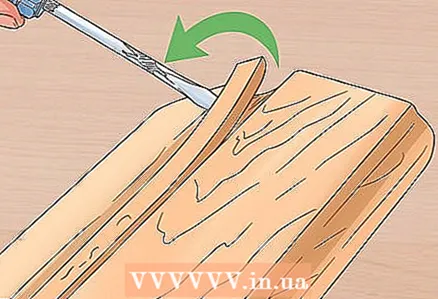 2 Peel off the wood feathers gently. Each side has a wooden "feather" that runs along its length and is usually not attached with glue or nails. If it does not come off easily, use a thin screwdriver to remove it without breaking it.
 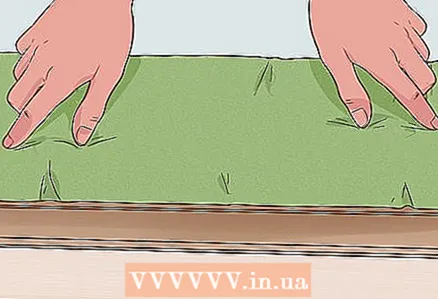 3 Attach a new strip of felt to the side. In contrast to the table top, the cloth on the board should be placed face down. Make an excess of about 10 cm at each end and 1.25 cm above the feather groove.
 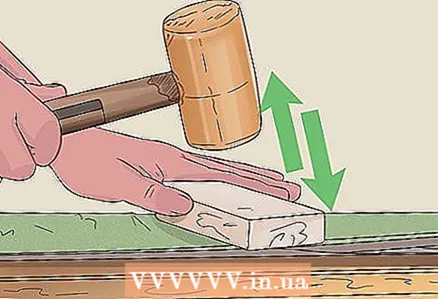 4 Using a mallet and hammer, insert the center of the feather into the slot. Insert the pen to its original position, but do not press down on it. An assistant should stretch the web between the center and one of the bead edges. Attach a mallet to the feather and tap it lightly with a hammer, inserting the feather into the stretched part of the canvas, but stop 5 cm from the edge where the pocket will be. Stretch the other side, repeat the process for the entire remaining length of the feather, again stopping 5 cm from the edge.
 - Do not hit the pen directly, as this could dent the table.
 5 Pull the felt towards the board and tap on the ends of the feather. Pull the felt over the edge of the table to the rubber board, then nail the rest of the feather to secure it in place. Cut and fold the felt as necessary to remove excess material and cover the ends of the beads with it.
 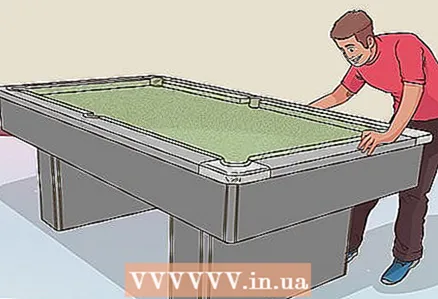 6 Attach the outer sides. Once you're done with them, bolt them to the table. If you have difficulties with the location of the bolts, you can insert a screwdriver into the holes and see how they will be located. Do not try to punch holes for mounting on the playing surface, as you may make mistakes.
Tips
- After removing the beads from the table, keep them separate so you know which bead to bind to each side, this will make assembly easier.
You will need
- New fabric for billiard table
- Stapler or staple gun
- "Or" special glue (like 3M Super 77)
- Flat screwdriver


