Author:
Virginia Floyd
Date Of Creation:
11 August 2021
Update Date:
1 July 2024

Content
- Method 2 of 3: Create Your Own Design Box
- Method 3 of 3: Convert a regular box to a popcorn box
- What do you need
- For example, the standard Letter size (216 x 279 mm) will work with smaller boxes that are more suitable for children. If you need larger boxes, try A4 or even A3 sheets.
- Before confirming a printout of the template, make sure your printer can handle this size and density of cardstock. Select the appropriate settings in the print options.
- The density of the cardboard should be between 135-300 g / m².
- To create a unique box, you can print your template on colored cardboard, such as blue or pink.
 3 Mark the fold lines on the template. Take a folded bone or roller to mark the folds on the future box. Be careful not to accidentally cut through the cardboard.
 - Mark the folds along the front (patterned) side to fold the cardboard in the right direction.
4 Cut out the workpiece. Carefully cut the box blank along the outer contours of the template. Be careful not to cut off the bonding flaps. Cut the paper straight so that the box is not skewed. 5 Fold the folds into the blank and fold the box. Make the necessary folds on the workpiece along the outlined lines and fold the box out of it, making sure that all sides are straight. Also check that all bonding flaps are in place. 6 Glue or tape all the tagged areas with glue or tape. The box template will necessarily include valves for gluing the sides together. Find them and use non-toxic glue or tape to secure the box in these places. If you decide to use glue, be sure to wipe off excess glue from the box, and then let it dry. - You can also glue the box with double-sided tape.
- When gluing the box with glue or tape, be sure to carefully align the sides. For the convenience of aligning the aligned sides, the box can be placed on the table with these sides.
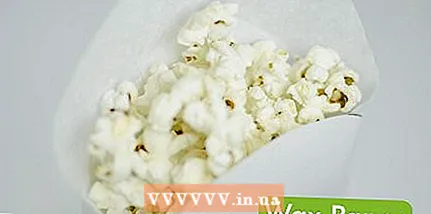 7 Line the inside of the box with wax paper and fill with popcorn. The waxed paper will keep the popcorn oil from soaking into the box, so it can be reused. Fill the box with popcorn of your favorite flavor and enjoy it! When the popcorn is finished, discard the used wax paper. And if the box is needed again, line it up again with clean waxed paper.
 Method 2 of 3: Create Your Own Design Box
 1 Choose the right material for the box. Thin or thick white cardboard is best because it is strong and dense enough, but not too thick to be difficult to cut.
 - For work, you can use sheet cardboard not only white, but also in another color of your choice.
- 2 Find a ready-made box template or draw one yourself. Print a box template and transfer its contours to cardboard, or simply draw a blank on it according to your parameters. To keep the lines straight and accurate, use a straight edge and carefully measure all sides, including the flaps for holding the bottom and joining the sides of the box.
- The template should include the four main sides of the box, arranged in a row. The sides can be tall rectangles or trapezoids tapering towards the bottom of the box. A fastening valve should be provided on the side of one of the extreme sides.
- Draw a rectangular box underneath one of the main sides of the template. The length of the sides of the bottom will be determined by the length of the lower edges of the sides of the box. Provide a flap on the sides of the bottom to secure the bottom of the box to the sides.
- A standard popcorn box is usually 10cm x 7.5cm x 20cm.
- 3 Cut out the workpiece with scissors, a utility knife, or a dummy knife. Choose the most suitable tool for you depending on the thickness of the cardboard. With a knife, it is better to additionally use a ruler so that the cuts are even.
- If you are working with thick cardboard, then you will have to work with a utility knife and ruler.
- If you are using poster board, you can cut it with a ruler and a dummy knife, which must be sharp enough to cut through the material.
- Thin cardboard can be cut with regular scissors.
- 4 Glue the box with glue or tape. If you decide to use glue, apply non-toxic craft glue to the tags, assemble the box, and let it dry for 30 minutes before filling with popcorn. If you used regular single-sided or double-sided tape, stick it along the mounting flaps, and then press them in place to assemble the box.
 5 Line the box with wax paper and fill with popcorn. Line the inside of the box with wax paper to avoid staining and reusing the box. Fill the box with hot popcorn and enjoy. When the popcorn runs out, just throw away the stained wax paper. And if you need the popcorn box again, line it up again with clean wax paper.
Method 3 of 3: Convert a regular box to a popcorn box
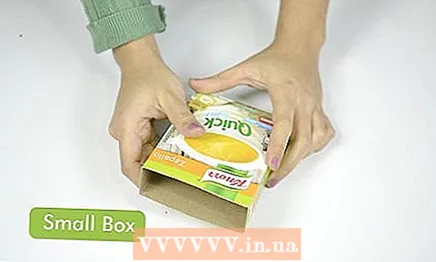 1 Find a small flat box. Try a flat food packaging box.Cut off the top flaps of the box and align the sides at the top.
 - If the box is too tall, trim the top to the desired height.
- 2 Cover the box with white paper. Use thin, white paper that bends and folds easily. This can be printer paper, wrapping paper, or meat paper. Wrap the box with paper and glue it down, then cut off the excess.
- 3 Decorate the box. Use heavy colored paper or thin red cardboard to cut out stripes and a circle for a classic red and white popcorn box. To create a box with your own unique design, you can decorate it with paints, stickers, or markers.
- 4 Add popcorn caption. The letters can be cut out of white paper and glued onto a red cardboard circle with glue, or self-adhesive paper can be used right away. If you are making a classic popcorn box, place a red circle on it in the center and place the word “popcorn” in the middle of it. Attach the letters with glue or simply peel off the backing from the self-adhesive paper to stick the lettering onto the box.
 5 Line the box with wax paper and fill it with popcorn. Use a sheet of waxed paper to line the bottom and sides of the box, thus protecting them from oil and grease. Thus, your box can be reused for the next home movie viewing. Fill the box with popcorn, and when it runs out, throw away the used wax paper.
What do you need
- Printable box template
- White thin or thick cardboard
- Colored cardboard or thick colored paper
- White printer paper, wrapping paper, or meat paper
- Scissors, utility or breadboard knife
- Ruler
- Glue
- Paints, markers, stickers
- Wax paper


