Author:
Marcus Baldwin
Date Of Creation:
22 June 2021
Update Date:
1 July 2024
Content
- Steps
- Part 1 of 4: Preparing your nails
- Part 2 of 4: Marking the shape of the nails
- Part 3 of 4: Applying the color
- Part 4 of 4: Securing your manicure
- Tips
- Warnings
- What do you need
Whether you're practicing for your new salon or just having a sleepover, knowing how to get someone a manicure can help that person feel calm and beautiful, and help you hone your craft. Put on the music, grab a manicure set and let's get started.
Steps
Part 1 of 4: Preparing your nails
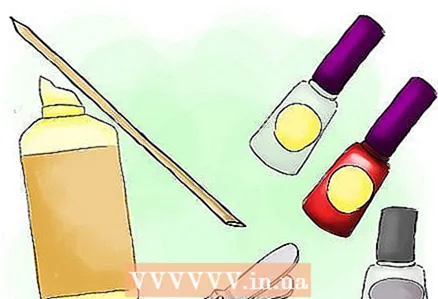 1 Take whatever you need. You will be much happier when you have everything at your fingertips if you are going to devote to your manicure for the next 15 minutes or so. You will not need to get up and not fuss around, run, trying to do everything right; it's all close by now. Don't forget to grab:
 - Your base coat, nail polish, and top coat
- Nail polish remover
- Cotton swabs
- Small tray with warm water and soap
- Moisturizing cream
- Nail scissors
- A file
- Tool for pushing back the cuticle (scapula) or removing the cuticle
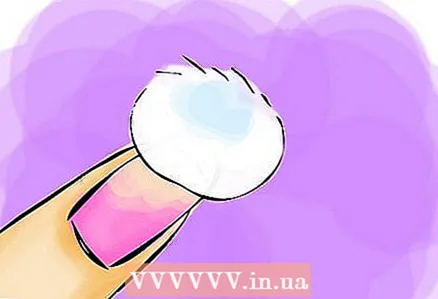 2 Remove any nail polish present. Take a couple of cotton balls or a cloth and dip it in nail polish remover. Wipe the nail polish off gently, making sure to run over nooks and crannies. Then, wash your hands really quickly, just to get rid of the smell.
 - Better to use 100% acetone. It will smell and make your friend's hands a little gray, but it is easily washed off with soap and water (which will be used later). 100% acetone does its job much, much faster.
- Alternatively, you can use an acetone bath.It is filled with pink, rubbery bristles that will do all the work for you. Nail polish, which is very difficult to remove, can be removed in a couple of minutes with this type of bath.
 3 Fill a container with soapy water. Take a small tray and fill it with warm water (make sure it's not too hot). Add a mild soap that smells good and moisturizes your skin. This will help combat acetone odor and gray effects, and will loosen dead skin on your nails and cuticles.
 - If you want and have stock, consider using an exfoliating brush with warm water and soap. It exfoliates the skin and leaves it bright and radiant.
- A mild facial cleanser can also be used as a soap. Even a mild dish soap can work.
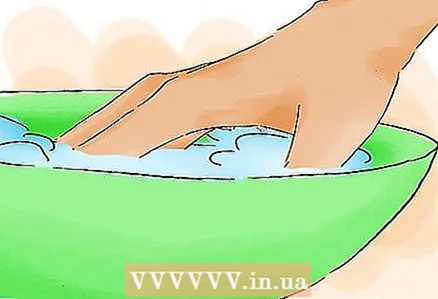 4 Dip the person's fingers in soapy water. Most manicure trays are designed for just one hand at a time. Thus, while one hand is soaking, you can massage and moisturize the other. Use a scented lotion or massage oil and rub your hand for a few minutes to give the other hand enough time to get wet.
 - After a few minutes, change hands by placing your moistened hand in a tray of water. Spend a few minutes massaging your other hand and then move on to the next step.
Part 2 of 4: Marking the shape of the nails
 1 Trim the person's cuticles. Use a trimmer and trim the skin around the cuticle. But be careful; be too rough and may cause bleeding from the cuticle. You can also use a cuticle remover gel. It is a liquid that is simply left on the skin for a few seconds. This eats away at the dead skin cells and makes it easier for it to come off. It is also good if there are corns.
 - Make sure you get the timing right. You don't want to start too early and cut your skin, which can lead to injury, but you also don't want to hesitate to get the other hand to wrinkle. After a few minutes, you can take your other hand out of the water, blot it dry, and return to completing the first hand.
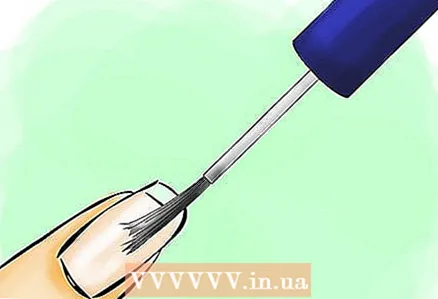
 2 Move the cuticles of the person you are nailing back. Use a rubber cuticle spatula and gently push the cuticle back. This will make your nails look bigger and cleaner. Make sure all loose skin is removed and evaluate both hands.
 - Some people like to moisturize their cuticles after this stage. If you do, just make sure you remove any residue with nail polish remover before you start painting your nails.
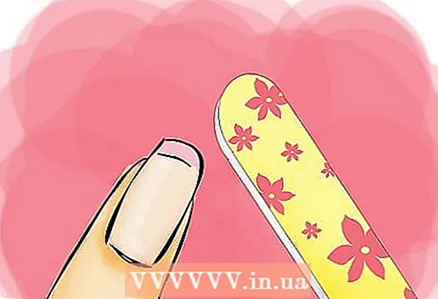 3 File the person's nails. File your nails as your friend would like. Rounded? Square? Something in between? Make sure they are the same length as well. Ask your friend what he likes and build on it.
 - Be sure to cut in one direction to keep your nails as strong as possible. Do not hurry; rushing too much and you will end up with a shorter nail than you expected; and then you will need to shorten all other nails.
- 240 grit corundum files are a good place to start if you're unsure.
Part 3 of 4: Applying the color
 1 Apply a base coat. It is important to start with a transparent base coat applied in a thin layer, smoothly and carefully. Some bases act as a glue that helps preserve the color of the nails and prolong their preservation, preventing them from cracking. Other nail bases are thickeners that brittle nails are in dire need of. Talk to your friend; which is more suitable for him?
 - One layer will be enough. Basecoats also don't take long to dry, so you don't need to take a break. By the time you apply it to the tenth nail, the first nail should be ready to apply color.
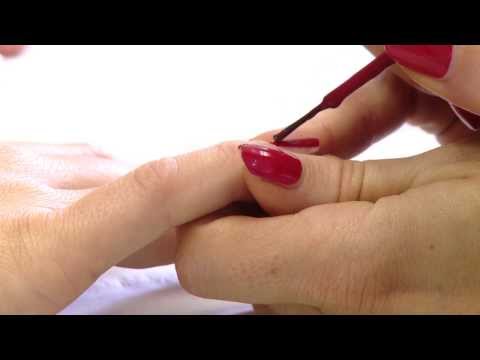
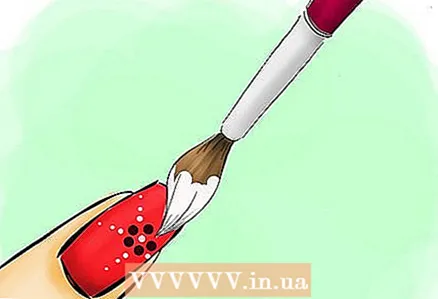
 2 Choose the color of your nail polish. Ask your friend what color she would like, and start applying the polish on each nail evenly in two layers. Make the layers thin; thin layers look better than thick one. Start with the same finger as you did the base coat and repeat your route. Take your time, apply the varnish evenly and thoroughly. One stroke in the center, and one on the left and right sides for each finger.
 - If you accidentally apply colored nail polish to your skin, take a small cotton swab dampened with nail polish remover and wipe the nail polish very thoroughly without touching your nail.
- Alternatively, take your own nail and lightly scrape off the not-yet-dried nail polish as soon as it hits the wrong spot.
- 3 * Did your friend ask for a French manicure? You can read about it here.
 4 Apply the pattern to your nails if desired. The vast world of nail polish is getting wider and wider. If you have gems, ribbons, and other nail art tools, why not try it on your girlfriend? You can also take a toothpick and make fancy designs. At the end of the day, the only way to improve your skill is to practice.
 - If your friend is not sure what she wants on the nails, suggest that she just do it on one finger. She will be able to "try on" such a manicure, besides, drawing on one finger is very fashionable now, if she wants to keep it this way.
- Need ideas? Try reading the WikiHow article on "How to Design Nails".
 5 Apply top coat. To set color and prevent chipping, apply a top coat. It will also make your nails look very shiny and attractive. However, keep this layer thin; a thick layer, although shiny, may not make your nails look better.
 - Your girlfriend will need to reapply topcoat every day or so if she wants the color to last longer.
Part 4 of 4: Securing your manicure
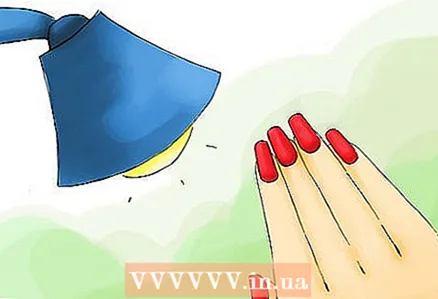 1 Place your nails under the light source. If you understand all the intricacies of this case, put your friend's nails under a flashlight, such as a manicure lamp. Put on some music and come back to check your nails in about ten minutes. It is always better to spend a little more time holding your nails under the light than to smudge them on the way out.
  2 Alternatively, use a fan or hair dryer. There is nothing worse than going through all the trouble to get beautiful nails and then ruining them in a minute. So if you can, place a fan in front of your nails and keep them there for about 20 minutes.
 - With a hairdryer, things go a little faster if you're short on time. Switch the air temperature to medium and move the hair dryer back and forth, making sure the hot bursts of air reach each nail. After about five minutes, check your nails, and continue if necessary.
 3 Or just sit still. Are you killing time in a sleepover? As long as a person can sit in one place for 20 to 30 minutes, everything will be fine. Don't let her do anything; play a movie, serve her a drink, and keep her away from the popcorn if necessary. You put too much work into these nails to keep them from ruining them!
 - Once dry, you can moisturize the skin a little, especially if you haven't done so after the cuticle cutting phase. Use a good lotion and dab lightly on your fingers and rub into the cuticles, keeping them hydrated and healthy.
Tips
- Once you've drawn your nails on one hand, move on to the other. After you have done both hands, wait 2 minutes, then varnish them again. Wait two more minutes before applying clear coat.
- Choose a color that suits the person.
- Try a cute design on your nails.
Warnings
- Be especially careful when using nail scissors.
- If acetone comes in contact with your eyes, immediately flush your eyes with cold water for 20 minutes. If it comes in contact with your mouth and you accidentally drink it, don't force yourself to vomit! Call poison control and do as they tell you.
What do you need
- Nail polish, top coat, and base coat
- File
- Cuticle trimmer or cuticle remover gel
- Cuticle spatula
- Bowl or tray of warm, soapy water
- Stones (optional)
- Acetone (nail polish remover)
- Cotton swabs
- Lotion


