Author:
Carl Weaver
Date Of Creation:
1 February 2021
Update Date:
1 July 2024

Content
- Steps
- Method 1 of 3: Layout and Basis
- Method 2 of 3: Basement / Basement Wall Frame
- Method 3 of 3: Framing the Wall of the House
- Warnings
- What do you need
There are several ways to build walls and partitions. One such method is to install a timber frame that will serve as a “skeleton” for the future wall. The erection of the frame is an important step, as it provides the strength and stability of the wall. Below are instructions on how to erect a skeleton, whether for a new room or for adding a wall to an existing space.
Steps
Method 1 of 3: Layout and Basis
 1 Make the markup. Using a chalk line marker (a cheap tool for marking lengths and straight lines) and a measuring tool for corners, mark the location of the wall on the floor. If there is a door in the wall, also remember to mark it when marking.
 - Make sure the future wall will stand exactly at a 90-degree angle to all four corners. A slight deviation during the markup phase will lead to instability of the wall in the future.
- Pay attention to the guide beams (ceiling or floor), whether they run parallel or perpendicular to your new wall.
 2 Slice the base pieces. Choose good pressed wood 5 cm wide and 10 cm high, cut the boards, then divide the boards into groups of equal length. These base pieces will be fixed to the ceiling and floor and will serve as the base to which the frame is attached.
  3 Mark on the base elements the places where the posts will be attached. Place the top and bottom on the floor next to each other. Measuring every 40 cm from one end, carefully make horizontal marks on both boards until you reach the end. These markings will help you in the correct positioning of the racks.
 - You can also mark the lines with an X to make them easier to see.
Method 2 of 3: Basement / Basement Wall Frame
 1 Secure the bottom guide. Now that you have made measurements and marks, place the bottom piece along the chalk line indicating the location of the future wall. In order for the wall to be stable, you need to attach this plank to the concrete floor.
 - Start with a puncher. Using a 0.48 cm thin-walled diamond bit, drill a hole through the wood plank into the concrete, first from one edge and then the other. After that, drill more holes every 40 cm, according to your marks. The holes should be in the middle of the marked lines on the board.
- Take a screwdriver. Use a screwdriver to screw 7.6cm screws into each hole.
 2 Attach the top guide. If the ceilings are perpendicular to the bottom panel, then this is a fairly simple task; if they run in parallel, then you will need to do a little extra work first.
 - For parallel beams, attach short 5x10 cm pieces of planks perpendicular between the two nearest guide rails every 40 cm and attach the top piece to them.
- For perpendicular beams, attach the top rail to the beam on the ceiling. Make sure the top is right over the bottom. Then, with nails, nail the top to the joist or short planks you installed at each interval.
- You can check how accurately you set the top guide with a pendulum (a weight suspended from a strong thin thread). Bring the pendulum to the top and see where the weight falls.
 3 Install the stands. Racks are additional boards cut from the same material as the base elements that are attached to the floor and ceiling. The uprights provide support for drywall and other finishing surfaces.
 - Measure and cut. Each post must be adjusted so that it fits snugly between the top and bottom.
- Insert the stand. Insert it between the two rails, just above one of the screws on the bottom base. Using the pendulum and angle, make sure the board is straight.
- Attach and repeat.Attach the uprights at both ends with 7.6 cm screws, screwing them in at a 45 degree angle. Repeat this process for the rest of the uprights throughout the frame.
 4 Install short spacers. The spacers add structure and also act as a fire suppression device in case of fire. These spacers are cut from the same board used for the entire structure.
 - Cut the spacers so that they fit snugly against the uprights. They must be fastened at a height of 90 cm from each other, continuing the countdown from the spacer that was installed last.
Method 3 of 3: Framing the Wall of the House
 1 Measure the space in which the new wall will be erected. Using a tape measure, measure the height and width of the wall for which you will assemble the frame. The width will be used as the distance between the upper and lower frame guides, and the height will be used as the measurement of the individual posts.
 - In general, when you are building a non-basement wall, you will assemble the entire structure on the floor, and then lift and move it to where you will attach it to the beams. In order to perform this task correctly, you must know exactly the length of each board so that the wall is at the correct height.
- Buy enough planks. When calculating, keep in mind that you will need one post every 40 cm along the entire frame. To calculate the required number of racks, divide the width by 40, and you can calculate the required number of boards that will be used to cut the racks.
 2 Based on your measurements, cut the required number of racks and rails. Using a table saw or circular saw, cut your rails and posts according to the measurements you took in the previous step. Start by trimming the bottom and top guides to match the width measurements. Place them together to make sure both pieces are flush and clean the ends if necessary. Then cut the uprights to the appropriate height.
 - In order to find out the height of the racks, it is necessary to subtract the width of the upper and lower rails from the total height of the room.
 3 Mark the locations on the top and bottom rails to which the posts will be attached. Using a tape measure and pencil, draw lines on the guides. On these lines, you will attach the racks. Thus, each post should have three marks on the top and bottom: the center point and two edges of each post. In order for the load-bearing partition to withstand the load, each post must be installed every 40 cm, and this distance must be calibrated accurately enough.
 - Make the first “x” mark 40 cm from the edge of the frame, then subtract 9.5 cm from this mark and draw a line (at 38.5 cm mark). Use a shorter piece of square frame plank - this will be the exact width of the planks 5 x 10 cm to mark the line where the edge of the next upright will be. In other words, the "x" you marked 40 cm will represent the center point of the upright, and the two lines will represent the sides of the upright. This is necessary to account for the width of each subsequent post, so that the center is equidistant from the next.
- Mark "x" marks every 40 cm, marking the center of the uprights. Use a small board to mark the edges of the posts. This procedure must be done on both the upper and lower tracks.
 4 Assemble the frame. Use your uprights to lay out the frame the size and shape you want. The boards will be installed on the floor.
 - Start at the very edge. Place the stand butt against the top edge of the bottom rail and use a 7.6 cm screw to screw it to the back of the stand. Make sure the boards are straight.
- Continue screwing all the uprights in order to the bottom rail, according to your marks.
- Attach the top guide.Now that all the uprights are nailed to the bottom rail, attach the top piece along the free ends of the uprights, and screw it in as well.
 5 Install spacers. The spacers are short pieces of the same board 5 x 10 cm, which are installed perpendicularly between the posts at a distance of about 90 cm from the bottom of the wall. Measure the spacing between the uprights, and cut additional boards accordingly. Install the spacers with 7.6 cm screws, screwing them in at a 60 degree angle at both ends to ensure they are firmly positioned between the uprights.
 - Stagger the spacers in height. Line up the top edge of the second spacer with the bottom edge of the first, then reverse with the next spacer while maintaining order. This should provide enough space to nail them to each rack.
 6 Lift up the wall. Ask a friend to help you and lift the frame up so that the bottom rail remains on the floor. Slide the frame carefully into place, double-checking all corners and positions.
  7 Check each section for clearances and plumb lines. Now that your wall is in place, make sure it is upright and secure against the joists. Use thin pieces of wood to fill in any gaps between the ceiling and the top of the frame if you've made small mistakes anywhere. You can buy these at most home improvement stores and use them to fill small spaces.
 - A plumb line check is needed to make sure that the wall is strictly vertical. Use a level and a hammer to make small adjustments. If necessary, tap the wall with a hammer and slide it forward or backward.
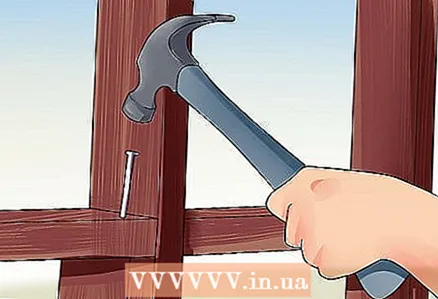
 8 Attach the wall to the beams. Start attaching the top rail. Use 9cm lightweight construction nails and nail them straight through the frame at short intervals after you have checked the wall plumb and all gaps.
 - Secure the lower frame rail. Use the same nails, driving them across the board to the floor.
- Secure the side posts. Also, using nails, nail both side posts to the walls of the house.
- Trim the thin pieces of wood that you used to fill the gaps. Run your knife along the top guide frame and break off the protruding ends.
Warnings
- Always wear safety glasses and hearing protection when working with power tools.
- Do not build partitions alone. Work with a friend for safety and to reduce stress.
- Check which beams the cables run through. Do not pinch them between the boards.
What do you need
- Many boards 5x10 cm
- Chainsaw
- Hammer or pneumatic hammer
- Screws / nails (7.6 cm and 9 cm)
- Concrete screws when erecting a wall in a basement / plinth
- Pendulum
- Level
- Marking chalk line
- Roulette
- Perforator
- Screwdriver
- Pencil


