Author:
Florence Bailey
Date Of Creation:
25 March 2021
Update Date:
1 July 2024
Content
- Steps
- Method 1 of 3: Finding Materials That Suit Your Needs
- Method 2 of 3: Create Pages
- Method 3 of 3: Taking it to the next level
Making a scrapbook for storing memories is a great way to preserve memories and take advantage of your creativity. Not only will you enjoy making your own designs, but your family and friends will also appreciate your recording of good times and important events. This article focuses on creating a traditional paper album, but if you are more technically savvy, you can try creating a digital album. Let's discuss the materials needed for the work and start creating the album.
Steps
Method 1 of 3: Finding Materials That Suit Your Needs
 1 Decide on the style of the album. Albums come in many different forms, so think about what works best for you in terms of storage space and content.
 - Album on rings... You can use a regular three-ring photo album as a scrapbook for memories. In such an album it fits perfectly on the bookshelf, so it is convenient to store it. In the album with rings, you can insert additional sheets when needed and anywhere in the album. You can also protect your scrapbook pages with standard photo-safe acid-free paper by inserting it between the pages to prevent wear and tear. The only drawback of the album is that there will be a gap between the two-page spread of the album where the rings are located, so the overall look will not be seamless.
- Album on screws... A screw-on album is held in place by small metal screws that you have to unscrew and tighten to add new sheets to the album. As with a ring album, you can insert pages anywhere in the album, only it takes a little more effort to loosen and tighten the screws. Thus, this style of the album provides an almost seamless two-page spread of the album, when opened, the pages are tightly adjacent to each other. You can easily insert your finished pages between the cover sheets of the album.
- Fixed Cover Album... You can buy a bound album with a certain number of pages in it, i.e. you will not be able to add or remove pages in the album. This means that you have to carefully plan and translate your idea into the pages, as you cannot simply remove the page if you make a mistake. These albums usually do not have protective sheets, which can be both good and bad. This is an advantage if you want to use more massive decorative elements or glue envelopes for photos inside. The downside is that if you don't have security pages, you lose some protection, so you'll have to handle the album more carefully.
 2 Decide on the size. There are two standard album sizes: A4 and square 30x30 cm. There are also non-standard sizes. The style of the album you want may dictate the size requirements.
 - A4 size album "... A4 albums are the most economical choice. Additional pages for such albums are cheaper, as they are smaller than 30x30 cm pages. You can save money by purchasing cover sheets for the album at an office supply store, as their size is standard. Plus, you can use an inexpensive ring scrapbook for regular A4 paper pages, or try buying a ring notebook of this size in your office supplies to use as a scrapbook.
- Album size 30x30 cm "... Albums of this size are gaining popularity, as a result, decorative sheets for such albums are even more common than for A4.Another advantage of 30x30 cm albums is that more photos fit on the page.
- Custom sizes... You can find an album of any size, from pocket-sized to impressively large. Usually these albums are bound with a fixed number of pages. They are a good choice if you are going to dedicate the album to a single event, like having a baby, family reunion.
 3 Choose paper. This is one of the most interesting and potentially most difficult steps in preparing an album. The choice lies among the many hundreds of types of paper. There are papers with a holiday theme, a sports theme, a hobby theme, floral designs, geometric designs, the list is endless. Make your choice based on what you like best or what you think will fit the theme of certain pages in your album.
 - You can buy paper either by packaging or by page.
- You do not need to purchase paper from a craft store. If you see something suitable elsewhere, take it. Just be sure the paper is labeled “archival quality” or “acid-free,” as acids in many types of paper can damage photographs and other memorabilia over time.
- Buy a little more than you need, especially paper of the design you like very much in case you ruin a page.
- You may wish to use a paired approach and take at least two sheets of the same design. Some people prefer to use pairs of identical pages for spreads in an album, or use paper with the same design in two matching colors. For example, the same snow pattern on a red and green background.
 4 Stock up on basic materials. Technically speaking, the album can take any shape you can think of. Is yours going to be made of newspapers and pasta? Regardless of how you see your sketchbook, there are a few basic things you will need: scissors, glue, and cardboard.
 - Scissors... Get ready to spend 200-500 rubles. a pair of good quality sharp, straight scissors. You will be using scissors heavily, so it makes sense to spend a little more money on this important tool.
- You can purchase a paper cutter if you wish. Depending on the size, it can cost from 300 to 2500 rubles.
- There are tons of curly scissors for decorating the edges of sheets of paper or photographs as you cut them. They are fun to use, but they are more of a thing that is good to have than one that is absolutely necessary.
- Glue... There are various options for gluing photos and decorative elements to pages, but you probably won't need anything more than a good glue stick. It's easy to use and comes with an acid-free, photo-safe formula.
- If you want to be able to take photos out of an album, buy photo corners. Insert the photo into the corners and glue them to the page. You can then remove the photo by gently pulling it out and out of the corners that will remain on the page.
- Cardboard... Take a pack of A4 colored cardboard. You can use it as a mat for photographs, make tags and inserts out of it, where you can write captions to the pages of the album.
- If you have taken an A4 album, then cardboard can be used as durable pages for the album.
- Scissors... Get ready to spend 200-500 rubles. a pair of good quality sharp, straight scissors. You will be using scissors heavily, so it makes sense to spend a little more money on this important tool.
 5 Stock up on decorative items. You might want to use some other basic materials to get started on the album. Making these albums can be a rather expensive hobby: there are countless materials for this activity, and you can have a lot of fun adding to your collection. However, the truth is that you only need a few basic elements to create a really beautiful album.
 - Stencils... Purchase a plastic stencil with many standard shapes (circles, ovals, squares, rectangles, rhombuses, etc.) Use it to "cut" your photographs and pieces of cardboard to a certain shape, for signatures and writing on the pages.
- Markers... You will need at least one good black marker to write on the album and label page titles. You can choose from several different marker colors (refrain from hard-to-read shades such as yellow or pale pink) with different tip thicknesses.
- Decorations... You can spend a lot on jewelry. Keychains, decorative tags, curly elements, jewelry, rivets - there is all this and much more. You definitely do not need to purchase ready-made jewelry in the store to make a beautiful and creative album. Check out the assortment on offer at your craft store, but don't assume your pages will look incomplete without it.
- Look for objects at home to decorate the page. Clip art from postcards, jewelry from old clothes, ribbon cuts, and anything else on hand can be incorporated into the page design.
Method 2 of 3: Create Pages
 1 Decide on a topic or message. Perhaps you have a large stack of photographs and other materials that you want to organize by putting them in a scrapbook to store your memories. It's time to get it out and decide what to do with it.
 - Let your materials give you direction. Browse photos, postcards, ribbons, prizes, newspaper clippings, and other materials, and group them based on relatedness to a specific occasion or event (graduation, summer vacation, New Years, etc.). Find background paper that best suits each implied idea.
- Decide in advance on the color scheme and theme. Perhaps your sister had a black and white wedding or had a baby girl recently. Grab the background sheets from your collection in the color and style that best suit your theme, and gather together all the photographs and other memorabilia that will be used on those pages.
 2 Play around with the layout. Before you start putting things on paper, you need to figure out how to place them on the page. Some people plan everything down to the smallest detail before sticking things on the page, others develop a general idea that includes the main points, and the details are completed along the way.
 - Take a plain sheet of paper the same size as your page. Use a pencil to sketch the location of the elements. Mark up spaces for photos, headlines, text, and other images.
- You can just roughly sketch out the location of the photos and already dance from it, or you can go in a more detailed way and plan everything, including the location of decorations and decorative elements. Experiment a bit and work the way you feel more comfortable and creative.
 3 Think in reversals. The spread consists of two adjacent album pages. Instead of thinking through the pages individually, consider how they will look next to each other in an open album. Consider pairing your page sketches to plan your spreads as a whole.
 - When accounting for spreads, it is easier to avoid placing incongruous pages side by side or pages that will compete for attention.
- While you don't have to use the same background for the spread, at least try to match colors or designs.
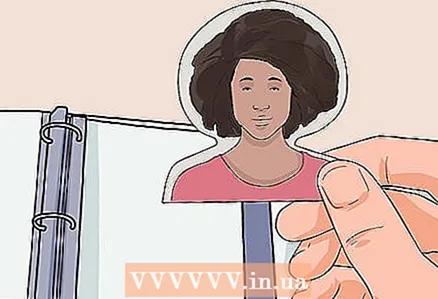
 4 Cut out photos. When you decide where you want your photos to appear on the page, you may need to crop them to the correct size to fit.Use scissors, a paper cutter, or a plastic stencil to resize and shape your photos.
 - If you're worried about ruining a particular photo, make a copy of it and use it for your album. Or take a photo of this photo and use a duplicate.
 5 Follow your outline. When you cut out the photos, arrange everything according to your sketch. Something that initially looked good on paper may not be very appealing when you see it ready-made on the page, so feel free to move things around on the page if you feel like you need to. Make sure you are 100% satisfied before sticking on anything.
  6 Add some text. You may wish to add a headline, caption, or a small piece of text that catchyly summarizes your memories. You could have planned this even during the sketching phase, or you could have waited until you see all the photos in their places to decide where to insert the text.
 - Don't write too much. Your photographs and other images / content will probably tell the story of the page themselves, so limit your text to 1-2 sentences of something interesting that you want to remember about the event / experience.
- Consider putting the date somewhere on the page. It may seem incredible to you that you may one day forget when an event happened, but life goes on, events accumulate, and you may no longer remember some dates. In addition, albums can be passed on to future generations, and those who will admire them for many years to come will appreciate the presence of dates on the pages.
 7 Add embellishments. Decorations add interest, support the theme, direct the eye and create unity among images of a common theme. Plus, if you decide to decorate the spreads of the album, you must do so in a way that you think is visually beautiful and makes a difference. There are a few ideas for adding embellishments to add extra effect.
 - Group them up. Collections are best displayed in groups, the same applies to jewelry. Consider grouping embellishments on a page to create a special accent.
- Depending on the number of decorations you use, you can create a couple of their groups on the page. When grouping jewelry, keep in mind that it is pleasant for the eye to see groups of three objects, or at least an odd number of them.
- Place decorations in the corners. Place embellishments in the corners of photos or text captions to further link them to the page. They will give images or text more "weight" and anchor them to the page.
- You can also place embellishments in the corners of the pages. If you have multiple pages of the same topic, you can use the same decorative elements in the corners of each of these pages to combine them together.
- Fasten them on top of each other or in layers. Stick 2-3 decorative elements on top of each other. Remember that this will make the album thicker, so choose your elements carefully. If you use an album with ties with fixed pages, you will not have interfering screen protectors on the pages, which will allow you to take on a little more chunky jewelry.
- Group them up. Collections are best displayed in groups, the same applies to jewelry. Consider grouping embellishments on a page to create a special accent.
Method 3 of 3: Taking it to the next level
 1 Attend a master class. In handicraft stores or art centers, there are occasional master classes on decorating albums by professionals. You can also purchase books and DVDs with some ideas. If you have extra time and money, you can also attend special seminars, trainings and workshops.
  2 Use the internet. One of the best ways to grow up as an album maker is to learn and share ideas with other album makers.Visit blogs, pages on social networks dedicated to this type of handicraft, boards on Pinterest, join professional communities.
 - If you decide to attend a workshop or just chat in the paper section of a craft store, you are likely to run into other hobbyists. If you like clubs, you can join an existing one or even start your own album designer club.
 3 Attend meetings of fans of the art of creating albums (scrapbooking).
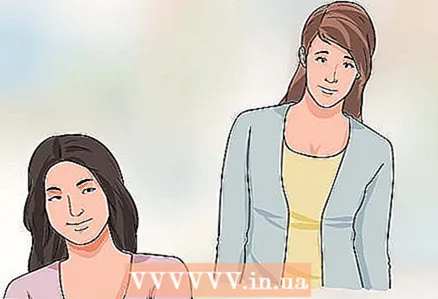 4 Become a pro. If you enjoy scrapbooking and want to share your skills with others, consider taking it up a notch and offering people your services as a professional.
 - Become a teacher. Teaching someone how to make an album means that you are not only good at what you do, but that you are also good at explaining and demonstrating techniques, approaches, and designs for performing albums. You will also need patience to work with newcomers, as well as the ability to deal with them in a positive and reassuring manner. To top it off, you must be aware of all the latest trends and materials used to share information with students.
- Check with your local craft stores to see if they need a scrapbooking instructor. Alternatively, consider doing some self-help by offering one-off or weekend workshops. Advertise yourself online and at handicraft stores.
- Become a teacher. Teaching someone how to make an album means that you are not only good at what you do, but that you are also good at explaining and demonstrating techniques, approaches, and designs for performing albums. You will also need patience to work with newcomers, as well as the ability to deal with them in a positive and reassuring manner. To top it off, you must be aware of all the latest trends and materials used to share information with students.
 5 Make albums for other people. Not everyone has the patience, creativity and skills to make an album, and people may be willing to pay money to have someone do it for them to preserve their memories. Advertise your services online or pay for a place at a fair to showcase your work. Bring your very best albums with you, as well as lots of business cards.
 - You can create a website for your business. Post photos of your best album spreads on it, or create digital pages so potential clients can see examples of your work.
- Work as a lyricist for flashback albums. If you're good with words, consider becoming a freelance writer. Scrapbooking sites may require authors to create content, so you can write and sell your own eBooks. There are special magazines dedicated to scrapbooking, so you might be able to sell your articles to them.
- For article ideas, head over to the scrapbooking forums and see what questions people are asking and what are the hot topics. Attend scrapbooking meetings, talk to representatives of scrapbook manufacturers to see if they need someone to write articles related to their products.
- Plan your own activities for scrapbooking lovers. If you are blessed with strong organizational skills and know what scrapbooking enthusiasts want to know and see, you may be able to organize an exhibition or hands-on lessons. You can offer your services as an independent contractor or try to find permanent work in an organization that is going to conduct such events on a regular basis.


