Author:
Sara Rhodes
Date Of Creation:
12 February 2021
Update Date:
1 July 2024

Content
- Ingredients
- Steps
- Method 1 of 3: Part One: Making the Tea
- Method 2 of 3: Part Two: The Fermentation Process
- Method 3 of 3: Part Three: The Final Step
- What do you need
- Tips
- Warnings
Kombucha is a sweet fermented beverage. Usually kombucha tastes sweet and sour. The strength of the tea flavor can be adjusted by the amount of tea bags added to the water. Kombucha can be purchased at most health food stores, as well as organic food stores in some grocery stores. The following tips will help you grow kombucha at home.
Ingredients
- The shoot of a kombucha ("mother" fungus) is also called a symbiotic culture of bacteria and yeast (hereinafter referred to as "culture" in this article). You can purchase kombucha online. Or, one of your friends can share with you, if he has several of them. If you have a "mom" mushroom, then you will never need to buy or look for a new mushroom. If you follow these tips on how to preserve your old mushroom, you can enjoy its delicious taste for a long time.
- Use the kombucha you already have for the starter, or boiled vinegar if you don't have one.
- Tea. Tea bags or regular loose leaf tea will do. Sometimes inexpensive, low quality teas taste better than expensive teas. Teas containing oils, such as bergamot, can ruin your mushroom and take a long time to get the desired result. You can use different types of tea, for example:
- Green
- Black
- Echinacea
- Melissa
- Sugar. Refined white sugar or organic cane sugar works well for this purpose. You can experiment with other fermentation agents such as juice. Many brewers prefer organic matter. If you can, try using such substances. Raibina (a drink that contains black currant), for example, stains mushrooms and tea.
Steps
Method 1 of 3: Part One: Making the Tea
 1 Wash your hands well with hot water, without using antibacterial soap, because it can spoil the fungus and destroy the good bacteria culture. As an alternative to soap, you can use apple cider vinegar or regular vinegar. Gloves are recommended, especially if you touch the bacteria culture.
  2 Pour 3 liters of water into the kettle and put it on fire.
 3 Boil the water for about 5 minutes to clear it.
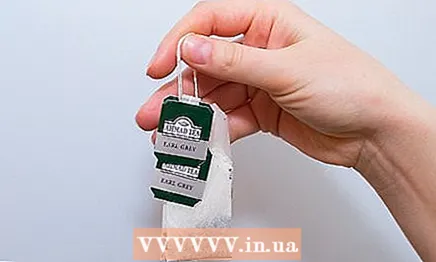 4 Add about 5 tea bags to hot water. Further, following your taste, you can immediately take out the bags after brewing, or leave them for a while while you do the next two steps.
  5 Turn off heat and add 1 glass of sugar. Sugar is an essential part of the fermentation process. The sugar will start to caramelize if the water continues to boil, so be sure to turn off the heat.
 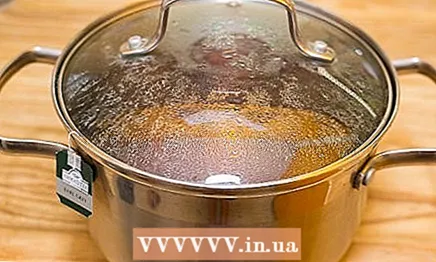 6 Cover and set aside the tea until it has cooled to room temperature (about 75 degrees Fahrenheit and 24 degrees Celsius). It can take a long time to cool down the tea, but be careful - if you add the mushroom to very hot water, it will die.
Method 2 of 3: Part Two: The Fermentation Process
 1 Rinse the pitcher well with hot water. If you don't have enough hot water, you can add 2 drops of iodine to the jug. Then add water and rinse the jug well. Cover it with a lid and set it aside. Alternatively, you can place the pitcher in an oven preheated to 285 degrees Fahrenheit (140 degrees Celsius) for 10 minutes. However, you can only do this if the jug is made of glass or ceramic.
  2 When the tea has cooled down enough, pour it into a glass jug and add the leaven there, which should make up about 10% of the total liquid. You can stick to the following ratio: 1/4 cup vinegar per gallon of tea. This will keep the pH level low.This will prevent mold and yeast growth while the tea is brewing early.
 - Make sure the tea is acidic enough by checking the pH level. It should be below 4.6 pH. If the level does not match the indicated figure, then continue adding starter culture, vinegar or citric acid (do not add vitamin C, because it is not effective enough) until you reach the desired pH level.
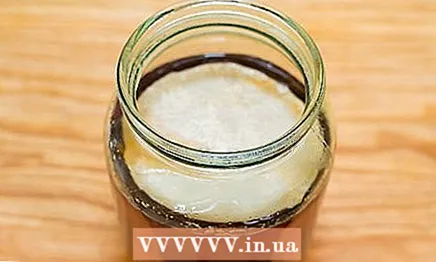 3 Gently place the symbiotic culture of bacteria and yeast in the tea, cover the top of the jug with a cloth and tie it tightly with an elastic band.
 4 Place the pitcher in a warm, dark place. The approximate temperature should be 70 degrees Fahrenheit (21 degrees Celsius). If you can control the temperature, 86º Fahrenheit (30º Celsius) is best. If the temperature is lower it will slow down the growth process, but if it is higher than 70 degrees Fahrenheit, it can lead to the growth of unwanted microorganisms.
  5 Wait about a week. When the tea starts to smell like vinegar, you can taste it and check the pH level.
 - The mushroom can be on the bottom, on the surface, or float in the middle. It is best to have the mushroom on top to prevent contamination.
- If you want to taste the drink, use a straw. Don't drink straight from a straw - it can ruin your tea. In addition, you do not need to dip the test strip deeply into the jug. Dip half of the straw into the tea, cover the other end with your finger, remove the straw and taste the liquid, and place it on the test strip.
- If the kombucha tastes very sweet, then more time is needed.
- A pH of 3 indicates that the fermentation cycle is over and the tea is ready to drink. Of course, the taste of tea may differ slightly from your preference and taste. If the final pH is too high, the tea needs a few more days to complete the fermentation cycle, or the brewing process was not done correctly.
Method 3 of 3: Part Three: The Final Step
 1 Gently remove the mother and child cultures with clean hands (or wear gloves if you are using them) and place them in a clean container. Note that they can stick to each other. Pour some kombucha liquid over them and seal the container tightly to protect the cultures.
  2 Using a watering can, pour most of your finished tea into a container. If you do not fill the container to the brim, the fermentation process will take forever. If you are low on liquid, use a smaller container. Alternatively, if the container is not completely full, add a little juice or tea. Add a small amount of liquid, otherwise you can dilute the tea too much. Leave about 10% of the old tea in a glass jar as a starter for growing new kombucha. Start the cycle over: pour in freshly brewed tea, add culture, cover, etc.
 - You can use each layer of kombucha to make a new tea; some recommend using a new layer and removing the old one. It is not necessary to lay two layers to make new tea, just one layer is enough.
- During each fermentation cycle, a new "baby" appears from the "mom". Therefore, after the first batch of fermentation, you already have two "mothers" - one from the original "mother" and the other from the new "baby". This multiplication will occur with each subsequent fermentation.
 3 Pour the finished kombucha into a jug or jars. Close the container tightly for the carbonation (carbonation) process, leave for 2-5 days at room temperature.
  4 Place the finished drink in the refrigerator. Kombucha is best consumed chilled.
What do you need
- Fermentation tank. It is recommended to use glass containers. Using cookware made from other materials (ceramics, metal and / or plastic) may leach out chemical elements (including lead if using ceramics) due to the acidic environment that occurs during fermentation during kombucha fermentation. Some people use stainless steel or food grade plastic, but glassware is better. Containers from 1L to 5L are suitable for this process.Drinking kombucha drink should be started in small amounts because it may take a while for the digestive tract to get used to drinking this drink. The volume of the container should depend on how much of the drink you want to receive. Ideal fermentation vessels are 5 gallon bottles for brewing or wine.
- Lint-free and dense fabrics (for example, a clean T-shirt). A cloth should be used to cover the container during fermentation. This will protect the drink from insects, especially fruit flies, dust and other debris that can contaminate your crop. The fabric allows microorganisms to breathe. It should be larger than the neck of the container.
- Elastic band or rope. Cover the container with a cloth and shade with an elastic band or tie the neck with a string.
- Apple cider vinegar for cleansing.
- Large container for heating water, brewing tea and adding sugar. Stainless steel cookware works well for this. It must be large enough to hold the entire volume of the liquid.
- Glass containers with lids for ready-made kombucha. You will need enough glass bottles or jars to hold the entire volume of the starter culture. The size of the bottles should correspond to the volume of the drink you are going to receive.
- Watering can. It will come in handy in order to pour the ready-made kombucha into a bottle.
- pH test strip
- Straw / small buster / pipette (pH measurement)
Tips
- Some prefer continuous fermentation method, which consists in pouring out the right amount of the finished drink that you want to drink, and then immediately add the same amount of sweet tea at room temperature to the same container. This method is the easiest to prepare this drink (especially if it is prepared in a container that has a tap at the bottom). But the disadvantage of this method is that the fermentation process will always be incomplete, the drink will always contain some amount of unprocessed sugar along with fermented tea. If you use this method, you should periodically empty and wash the container to prevent contamination.
- Note that some natural foods that have antibacterial properties (such as honey) will not kill the symbiotic culture of bacteria and yeast, but can significantly increase the fermentation time.
- If you want to speed up the process, here's the "quick chilling method": Prepare sweet tea from 1 to 2 liters of water, but with the same amount of sugar and tea as mentioned above. To cool the tea, add chilled filtered or boiled water. Then add the symbiotic culture of bacteria and yeast, cover the container and store as described above.
- Kombuchas differ from each other in appearance. They can be of different colors, including purple.
Warnings
- Wash your hands and work surface thoroughly before starting the process to keep everything sterile and clean. If the kombucha gets dirty during the cooking process while it is still young, then you can grow something you never expected. Often, this can simply ruin the taste of the drink, but it can also be hazardous to health.
- Do not close the containers with a lid, even after the fermentation process seems complete. If you want to do the anaerobic phase, then cover the jar with a lid, this will help the carbon dioxide to replace the oxygen molecules.
- Be careful if you use non-cooking plastic, metal, ceramic, or glass containers to grow your kombucha, they can (and in most cases do) release toxins such as lead. A heavy, glass jug or large heat-resistant glass container is the best choice.


