Author:
Virginia Floyd
Date Of Creation:
11 August 2021
Update Date:
1 July 2024

Content
- Steps
- Part 1 of 3: Building the frame
- Part 2 of 3: Bonding panels
- Part 3 of 3: Finishing the job
- Tips
- Warnings
- Additional articles
Walking around the lake with your own boat can be a lot of fun. A small boat can be transported on the roof of your car or in the back of a pickup truck if you are suddenly going out to the lake. This article describes how to build a canoe, (3.5mX0.7m, with a depth of 0.3m), using stitch and glue technology. Skip to step 1 for more information.
Steps
Part 1 of 3: Building the frame
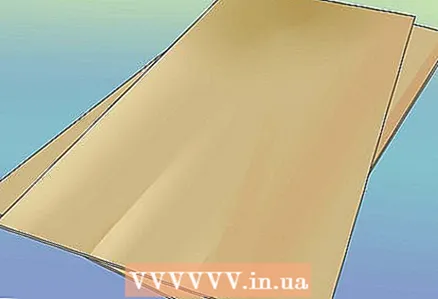 1 Saw the plywood and fold in two layers. Take two sheets of plywood 1.2mX2.50mX3mm, cut in half to make sheets 0.6m wide. Fold the resulting sheets together, fasten with small nails at the top and bottom.
 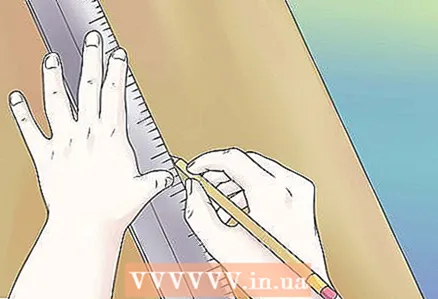 2 Mark out the plywood. On the stapled panels along the long side, mark vertical lines every 30cm. Draw marks on these vertical lines that will form the profile.
 - Use a long plank or plank to outline the outline of the canoe on the panels. Try to draw straight, flowing lines.
- Only 3 panels are needed per side. From four half-sheets of 2.5m plywood, 12 panels need to be made, then these panels are fastened in pairs, through a beam or in a quarter to make only 6 panels. Three on each side.
- A tenon joint made with a tenon and dovetail pattern is also a good way to join panels. When making a connection through a spike, you need to leave 3cm of stock.This type of connection will give your boat a beautiful, finished look.
- This rather simple technology makes it possible to make a boat with a characteristic "v" -shaped canoe, rather than a flat bottom.
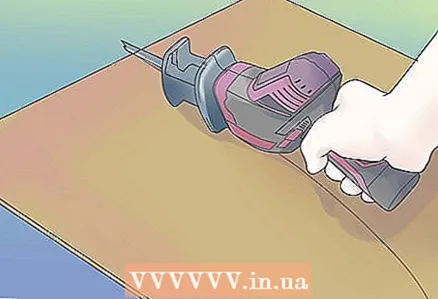 3 Make panels. When the panels are marked and all dimensions are verified, you need to saw them using a jigsaw.
 - After the panels have been sawn using a wood rasp, round off the sharp corners to get as close to the outline as possible. You can also use a plane.
- You can now secure the panels together with a tenon, quarter or timber connection as discussed earlier. You can find more detailed instructions on how to make each of these connections on the Internet.
 4 Drill holes in the panels. When the panels are ready, it's time to drill holes along the bottom and top edges, backing 1cm from them.
 - This operation is easier to perform by drilling 2 corresponding panels at once, folding them together.
- This technology assumes that the boat will be made of three pairs of matching panels.
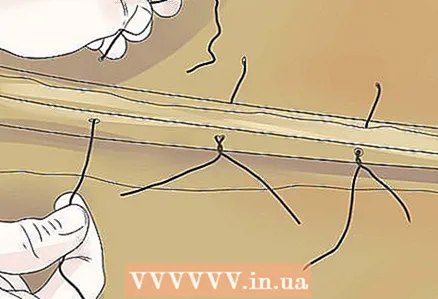
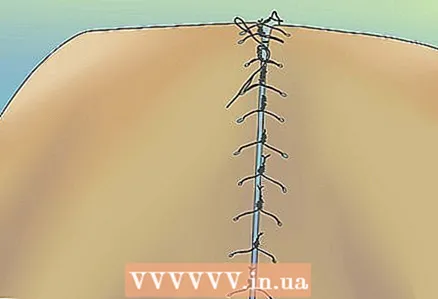 5 Clip the panels together. Use a soft, easily bendable wire such as copper. Cut into pieces of 10cm long wire. You will need a lot of them, so cut a lot, but if you don't have enough, you can always make more.
 - Place the two bottom panels together on an end and tie them moderately tight together through the center and bottom holes. The wire should be loose enough so that you can open the two panels like a book. These panels will form the bottom of your boat.
- Start tying the next panels starting from the center, doing several ties on each side alternately. Continue until you reach the ends.
- When you get to the top panel, line up the edges and tie them together. Try to keep them as level as possible so that they form a nice bead curve. At this point, you should see how the canoe is made.
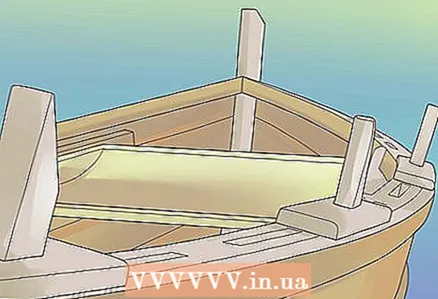
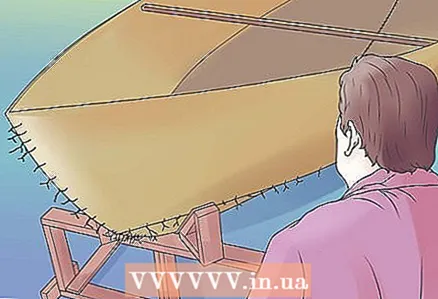 6 Look at the result of your work. With the edges of the top panels tied together, insert a 0.7 meter spacer between the sides. This will give the canoe the correct shape. Step back and evaluate the result from the outside
 - Make sure the canoe is symmetrical, level and not kinked. Tighten or loosen the wire if necessary, or even remove or add additional ties. Make sure the canoe is in the correct shape.
- To see the skew along the sides, use a pair of even bars. Make sure that the edges of the boards are at the same height at all points and that the panels are firmly connected to each other.
- You can use the "transition joint", which is a groove 1cm wide and 0.6 - 0.7m long, depending on the size of the boat, which is located on the lower front of the top panel. It will help ensure the sides are even. You can find more detailed instructions on the Internet and many books that describe the construction of boats with stitch and glue technology.
- Finally, make sure that the panels are firmly pressed against each other along their entire length, this will ensure smooth and neat adhesive joints.
Part 2 of 3: Bonding panels
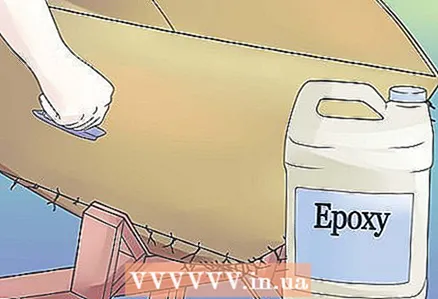 1 Use epoxy. Mix enough epoxy to cover the joints between the panels. Use a container for glue and a stick to mix. Then, using a sponge brush, apply glue to the seams.
 - Apply glue so that it covers the seam with a 3cm strip, making sure that the glue fills the seam well. Make the seam look like you are painting it with a stripe. For now, the seams should only be covered on the inside of the boat.
- Repeat this for all seams. Try to avoid smudges, remember: you only need to cover the seam - don't overdo it. If you have a smudge, use a brush to remove it. The absence of smudges will make it easier to sand the boat in the future. Also, try to prevent glue from dripping from the outside of the boat.
- Keeping time between coats, apply two coats of epoxy to everything, including the stern and bow seams.Staple the nose and tail seams well with staples before gluing. When tightening seams, use only wire, do not use clamps!
- Each layer of epoxy must be dried for about a day, so you have to be patient and resist the temptation to quickly test the water surface.
 2 Remove the wire. After drying, make sure again that all joints are covered with epoxy without gaps. If everything is in order, start removing the wire.
 - Remove the seams carefully, as the joints are still fragile at this stage. Try not to damage the glued seams, and be sure to remove all the wire.
- If you do damage the glue line, wire it back together and epoxy it.
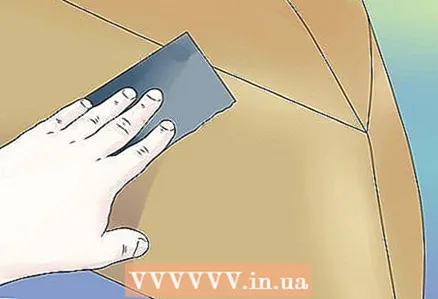
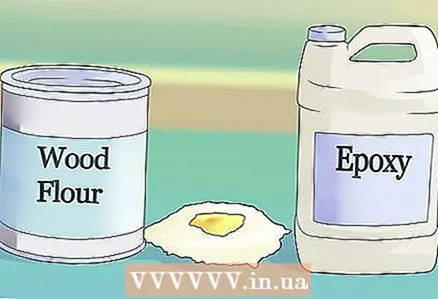 3 Apply a mixture of wood flour and epoxy. When all the wire has been removed, prepare a mixture of epoxy and wood flour (very fine sawdust). Wood flour can be purchased online or in hobby shops for joiners. This mixture will be used as a putty.
 - Mix wood flour and epoxy until you have a uniform, creamy, viscous substance. Apply putty to the seams that were glued.
- Apply a sufficiently thick layer of putty, about 5cm wide, to the side seams, then apply the putty to the inside of the stern and bow seams.
- Apply about 1cm of putty to the bow and stern seams, although this step will add weight to the boat, it will significantly strengthen the structure.
- Keep in mind that if the layer of putty is too thick, it will become brittle.
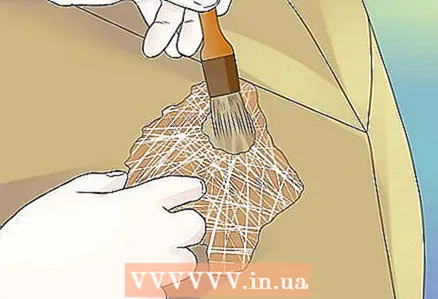
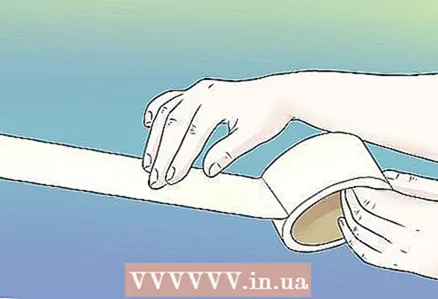 4 Reinforce the structure with fiberglass. Take a 7-10cm wide fiberglass tape, use one that feels like a regular fabric, without an adhesive backing, and glue it onto the seams that have been freshly covered with putty.
 - Apply another coat of epoxy over the fiberglass tape until the tape is clear. To make the seams as smooth as possible, apply enough epoxy to the fiberglass tape, then remove the excess with a rubber scraper. Keep in mind that too much resin is just as bad as applying too little.
- When removing excess glue, be careful not to dislodge the tape or damage the filler layer with the rubber scraper.
- When you get to the bow and stern seams, tape over the putty with fiberglass tape. Then tape the bow and stern seams again with fiberglass tape to stiffen the joint.
- Apply a second coat of putty to the fiberglass tape, letting the first coat dry for 24 hours.
 5 Start sanding. Once the second coat of epoxy has dried, it's time to turn the boat over. Ask for help to turn the boat over, be very careful as the boat is still very fragile.
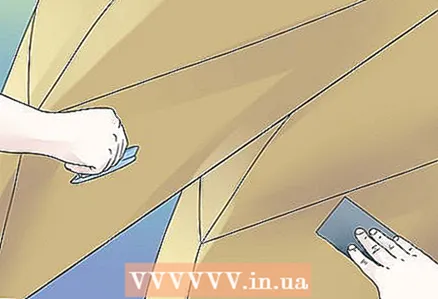
 - Using a rasp, round off the sharp corners between the bottom panel and the bottom. Then, sand the joints using P80 sandpaper. Beware of sanding thin plywood.
- Sand the entire outside of the boat with P120 sandpaper. Remove any epoxy drips and smudges that have seeped through the cracks. Be careful not to sand the outside of the thin 3mm plywood as this could damage the outer layer of your boat and leave flat areas on the hull.
- When finished sanding, remove most of the dust with a gauze cloth and then remove any remaining dust with a clean cloth and a compressed air gun. Sweep the floor and wait for the dust to settle.
 6 Apply a coat of epoxy and fiberglass to the outside of the boat. Once the dust has been removed, the outside of the boat is ready to be coated with a thin, even coat of epoxy. The resin should be applied to bare wood with a sponge brush. Let the resin dry for 24 hours.
 - Intercoat the outside of the boat with P 120 sandpaper. Intercoat sanding is necessary to ensure good adhesion to subsequent coats of epoxy and fiberglass.
- Now you need to cover the outside of the boat with fiberglass. The density of fiberglass fabrics suitable for canoes varies from 100 to 200g / m2. The denser fiberglass will make the boat heavier by requiring more epoxy to be impregnated.
- When covering the outside of the boat with fiberglass, follow the same procedure: apply another layer of resin over the fiberglass. If you've never done this before, first gather as much information as possible. Knowledge will help you build a good boat.
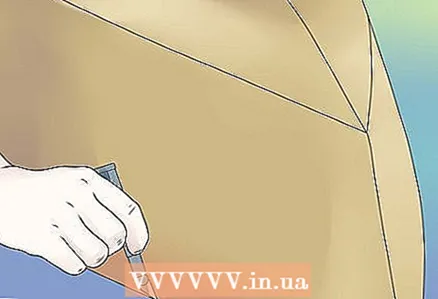 7 Cut off excess fiberglass. Smooth the edges of the glass fabric about two hours after applying the epoxy, just before it starts to cure.
 - If you miss a moment and the epoxy hardens, it will be very difficult to get rid of the excess fiberglass.
- Trim the fiberglass with a construction knife along the sides. Try not to pull too hard, the resin is still stringy at this point and problems may arise if you move the fabric.
 8 Apply another coat of epoxy and sand the boat. After the first layer of resin has dried, apply another layer to fill the pores of the fabric and make the bottom of the boat smooth.
 - Keep in mind that depending on the thickness and texture of the fabric, more than two finishing coats of resin may be needed.
- After trimming the edges of the fiberglass cloth, sand the surface with fine sandpaper P220, and again remove all dust. The boat is now ready for painting or varnishing.
Part 3 of 3: Finishing the job
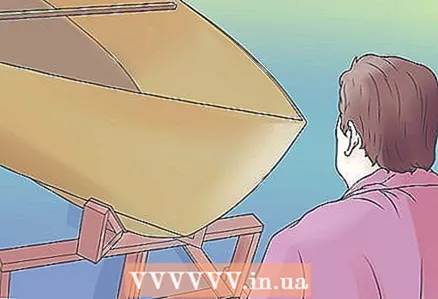 1 Flip the boat over. Carefully turn the boat over and place it on the stands. It is a great idea to make a couple of trestles to keep the boat securely in place while you continue to work.
 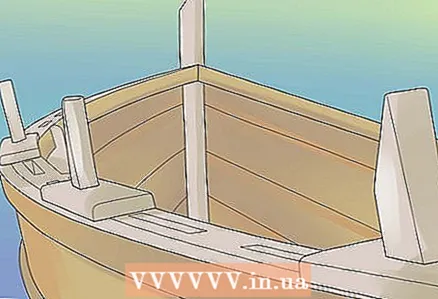 2 Install the gunwale. It consists of long bars that will be attached to the outer and inner sides of the canoe.
 - The gunwale will give the canoe a finished look, and will also protect the sides of the boat from damage.
- The planer should be 2-3cm X 1-2cm in cross-section, and its outer and inner edges should be rounded. Attach the gunwale to the sides using epoxy and brass or bronze self-tapping screws. You can secure the gunwale with clamps while the resin dries.
- At the bow and stern, you can attach small boards over the faceplate or between them if you take the time to fit them well. The splash-proof deck will look just fine.
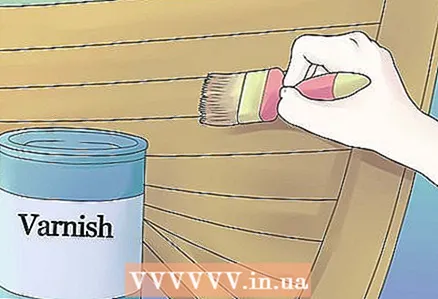 3 Apply a second coat of varnish or paint. You will need to cover the epoxy with a protective layer so it will not last long when exposed to direct sunlight. When you're done painting the outside of the canoe, flip it over and repeat on the inside.
  4 Sand with epoxy and apply a coat of paint. When sanding, remove all smudges and spatter. Avoid sanding the outer layer of the plywood.
 - When you're done sanding, apply finishing coats of epoxy. For best results, apply several thin coats of epoxy, intercoat drying for 24 hours.
- When the epoxy is dry, sand first with P120 sandpaper and then with P220 sanding paper to obtain a smooth, even surface.
- Remove all dust and then paint or varnish the inside of the boat.
 5 Make seating. You can make the seats either before or after applying topcoats of epoxy.
 - The seats should be located 3–4 cm from the bottom of the boat, and not be fixed to the plane.
- On a light canoe such as this, the center of gravity should be as low as possible.
 6 Dry the boat. Wait a week for all the resin to cure and the paint and varnish to dry.
Tips
- When building your boat, apply epoxy only in well-ventilated areas, otherwise inhaled vapors can permanently damage your nervous system.
- Take your time: if you hurry, you will make people laugh.
- Find as much information as you can about stitch and glue canoe construction.The more knowledge you have, the more problems you can avoid.
Warnings
- Always use life jackets when boating. Don't sit on your vests. In some bodies of water, the presence of life jackets is strictly monitored.
- Keep the area where you work clean. Ventilate well and keep a fire extinguisher handy.
- Epoxy is very toxic and you can get severe vapor poisoning. Try to avoid inhaling vapors and direct skin contact. Use protective equipment: safety goggles, a charcoal respirator, rubber gloves and a long-sleeved shirt.
- Wooden boats do not sink, they can capsize, but they will still stay afloat, so if you capsize - stay near the boat, it can save your life.
Additional articles
 How to use the sextant
  How to patch up a plastic gas tank
  How to row on an inflatable boat
  How to replace brake discs
  How to tie a boat
  How to book a taxi with Uber
  How to get rid of ants in your car
  How to get from England to the USA by sea
  How to drive a tractor unit
  How to choose a beautiful boat name and put it right
  Track your Uber ride history
  How to paint a boat
  How to live without a car
  How to build an ark


