Author:
Clyde Lopez
Date Of Creation:
21 June 2021
Update Date:
1 July 2024
![[Tutorial] How to use Lucky Patcher.](https://i.ytimg.com/vi/7bORF6R7HhQ/hqdefault.jpg)
Content
- Steps
- Method 1 of 5: Disable License Verification
- Method 2 of 5: Remove Google Ads
- Method 3 of 5: Installing custom patches
- Method 4 of 5: Change App Resolution
- Method 5 of 5: Create a Modified APK File
This article will show you how to use Lucky Patcher on your Android phone. Lucky Patcher lets you modify apps to disable license checking, remove Google ads, install custom patches, change permissions, and create APKs. To modify apps with Lucky Patcher, you need a rooted Android phone.
Steps
Method 1 of 5: Disable License Verification
 1 Root your Android device. To be able to modify apps through Lucky Patcher, you need a rooted Android phone. The rooting process is different for each Android device, and in the process of obtaining superuser rights, the phone may fail, and the warranty for the rooted phone will be void. Follow the most current instructions and proceed with extreme caution.
 - For more information, read the article "How to get superuser rights on Android without a PC".
 2 Open Lucky Patcher by tapping the yellow emoji icon. After that, you will see a list of installed applications on your phone.
  3 Tap the app from which you want to cut the license check. A menu with various options will appear on the screen.
  4 Tap Patch menuto display a list of patches that can be applied to the application.
 5 Tap Remove license checkto display various options for disabling the license check.
 6 Select the patch you want to use by checking the appropriate box.
 7 Tap Applyto patch the application to remove the license check. This process can take several minutes.
  8 Tap OK. If the installation is successful, you will see a window with the installation results. Tap OK to continue.
Method 2 of 5: Remove Google Ads
 1 Root your Android device. To be able to modify apps through Lucky Patcher, you need a rooted Android phone. The rooting process is different for each Android device, and in the process of obtaining the superuser rights, the phone may fail, and this also leads to the loss of warranty. Follow the most current instructions and proceed with extreme caution.
 - For more information, read the article "How to get superuser rights on Android without a PC".
 2 Open Lucky Patcher by tapping the yellow emoji icon. After that, you will see a list of installed applications on your phone.
  3 Tap the app from which you want to remove Google ads.
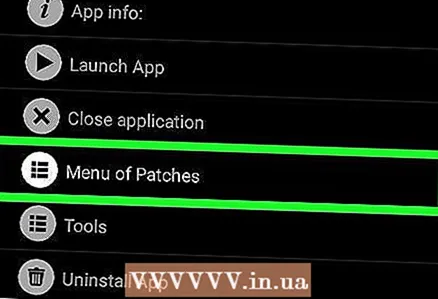 4 Tap Patch menuto display a list of patches that can be applied to the application.
 5 Tap Remove ads. A menu will open with two options.
  6 Tap Remove ads with a patch. This is the first option on the popup menu.
  7 Tap Applyto patch your ad remover app. This process can take several minutes.
  8 Tap OK. If the installation is successful, you will see a window with the installation results. Tap OK to continue.
Method 3 of 5: Installing custom patches
 1 Root your Android device. To be able to modify apps through Lucky Patcher, you need a rooted Android phone. The rooting process for each Android device is different, and in the process of obtaining the superuser rights, the phone may fail, and it also leads to the loss of the manufacturer's warranty. Follow the most current instructions and proceed with extreme caution.
 - For more information, read the article "How to get superuser rights on Android without a PC".
 2 Open Lucky Patcher by tapping the yellow emoji icon. This will display a list of installed applications on the phone.
  3 Tap the app to which you want to apply the custom patch.
 4 Tap Patch menuto display a list of patches that can be applied to the application.
 5 Tap Custom patch. The user patch menu may then appear on the screen. If there is only one custom patch available, you will be asked to confirm the installation of the custom patch.
 - To download the most current custom patches, tap the "" in the upper right corner of the screen and select the "Download Custom Patches" menu item.
 6 Select the patch you want to apply. You will see a pop-up window describing the actions of the patch.
  7 Tap Applyto apply the custom patch. This process can take several minutes.
  8 Tap OK. If the installation is successful, you will see a window with the installation results. Tap OK to continue.
Method 4 of 5: Change App Resolution
 1 Root your Android device. To be able to modify apps through Lucky Patcher, you need a rooted Android phone. The rooting process is different for each Android device, and in the process of obtaining superuser rights, the phone may fail, and the warranty for the rooted phone will be void. Follow the most current instructions and proceed with extreme caution.
 - For more information, read the article "How to get superuser rights on Android without a PC".
 2 Open Lucky Patcher by tapping the yellow emoji icon. After that, you will see a list of installed applications on your phone.
  3 Tap the app to which you want to apply the custom patch.
 4 Tap Patch menuto display a list of patches that can be applied to the application.
 5 Tap Change permissionsto display a list of permissions.
 6 Tap individual permissions. If the resolution description is green, then the resolution is enabled. If red - the permission is disabled.
  7 Tap Applyto restart the app with changed permissions.
Method 5 of 5: Create a Modified APK File
 1 Root your Android device. To be able to modify apps through Lucky Patcher, you need a rooted Android phone. The rooting process is different for each Android device, and in the process of obtaining superuser rights, the phone may fail, and it will also void the phone warranty. Follow the most current instructions and proceed with extreme caution.
 - For more information, read the article "How to get superuser rights on Android without a PC".
 2 Open Lucky Patcher by tapping the yellow emoji icon. After that, you will see a list of installed applications on your phone.
  3 Tap the app for which you want to create a modified APK file.
 4 Select an option Create Modified APK immediately after starting the application.
 5 Choose which patch to apply to the APK file. A list of patches will appear on the screen, the installation of which will create a modified APK file.
  6 Tap the blue button Rebuild application at the bottom of the screen. A modified APK file of the application will be generated with a different patch installed from the original application. All modified APKs will be in the folder / sdcard / LuckyPatcher / Modified /.
  7 Tap OKto confirm the creation of the APK file. Or click Go to File to open the folder with the modified APK file.


