Author:
Helen Garcia
Date Of Creation:
14 April 2021
Update Date:
14 June 2024
Content
- Steps
- Method 1 of 4: Repairing Physical Damage
- Method 2 of 4: Find Errors (Windows)
- Method 3 of 4: Reformatting the Drive
- Method 4 of 4: Checking the USB Port
- Tips
- Warnings
- What do you need
Do you have a USB flash drive that is not working? If the electronics of the drive is in order and you are not afraid of losing all the files that are stored on it, then you can try to format such a USB flash drive.
Steps
Method 1 of 4: Repairing Physical Damage
 1 First of all, you need to decide whether your files are of any value and whether you are ready to risk your data trying to restore files yourself. If your files contain important information, then in this case it is best to contact specialists who are professionally engaged in data recovery.
 - These firms have special equipment and tools for electronics repair. Most advanced organizations have equipment that allows the flash memory chip to be removed from the drive's printed circuit board to read the data it contains.
- The cost of data recovery services will depend on the degree of damage to the drive and the level of complexity of the work performed.
- Some data recovery companies offer services to fix minor / moderate damage, requesting up to 5 thousand rubles.
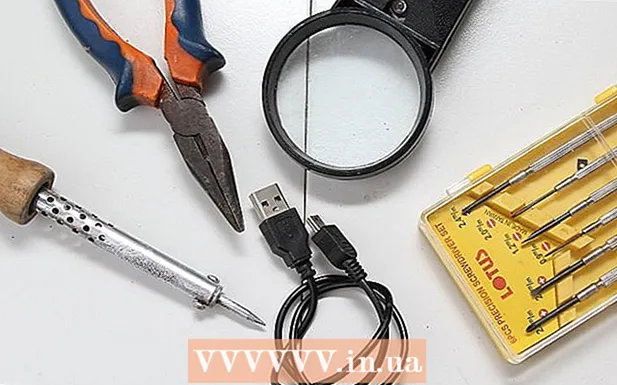 2 Get your tools. If you agree to risk your files, then in this case you will need:
 - Soldering iron with solder and flux
- Old USB cable
- Wire cutters and pliers
- Small slotted screwdriver
- Magnifying glass or jewelry loupe
- Note: These steps are only required if the drive has a damaged connector.
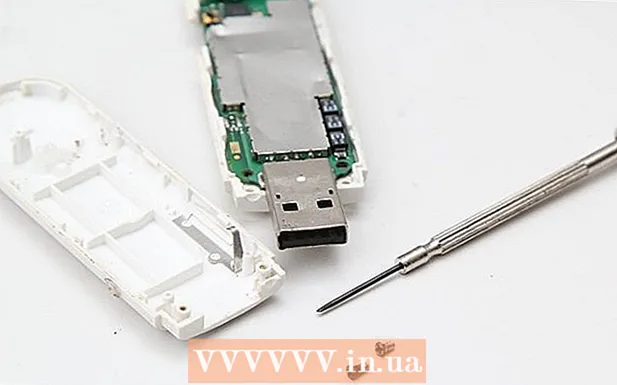 3 Use a screwdriver to carefully remove the drive casing.
 4 Examine the circuit board and pads with a magnifying glass. If the printed circuit board is damaged or there are defects in the contact pads, then most likely you will have to seek professional help.
 - Note: The pads are the four small rectangles on the PCB to which the USB connector of the drive is soldered. If the PCB and pads are intact, then you can proceed to the next step.
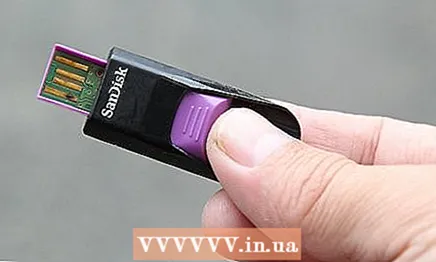
- 5Place the drive on a hard surface with the end of the connector facing you and the contact pads facing up.
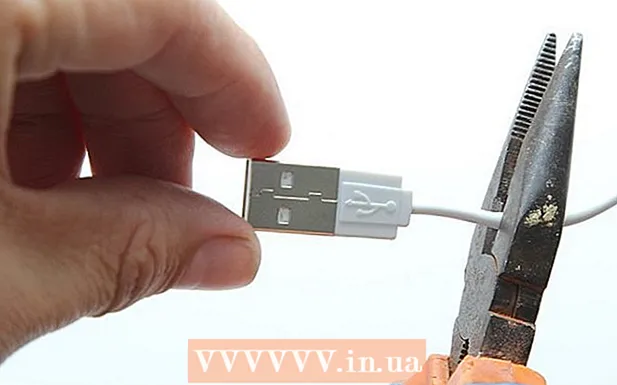 6 Use a wire cutter to bite off the USB cable connector. Make sure you bite off the same connector as the drive.
 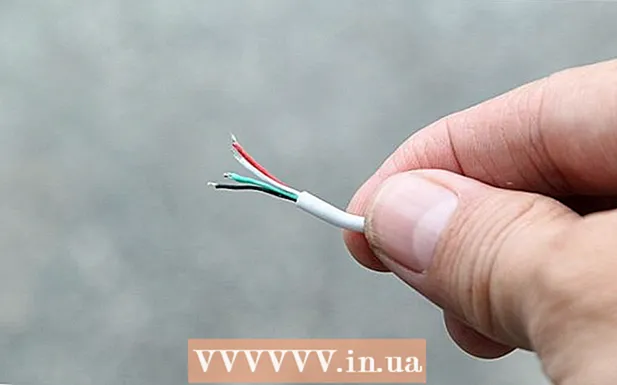 7 Using a wire-stripper pliers, strip approximately 0.5 cm of insulation from each wire from the cable. Or, if you don't have an unnecessary USB cable, you can try soldering small wires to each prong of a broken USB connector; you will create your own USB cable.
  8 Solder each of the four wires to the corresponding pad. The colors of the wires are in order from left to right: black, green, white, red. They should be soldered to the prongs in this order, from left to right when holding the USB - so that the two cut rectangles are facing up and away from you.
 - Do not confuse the order of connecting the wires, if you do not want your drive to burn out along with your files.
- If you used your own wires, solder each wire straight through the pad of the corresponding color.
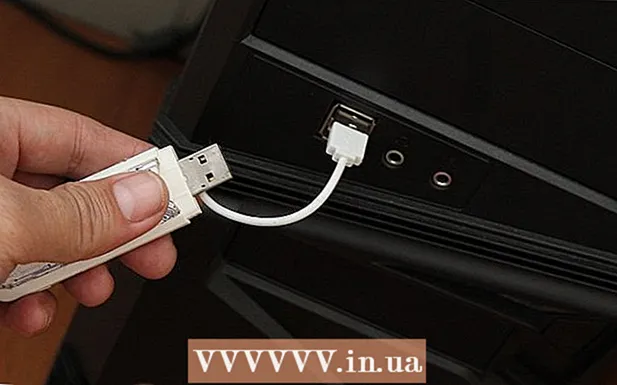 9 Plug the other end of the USB cable into your computer and wish yourself the best of luck.
- If the flash drive is recognized by the computer, then you did it! Save the files to your computer hard drive.
- If the flash drive is not recognized, then most likely the reason lies in a more complex problem that cannot be easily identified at first glance. In this case, you can try to seek help from specialists or simply hang the USB stick on the tree as a New Year's toy, so that it reminds you of the importance of backing up your files.
Method 2 of 4: Find Errors (Windows)
 1 Insert the drive into a USB port on your computer.
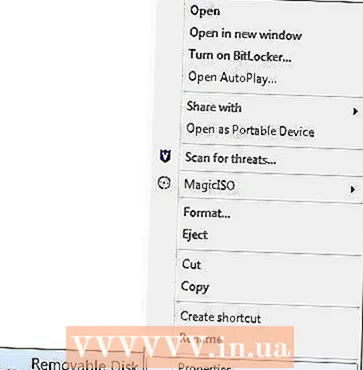 2 Open "My Computer" and right-click on the icon for your drive. Select Properties.
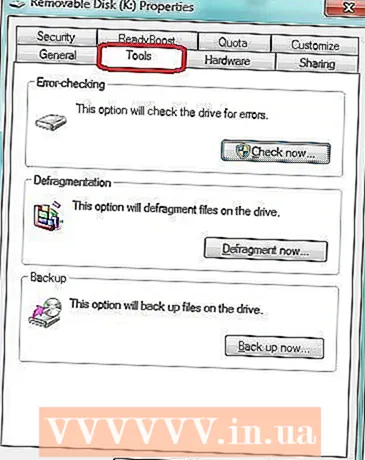 3 Click on the Tools tab.
 4 Click on the Check Now button.
- 5
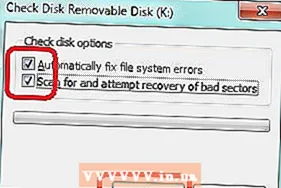 Select the "Automatically fix system errors" and "Search and try to repair bad sectors" checkboxes. Click on the "Start" button.
 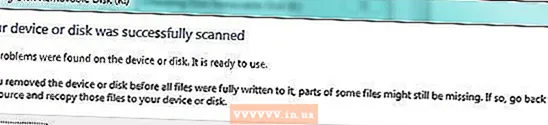 6 Wait for the verification to complete. Click on the "Close" button when finished.
Method 3 of 4: Reformatting the Drive
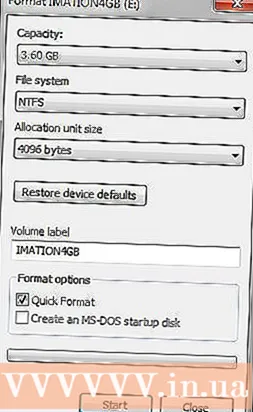 1 Format with NTFS instead of FAT32.
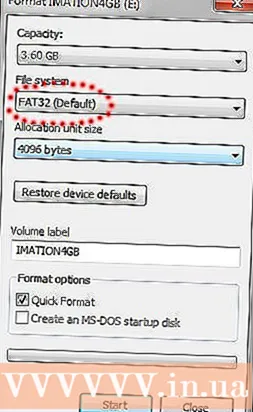 2 Then format it again to FAT32.
Method 4 of 4: Checking the USB Port
- 1Sometimes the problem lies in the incorrect operation of the USB port, and not the flash drive.
- 2 Remove the USB stick and restart your computer, then check the USB stick again. If it works, then the problem is solved. If not, then go to the next step.
- 3 Check the USB flash drive on another computer. If it works, then the problem is with your computer's USB port.
- It may happen that one of the USB ports will not work while the others are OK. Check each port on your computer and then on another computer. If these methods did not help, then most likely the problem lies in the flash drive itself.
Tips
- USB sticks are inexpensive and available everywhere. Consider just getting a new one. You will save your time and nerves.
- If you decide to seek help from specialists in data recovery, then try to state the situation and find out as many details as possible to make sure that this company has enough experience and the necessary special equipment for this work.
- If all your attempts to recover data have failed and the data in the drive do not represent value, check the manufacturer's website and specialized forums. There is a chance that you can find there utility programs for changing the firmware and low-level formatting of the drive.
- If your USB flash drive contains important data, then you need to try to recover the information, and not reformat the drive. Some electronic components of the drive may be defective even if there is no visible external damage. Usually, specialized equipment is required to accurately diagnose the cause of the problem, but a visual inspection can be carried out in order to detect burnt resistors.To do this, remove the drive casing and carefully examine the electronic components in the form of small bricks using a magnifying glass. If you find blackening of any of the resistors, this means that this resistor has burned out and the intervention of specialists is required.
- Get your drive formatting software ahead of time. Working with programs is not an easy task that can take a lot of your time.
Warnings
- Formatting will destroy all data in the drive.
- If your files are very important to you, then do not let the first stranger you meet with a soldering iron in hand to convince you that he can fix everything without much effort. Most often, if the USB connector is damaged, the pads come off the PCB. Therefore, a beginner in soldering will not fix the problem, but will only complicate the situation, causing even more harm. The term "ripped pads" means that when the USB connector is damaged, the solder that holds the four pins of the connector has separated from the PCB. In this case, you need to contact a specialist, and not try to make repairs on your own.
- Backing up data, formatting devices, and installing operating systems are lengthy and complex processes that must be performed by experienced people.
- Do not confuse low-level formatting (LLF) and reinitialization (resetting device settings to the default values set by the manufacturer). LLF was widespread in the 1980s due to the use of MFM and other disc formats that were not geometrically tuned during production. This is not suitable for modern devices as they cannot be formatted at a low level.
What do you need
- A recovery disk for your operating system.
- The serial number of your operating system.
- A working USB stick for comparing and testing both instances.


