Author:
Bobbie Johnson
Date Of Creation:
7 April 2021
Update Date:
1 July 2024

Content
- Steps
- Method 1 of 6: iTunes
- Method 2 of 6: iCloud Drive
- Method 3 of 6: AirDrop
- Method 4 of 6: Email
- Method 5 of 6: Microsoft OneDrive
- Method 6 of 6: Google Drive
- Tips
- Warnings
In this article, we will tell you how to copy files on your iPad that are located on a computer running Windows or macOS; such files can be used without an internet connection. You can copy files through iTunes, iCloud Drive, Microsoft OneDrive, and Google Drive.
Steps
Method 1 of 6: iTunes
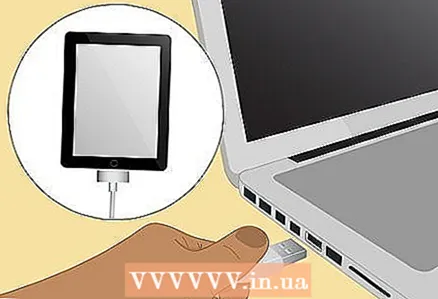 1 Connect iPad to your computer. To do this, connect the iPad charging cable to the iPad charging port and to one of the USB ports on your computer.
  2 Launch iTunes on your computer. Click on the icon that looks like a multicolored musical note on a white background.
 - If a message appears stating that iTunes needs an update, click Download iTunes. When iTunes updates, restart your computer.
- Apple intends to ditch iTunes starting with macOS Catalina (this system comes out in the fall of 2019). Mac computers will replace iTunes with Apple Music, Apple TV, and Apple Podcast. You can still use iTunes on Windows (at least for a while).
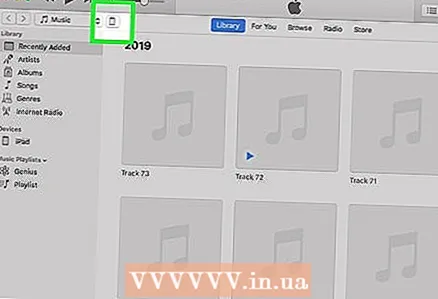 3 Click on the "Device" icon. It looks like an iPad and is located at the top left of iTunes. The iPad page will open.
  4 Click on File sharing. You will find this option in the left pane of iTunes; it is marked with an "A" icon.
 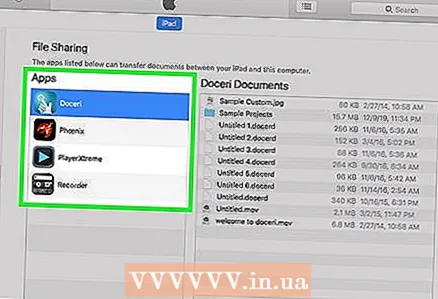 5 Click on the application to which you want to copy the files. Do this in the center pane of iTunes. Keep in mind that the application and file type may not match (for example, you can drag a Word document into the iMovie application folder).
 - Pages, Keynote, Numbers, iMovie, and GarageBand all have folders where projects are stored, which means you can drag almost any file into such folders.
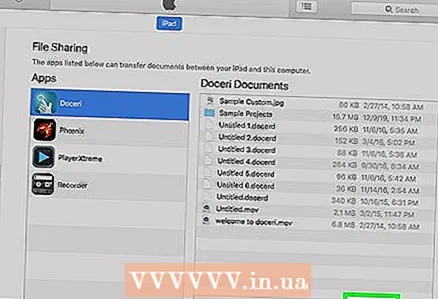 6 Scroll down and click on add file. You will find this option in the lower right corner. An Explorer (Windows) or Finder (Mac) window opens.
  7 Click on the required file. To open the folder with the file, click on it in the left pane.
  8 Click on Open. You will find this option in the lower right corner. The file name will appear in the iTunes window.
 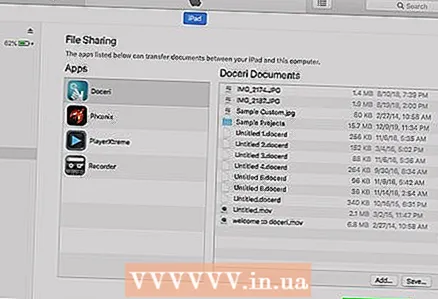 9 Click on Synchronization. You will find this option in the lower right corner. The file is added to the selected iPad app. From now on, this file can be opened on iPad at any time (even without an Internet connection).
 - When the synchronization process is complete, click on "Finish" - you will be taken to the main page.
Method 2 of 6: iCloud Drive
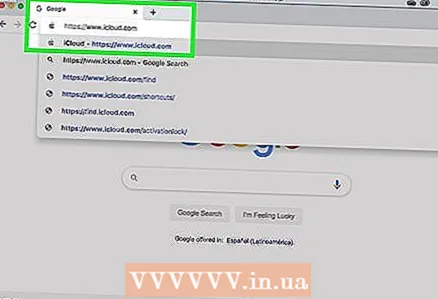 1 Go to address https://www.icloud.com/ in a web browser. The iCloud account login page will open.
 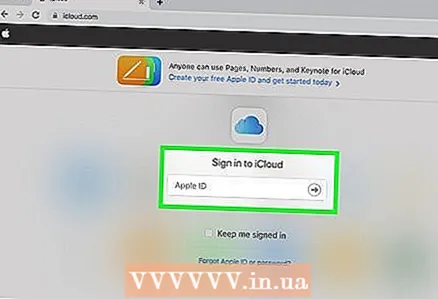 2 Log in to iCloud. To do this, enter your Apple ID email address and password, and then click the arrow icon to the right of the address and password lines.
 - If you're already signed in to your iCloud account, skip this step.
- If two-factor authentication is enabled, iPad displays a 6-digit code that you must enter on your computer.
- If a message appears asking you to confirm that you trust the device, click Trust on both iPad and computer.
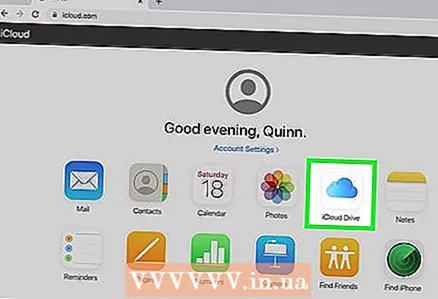 3 Click on "iCloud Drive"
  . This icon looks like blue clouds on a white background. You will be taken to your iCloud Drive page.
  4 Click on "Download". You will find this icon at the top of the page; it looks like a cloud with an upward pointing arrow. An Explorer (Windows) or Finder (Mac) window opens.
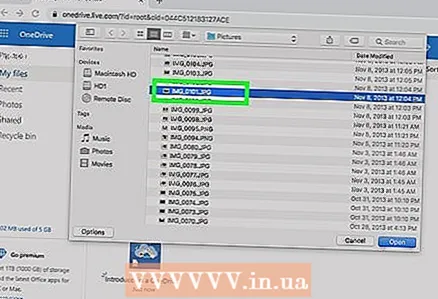
  5 Click on the file you want to upload to iCloud Drive. Find the file you want in the file browser and then click on it.
 - To select all files in one folder, click on any file and press Ctrl+A (Windows) or ⌘ Command+A (Mac).
- To select multiple files in the same folder, hold Ctrl (Windows) or ⌘ Command (Mac) and click on each file you want.
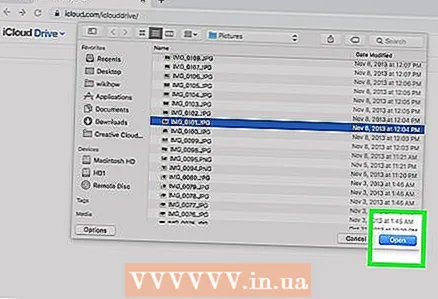 6 Click on Open. You will find this option in the lower right corner. The process of copying files to iCloud Drive starts.
 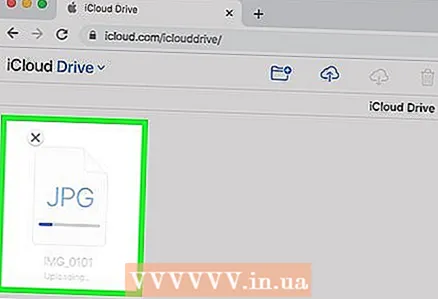 7 Wait for the files to upload to iCloud Drive. This process will take several seconds or even several hours, depending on the total size of the files.
  8 Launch the Files app
  on iPad. Tap the icon that looks like a blue folder on a white background. Instead of the iCloud Drive app, iOS 11 has a Files app — use it to download files from iCloud to iPad.
  9 Tap Overview. You will find this tab in the lower right corner.
 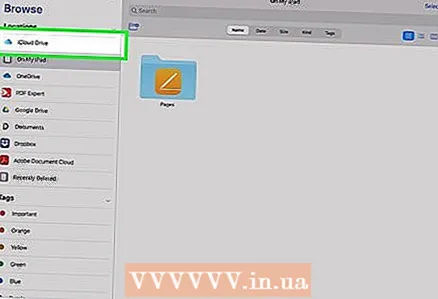 10 Click "iCloud Drive" . It's in the Locations section. The screen displays the contents of iCloud Drive.
 - If this option is not there, first click on Locations.
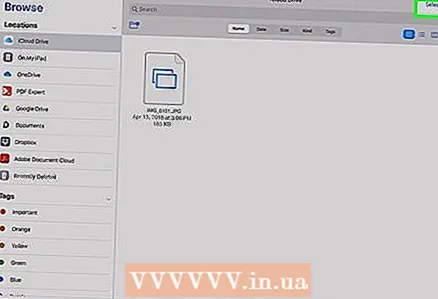 11 Tap Choose in the upper right corner. A round checkbox will appear for each file.
 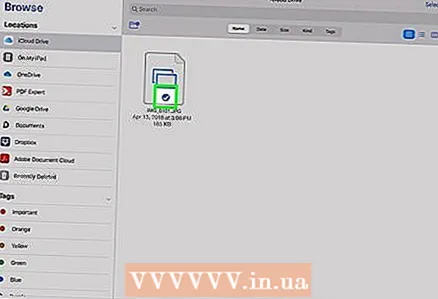 12 Touch each desired file. Check marks will appear in the round checkboxes.
 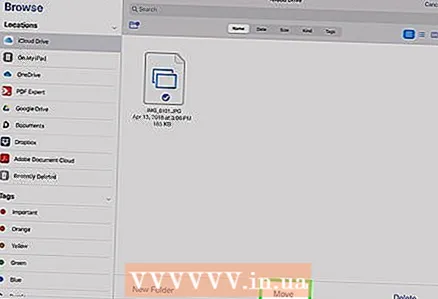 13 Tap Move. It's at the bottom of the screen.
 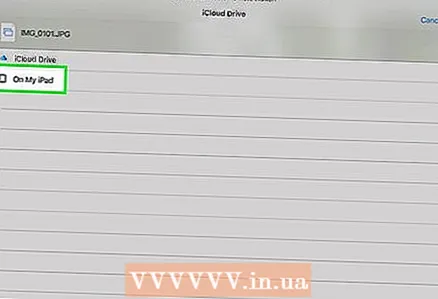 14 Click on On my iPad. This option is marked with an iPad-shaped icon. The folders that are on the iPad will be displayed.
 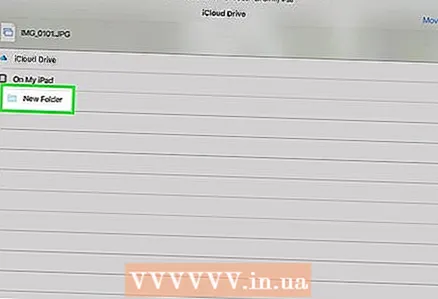 15 Tap the folder where you want to copy the files.
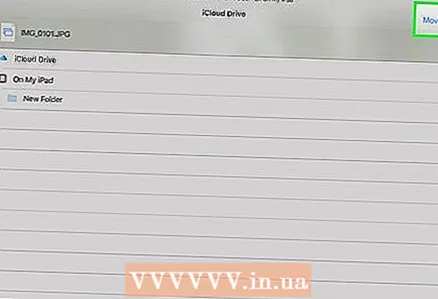 16 Tap Move. You will find this option in the upper right corner. The selected files will be copied to the specified folder - now they can be used even without an Internet connection.
 - The copied files can be opened in the Files application.
Method 3 of 6: AirDrop
 1 Open Finder
  on a Mac computer. Click the blue and white emoji icon in your dock.
 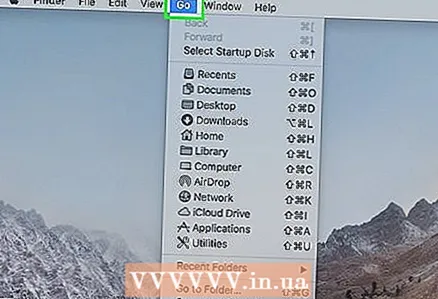 2 Click on Transition. This menu is in the menu bar at the top of the screen. A menu with options will open.
 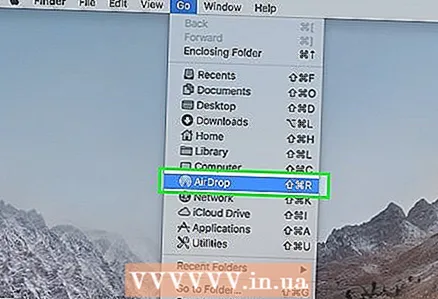 3 Click on AirDrop. You will find this option in the menu.
  4 Please select Contacts only or Everything. Do this from the menu under "Allow My Discovery". The computer will now be discoverable through AirDrop.
  5 Launch the Files app on iPhone / iPad. Click the blue folder-shaped icon at the bottom of the home screen.
 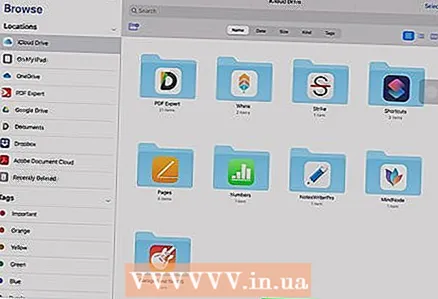 6 Tap Overview. This is the second tab at the bottom of the screen. The left panel will open.
 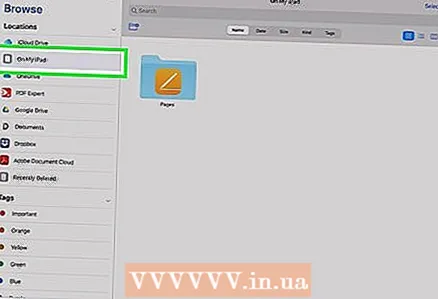 7 Click on On my iPad. This icon looks like an iPad and is in the left pane.
 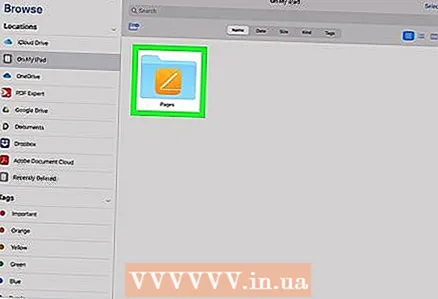 8 Tap the folder containing the files you want. The folder names are the same as the corresponding applications. Click on the application folder where the files you want are stored. All application files are displayed on the screen.
 - For example, if you want to copy Pages documents, click Pages.
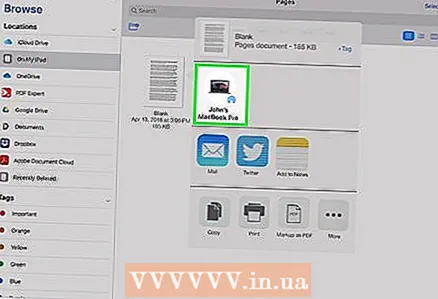
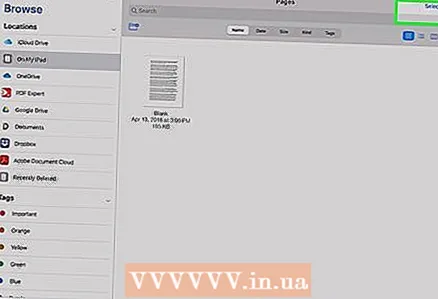 9 Click on Choose. You will find this option in the upper right corner of the Files app. A round checkbox will appear for each file.
 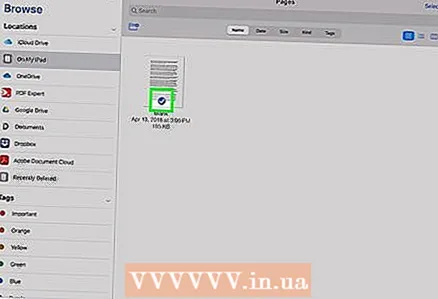 10 Click on each file you want. Check marks will appear in the round checkboxes.
  11 Click on General access. It's in the lower-left corner of the Files app. The sharing menu will open.
  12 Tap the AirDrop icon in the sharing menu. It looks like a series of concentric circles with a sector cut out. The menu will display the contacts that are available via AirDrop.
 - For a contact to be available via AirDrop, they must be authorized on the device using their Apple ID. In this case, both devices must be connected to the same wireless network and Bluetooth must be enabled on both devices.
- On the second device, also open the "Allow My Discovery" menu and select "Contacts Only" or "Everyone"
- AirDrop file transfers may not be supported on some older iPhone, iPad, iMac, or Macbook models.
 13 Tap the contact in the AirDrop section. This is the second section on the share menu.It has a profile picture and a list of devices of all contacts (including you) that are available through AirDrop. Copying files to your Mac starts; when the process ends, a beep will sound. The files will be copied to the Downloads folder, which can be found using the Finder.
Method 4 of 6: Email
- 1 Launch the iPhone / iPad email exchange app. To do this, tap the icon of the corresponding application. If you're using Apple's Mail app, tap the white envelope icon on a blue background at the bottom of the screen. If you use Gmail or Outlook, click on the icon of one of these applications on the home screen.
- 2 Click on the new letter icon. In Apple's Mail app and in Outlook, this icon looks like a pencil with a piece of paper at the top of the screen. In the Gmail app, this icon looks like a "+" symbol and is located in the lower left corner.
- 3 Please enter your email address. Do this on the "To" or "Recipient" line on the new email page.
- 4 Enter a subject for your email. Do this on the "Subject" line. It can be the name of a file or just the word "Files".
- 5 Tap the attachment icon. Typically, it looks like a paperclip and is located at the top of the screen or in the upper-right corner of the on-screen keyboard.
- 6 Click on Overview (if this option is available). This is the second tab at the bottom of the screen.
- In Gmail, just click on the file you want in the file list.
- 7 Tap On my iPad. This option is marked with an iPad-shaped icon and is in the left pane.
- 8 Tap the folder containing the files you want. The folder names are the same as the corresponding applications. Click on the application folder where the files you want are stored. All application files are displayed on the screen.
- 9 Tap the file you want to copy. The file will be attached to the email.
- Some postal services limit the size of the file that can be sent with the letter. If the file does not attach, it may be too large.
- 10 Click on the "Send" icon. In Apple's Mail app, this icon is in the upper-right corner. In Outlook and Gmail, this icon looks like a paper airplane and is in the upper right corner.
- 11 Launch your email app on your Mac. In Outlook or Mail, click the appropriate icon found in the Applications folder in the Finder or in the Dock. If you are using Gmail, go to https://mail.google.com in your web browser.
- If you are not yet logged into your mailbox, enter your email address and password.
- 12 Open the letter you sent to yourself. To do this, find the letter with the subject you entered and click on it.
- 13 Double click on the attached file to download it. As a rule, attachments are displayed at the bottom of the letter. By default, the files will be downloaded to the Downloads folder, which can be found through the Finder.
Method 5 of 6: Microsoft OneDrive
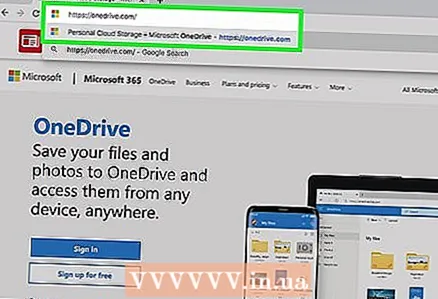 1 Go to address https://onedrive.com/ in a web browser. If you're already signed in to your Microsoft account, you'll be taken to the OneDrive home page.
 - If you are not yet signed in to Microsoft, enter your email address and password.
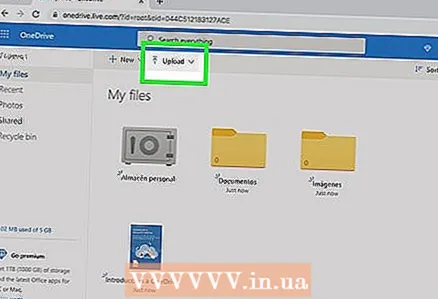 2 Click on Download. You will find this option at the top of the page. A menu will open.
 - To copy files to a specific folder, first click on it.
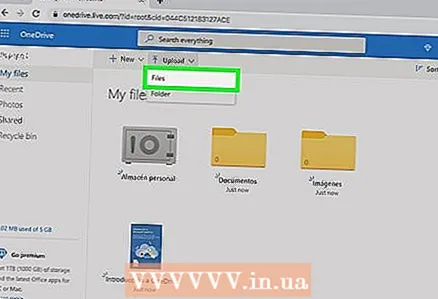 3 Click on Files. You will find this option in the menu. An Explorer (Windows) or Finder (Mac) window opens.
 - Click on "Folder" if you are going to upload a folder with files.
 4 Highlight the files. To do this, click on the desired file or hold Ctrl (Windows) or ⌘ Command (Mac), and then click on the multiple files you want.
 - To select all files in one folder, click on any file and then click Ctrl+A (Windows) or ⌘ Command+A (Mac).
- If you want to download the entire folder, click on it.
 5 Click on Open. You will find this option in the lower right corner. The files will start uploading to OneDrive.
 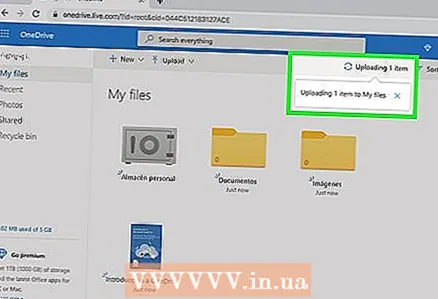 6 Wait for the files to upload to OneDrive. The download time depends on the total size of the files.
  7 Launch the OneDrive app
  on iPad. To do this, tap the icon that looks like white clouds on a blue background.If you're already signed in to your account, you'll be taken to the OneDrive home page.
 - If you are not logged in yet, enter your email address and password.
 8 Highlight the files you want to download to iPad. To do this, tap and hold one desired file, and then tap on other desired files / folders.
  9 Click Share
  . This icon, which looks like an upward pointing arrow, is located in the upper left corner. A menu will open.
 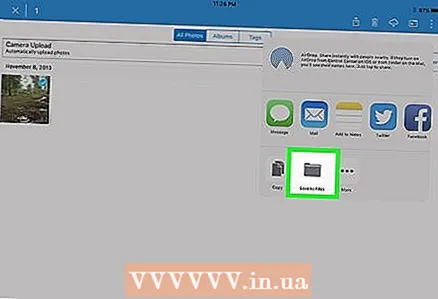 10 Click on Save to Files. This icon, which looks like a folder, is located in the menu at the bottom of the screen.
 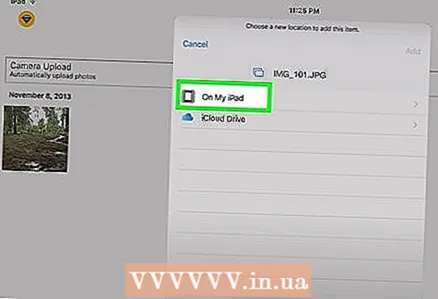 11 Tap On my iPad. A list of folders on iPad will be displayed.
 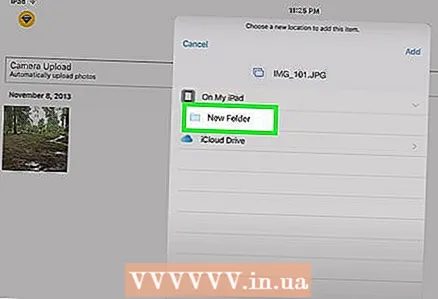 12 Tap the folder where you want to download files from OneDrive. Under On My iPad, click the folder you want (for example, Pages).
 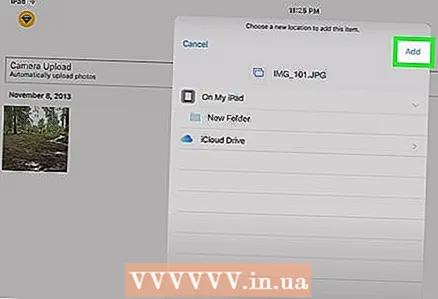 13 Tap Add. You will find this option in the upper right corner. From now on, files can be opened on iPad at any time (even without an Internet connection).
Method 6 of 6: Google Drive
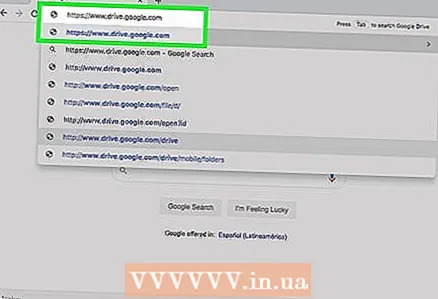 1 Go to address https://www.drive.google.com/ in a web browser. If you're already signed in to your Google Account, you'll be taken to the Drive home page.
 - If you are not yet signed in to Google, click Go to Google Drive (if available) and enter your email address and password.
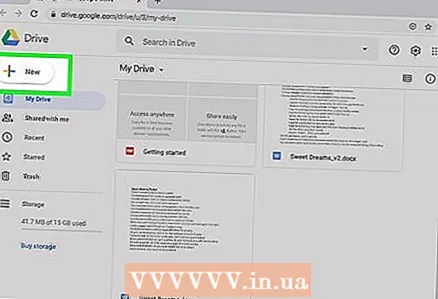 2 Click on Create. This blue button is in the upper left corner. A menu will open.
 - To copy files to a specific folder, first click on it.
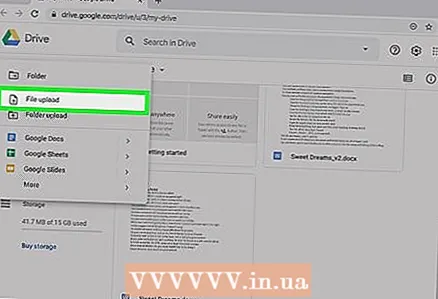 3 Click on download files. You will find this option in the menu.
 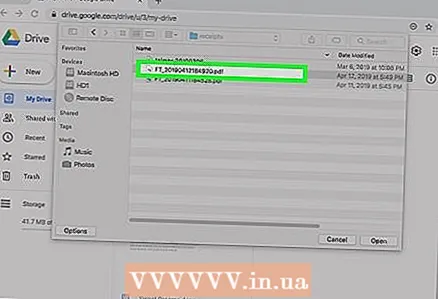 4 Select the files you are going to upload to Disk. To do this, click on the desired file or hold Ctrl (Windows) or ⌘ Command (Mac) and click on a few files you want.
 - To select all files in one folder at once, click on any file and click Ctrl+A (Windows) or ⌘ Command+A (Mac).
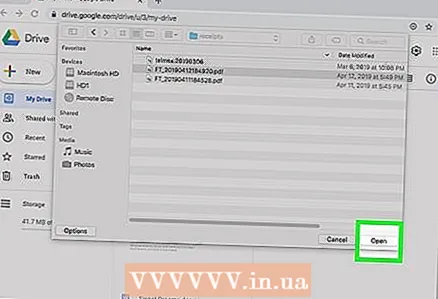 5 Click on Open. You will find this option in the lower right corner. Uploading files to Disk will start.
 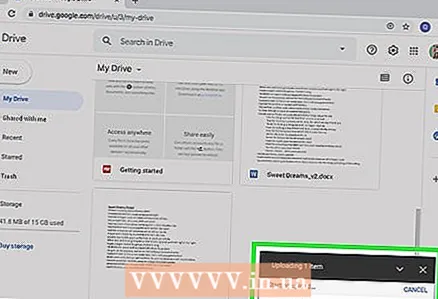 6 Wait for the files to upload to Disk. This process will take some time, depending on the total size of the files.
 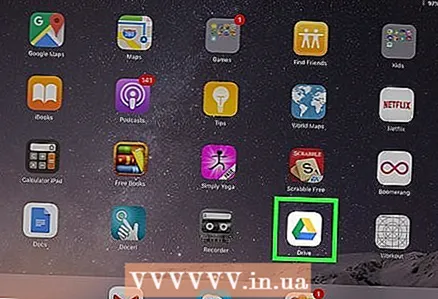 7 Launch the Google Drive app on iPad. Tap the triangle-shaped icon with blue, green, and yellow sides. If you're already signed in to your Google Account, you'll be taken to the Drive home page.
 - If you are not yet logged into the account where you downloaded the files, enter your email address and password.
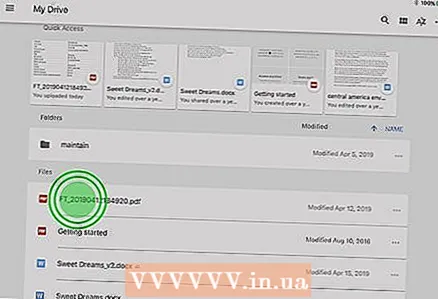 8 Highlight the file. To do this, touch and hold it. To select multiple files, touch and hold one desired file, and then tap on other desired files.
 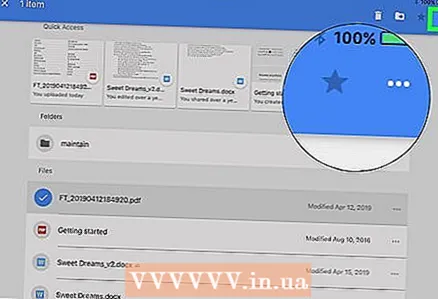 9 Tap ⋯. This icon is located for every file in Drive.
 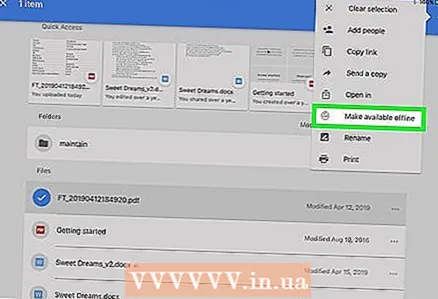 10 Tap Make available offline. You will find this option in the pop-up menu. From now on, files can be opened in the Google Drive app even when the tablet is not connected to the Internet.
 - The Google Drive option can be found in the Files app, but you won't be able to download multiple files from Drive to Files (as with other cloud storage apps).
Tips
- Most cloud storage applications include an "Offline" feature that allows you to work with files offline. To do this, tap the file, click on the "⋮" icon and select "Offline" from the menu.
- Once the files are uploaded to the Files app on iPad, you can delete them from cloud storage (leaving the files on your tablet).
Warnings
- If your tablet is running iOS 11 or later, it won't have the Files app. Therefore, the files must be opened with the appropriate applications.


