Author:
Virginia Floyd
Date Of Creation:
5 August 2021
Update Date:
1 July 2024

Content
- Steps
- Method 1 of 2: Scan (photocopy) a book
- Method 2 of 2: Scanning (speed reading) a book
- Tips
- Warnings
- What do you need
Scanning a book can mean two things: reading the book quickly or digitizing it. People want to scan (read quickly) a book in order to process large amounts of information quickly and efficiently. Scanning (photocopying) is used for other purposes. For example, a favorite book falls apart, but after scanning it, it can be saved digitally. We will tell you how to do both correctly.
Steps
Method 1 of 2: Scan (photocopy) a book
 1 Select your scanner. You have to choose between a flatbed scanner and a roll-to-roll scanner, depending on what you want and what you can afford:
 - A flatbed scanner usually costs less and scans fairly accurately. Its advantage is that you do not need to embroider to scan a book. What's more, the flatbed scanner can scan just about anything that can be put on the glass, not just paper documents. This is a convenient and multifunctional solution, especially for books.
- A roll scanner can scan pages from both sides and is much faster than a flatbed scanner. It takes up the same amount of space, but it is not possible to scan a bound book with this type of scanner. There are other disadvantages as well:
- The moving parts of the scanner that feed the paper are prone to paper jams, which will stop the scanner.
- Roll scanners are not designed to scan books, but to digitize large numbers of single sheets.
- Roll scanners usually produce a less clear image because the pages move as they are scanned.
 2 When buying a scanner, pay attention to the warranty period. A good, though not expensive, roll-to-roll scanner is an investment, so it's worth considering the guarantees offered by third parties. If you are going to use your scanner frequently, you should pay an extended warranty.
 - Renowned guarantee companies like Square Trade are more expensive than less popular ones, but generally you can rely on them.
- The cost and duration of the extended warranty are the main pros when compared to a regular, locally purchased warranty. But factors such as shipping costs (if applicable), confidence in the warranty provider, and the estimated frequency of repairs must also be considered.
 3 Divide the book into separate pages. This is absolutely essential if you are using a roll-to-roll scanner. In the case of a flatbed scanner, this is also desirable in order to get excellent quality images and not damage the scanner, since when scanning a bound book, you have to press on the cover with some force.
 - If there is a shop nearby that offers scanning and photocopying services, you can bring the book to them and ask them to trim the binding with special large scissors. It costs almost nothing and will save you a lot of time; this will eliminate the next few steps and the pages will be free of glue and seams.
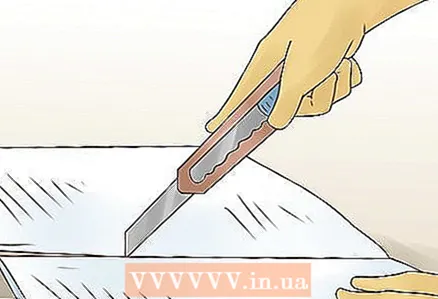
 4 Remove the binding from the book. Despite the apparent complexity, there are several easy ways to accomplish this, for both paperback and hardback books:
 - Hardcover: Use a utility knife to cut the loops between the binding and the pages. Then use a damp, but not wet, sponge to remove the remaining paper.
- Soft binding: Use a stream of warm, but not hot, air from a hair dryer to warm up the glue that holds the pages together. Then just pull the pages out of the binding.
 5 Using a utility knife, divide the pages into groups of 20. You can split 20 pages from start to finish, or you can split the book in half, then each half in half, and so on.
 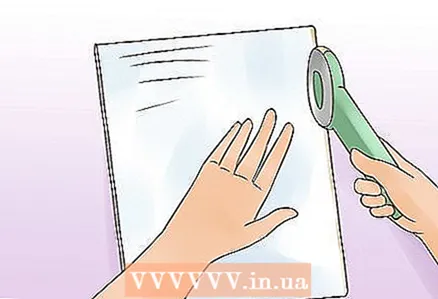 6 If possible, cut off a thin strip of paper with remnants of the glue holding the book together with a sharp knife or industrial scissors. Industrial scissors are optional, but if you do decide to buy one, use the old-fashioned scissors - they can easily cut thin strips.
 - When trimming the edges with the paper circular cutter, fold the pages to make the edges more even.
- Also, for a smoother cut, do not cut many pages at once when using the circular cutter. If you cut with a circular cutter, the margins will be narrower (you can change the margins by cropping). A good scissors and an image editing program like Windows Live are all you need to give your pages a more “professional” look.
 7 Peel off any remaining adhesive from each page to avoid damaging the scanner. If you have used industrial shears or a circular cutter, there may be no residue.
 - Pages can remain sticky; Remove any glue residue completely to avoid paper jams.
- If there are streaks in the scanned images, glue is likely on the lens. Wipe off the rubber adhesive from the lens with a soft cotton cloth dampened with rubbing alcohol or glass cleaner.
 8 If possible, fold the pages in order. If at this stage the pages are jumbled, arrange them.
  9 If you don't have Paper Port installed, buy one or a similar one. Paper Port collects scanned pages into one file, and can also convert from to various formats: PDF, TIFF, JPEG, BNG, etc. The great thing about PDFs is that you can't accidentally change them while you're reading them. For simple scanning, PDF and TIFF are enough.
  10 Also consider installing an image editing program such as Windows Live. With Windows Live, you can align the edges of the page. Jagged edges can appear when the book is divided into separate pages and can be distracting while reading. Take advantage of the "Straighten" and "Crop" functions of Windows Live.
 - If you want, you can make your projects technically correct. Windows Live will help you here - the pages will be the same size and without additional settings.
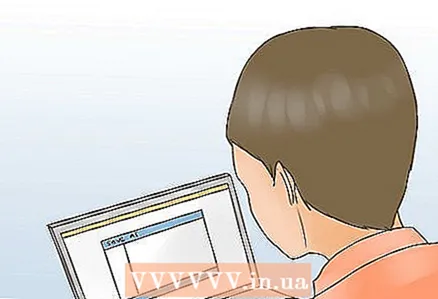
 11 Scan your book, including blank pages. Blank pages are essential, they stop the flow of thoughts. If you do not include blank pages, please leave a note to that effect. For example, if pages 95 and 96 were skipped, check the box on page 94 (write “pages 95 and 96 are blank”), because when reading, missing pages can be confusing for a while. Keep the correspondence between the page number in the book and the number of the scanned page. These numbers should be, if not the same, then at least, shifted by a fixed number, so that when reading you can be guided by the content.
  12 Take care of your scanner, feed paper one sheet at a time. Paper jams that occur when the scanner picks up two or more sheets at once will wear out the scanner more quickly.
 - Pages united by the Paper Port can be separated by it, but if all pages are in one file generated by the scanner, such a file cannot be changed. If you scan each page separately, any mistake can be corrected simply by scanning the page again.
 13 Note how the scanner is numbering pages. If the scanner numbers each page in order, do not change anything.This is ideal for inserting a missed or re-scanned page.
 - If the scanner adds date and time to the page number, set it to simple sequential numbering. This numbering is much easier to work with.
- When working with scanned pages with date and / or time stamped on them, one of the options, though tedious, is manual page numbering in order. Option two: Divide your pages into small groups. This makes it easier to maintain the sequence of the pages.
- Divide your work into parts when using the Paper Port. The Paper Port is significantly faster with fewer pages. Instead of connecting 350 pages at a time, connect 60 pages at a time. It will be significantly faster and will require less memory.
 14 Scan the cover and picture pages in color. When scanning an entire book in color, first scan several pages at different DPI (dots per inch) and look at the size of the resulting pages. Multiply it by the number of pages to estimate the size of the final file.
 - Adjust the DPI by balancing readability and book file size. Colored pages will take up a lot of space. In addition, scanning a page at high DPI will take several minutes, while scanning a page in grayscale at the default DPI will take several seconds.
- Note that every page scanned in color must be processed in an image editing program such as Windows Live Photo Gallery, as text may be faint. In Windows Live, go to exposure settings, then select “lighting” and move the brightness slider to darken the image.
 15 Use grayscale for black and white pages. For each page scanned in this or in color mode, adjust the brightness so that the text is readable. Editing is absolutely necessary in this case, otherwise the pages will be faint.
 - In Windows Live Photo Gallery, go to the exposure setting and move the brightness slider. Adjust the brightness to make the text darker. Then the text will not differ from the text scanned in black and white. Adjusting the brightness will not affect the drawing or photograph.
 16 Scan text in black and white. Set this to the mode, do not select "auto". When set to auto, the scanner will choose between color, grayscale, and black and white, but it is unlikely to choose what you want.
  17 Review the scanned pages. Always save pages as TIFF files because TIFF files are easy to view and edit. Although PDF will be your main format (Paper Port can only merge PDF files), individual pages in PDF format are inconvenient to view.
 - For example, when viewing hundreds of pages in TIFF files, you can simply scroll through them, whereas PDFs will have to open (and close) one at a time. What's more, PDFs cannot be edited, so if you have one PDF with hundreds of pages in which you would like to change a page or two, there is nothing you can do. That is why it is worth saving pages in TIFF files and converting them to PDF later after editing.
 18 After viewing the scanned pages in TIFF files, save them in PDF format. Then, using the Paper Port, combine all the pages into one file. The finished file cannot be split into separate pages if you notice an error. But a single PDF is easier to view.
  19 Organize a good backup system on your or on an external hard drive in case of computer errors, your mistakes or accidental deletion. If the backup system does not work, restore the deleted files from the recycle bin. The scanning process can be confusing and errors are possible. It is best to do scanning when your mind is clear and not fatigued.However, a backup system still does not hurt.
  20 Do not change the structure of the page, especially the margins. A book printed in small print is a good candidate for scanning, but you do not need to crop the page and reduce the margins (for example, if you want to make the book more readable), because the margins for a book are like a picture frame. The page looks better with margins.
 - When reading a book printed in small print on a computer, you can easily enlarge the font using the "enlarge" button. By scanning a book with very small print, you can crop the pages a little, making them a few percent larger and therefore more readable.
Method 2 of 2: Scanning (speed reading) a book
 1 Review the content. The content reflects the structure of the book. Take some time to digest the order of the table of contents before you read on.
 - By reading the content, you create a template in your brain, a basic structure into which the pieces of information will then be folded. If you don’t memorize the structure of the book and immediately start speed reading, your brain will have to create it on the go, as it reads, before it can start organizing information. This takes time and mental effort. Save both by spending 30 seconds exploring the content.
 2 Read the introduction and end of the chapter. In most cases, it will be clear from the introduction what this chapter is about, and at the end, the main thoughts of the author outlined in the chapter will be summarized.
  3 Read the beginning and end of the section. After reading the beginning, you will be able to understand the topic of the section. One or more introductory sentences are usually followed by justification or proof. If done correctly, reading the introductory sentences will be enough to understand the topic; reading the proof is optional.
 - At the end of a section, there is usually a jump to the introductory sentences of the next section. If you read the last sentence of one section and then the first sentence of the next, it is very likely that you will understand the introductory sentences.
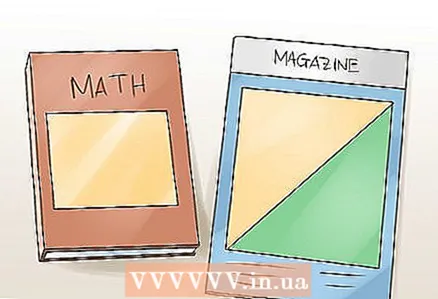 4 Different books require different approaches. An article in a newspaper is suitable for quick viewing, whereas a book on mathematics is not. Before you start speed reading, decide which part of the book you want to scan, and if you can leave some time for more in-depth study.
 - Fiction books are incredibly difficult to scan. It is impossible to say in advance where the plot will turn, and there is no "guide" in the form of content. When reading a fiction book, take a minute or two to read (not scan) the part of the book that you think is important. A little dive into the details will help you better understand the plot.
 5 Stop when it comes to what's important. What's the point in reading if you don't remember or understand the most important parts of the book? Allow yourself to slow down when the story gets interesting. Try to understand well the meaning of the important sections of the book. They will be sort of milestones on your journey through the book.
 - Sometimes the book directly says that an important point will be presented now. Such parts are usually highlighted or framed - it should be clear from this that you should stop here and study this material.
- If you're reading a novel, for example, read the chapter annotation before you start speed reading. This will help you highlight the main parts. When you get to these parts, as you read, you will know where to stop.
 6 Try not to reread the sections. Sometimes people reread sentences and do not understand what they are reading. Don't reread - read more slowly. If you read quickly but twice, you probably won't be able to scan a book as fast as someone who reads slower but once at a time.
 - Cover the line with a dark sheet of paper after reading. This way, you won't be tempted to reread it. Slide the sheet as you read it.
 7 Train, train, train. Exercise at least once a week for 30 minutes. As you practice, notice how many pages you can scan with your eyes during this time while maintaining a high percentage of comprehension. Next week, try to read more in the same amount of time, but without losing the point.
Tips
- Listen to music, radio, or turn on the TV while scanning so that the process is not so boring.
- There are special expensive devices for photocopying (digitizing) books, which are a camera aimed at the book. They are intended for libraries and archives to digitize large fragile-bound books or maps. These devices cost several thousand dollars.
- If there are only a few diagrams or illustrations in the book, scan the entire book in black and white (not grayscale), then scan the figures separately and insert them into the scanned pages. Text scanned in black and white will be more readable, easier to recognize by the OCR system, and the file will take up less space. However, with the free Windows Live Photo Gallery, text scanned in grayscale mode can be made darker and comparable to black and white in readability.
- Clean the inside of the scanner from paper. After you've scanned several books, there will be paper trash in the scanner. Use a can of compressed air, a mini vacuum cleaner, a sweeping brush or rag.
- Read the user manual for the Paper Port and for the scanner. Read a book on scanning. Ask for help online. Ask the people working in the photocopy service.
- Think all the time about how to improve each step of the scan and bring your ideas to life. Increase your scanning speed and make your job easier.
- If you have a copy of Acrobat Pro, you can scan straight to PDF without Paper Port and intermediate TIFF files.
- Unplug the scanner from the wall outlet when not in use to extend the life of the power adapter (which can be expensive to replace). Check out adapters on Ebay.
- Always close the scanner when not in use and be careful when handling it. Close the paper feed tray and remove the paper holder. This will not only help keep the scanner dust free, but also protect these fragile parts from accidental damage - not all scanners are created equal. When using the scanner, be careful not to break the pull-out parts or any other parts that look fragile.
- When the layer of printing glue is thicker, the book breaks apart much more easily. Therefore, when buying a book (for scanning), choose a book with a medium amount of glue. By opening the book to different pages, you will be able to determine the thickness of the glue layer.
- Read on for tips for organizing your files.
Warnings
- Read the instructions for the scanner! This is only an overview article, it does not take into account the specific nuances of working with each type of scanner. Reading the instructions is necessary for faster and more correct use of the scanner, as well as to avoid possible errors.
- Look for a book on the Internet, if it already exists! It will be a shame to "disassemble" your favorite book, and then find out that the electronic version can be obtained for less than $ 5.
- Make sure you do not infringe on copyright for printing and distribution. See the rules for using the book on the inside cover. May be copied for educational and non-commercial purposes only.
- If you have to "take apart" a book into separate pages, make sure that the value of the scanned book is greater for you than the value of the physical copy.
What do you need
- Scanner, optional
- Books to scan
- A paper knife, rug or board for cutting, and a utility knife (if you intend to remove the binding from the book)


