Author:
Gregory Harris
Date Of Creation:
14 August 2021
Update Date:
1 July 2024

Content
- Steps
- Method 1 of 4: Using vinegar and ammonia
- Method 2 of 4: Using hydrogen peroxide and baking soda
- Method 3 of 4: Using oxygen bleach
- Method 4 of 4: Maintaining the grout
- Tips
Grout is a mixture of water, sand and cement that anchors the tiles. It can be difficult to keep it clean. Tile grout easily absorbs dirt and stains, changing its color from white to black. Learn how to clean your grout so that it shines white again. And also how to keep an eye on the grout so that you don't have to clean it too often.
Steps
Method 1 of 4: Using vinegar and ammonia
 1 Do a preliminary cleaning. Before you go into deep cleaning methods, you need to do the usual cleaning of your tile. Clean as usual - sweep and mop the floor. This will remove all debris on the surface and make your job a little easier.
  2 Make a solution. In a bucket or large bowl, stir in about 1.75 liters of warm water, about 125 grams of baking soda, about 80 grams of ammonia, and about 60 grams of white vinegar. Stir the mixture until the baking soda is completely dissolved.
  3 Pour the mixture into a spray bottle. When the mixture is in a spray bottle, it is easier to both apply to contaminated areas and store it. Fill the spray bottle completely with the mixture and shake well.
  4 Spray the grout with the mixture. Start with a small surface, about 30-60 square centimeters in size. Spray the grout with the mixture until it gets wet. Let the mixture soak for 3-5 minutes.
  5 Start cleaning. Use the brush of your choice - a hard bristle brush, a toothbrush, or a household sponge - all are fine. Use a little effort to clean the dirt from the tile joints.
  6 Remove dirty liquid. All of your cleaning will probably create puddles of dirty liquid on your tile. Use a damp cloth to wipe them off by squeezing the liquid into a separate container. This will keep your tile clean at the end.
 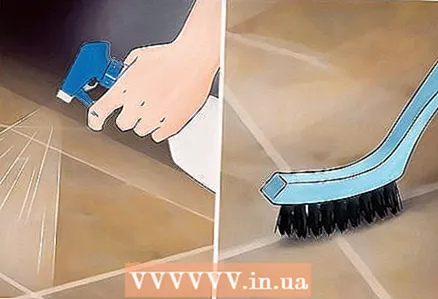 7 Finish cleaning the grout. Using the above procedure, move on to the rest of the grout. Cleaning must be done thoroughly. Concentrate on simply cleaning out the dirty and dark areas of the grout. After that, natural whiteness will appear.
  8 Perform final cleaning. When you are sure that the grout cleaning is complete, then re-clean the entire surface. If you've worked on a countertop or in a bathroom, use a regular cleaning spray and rag to wipe down your tiles. When cleaning the floor, first wash the tiles with a mop and wipe dry.
Method 2 of 4: Using hydrogen peroxide and baking soda
 1 Clean your tiles. Before you start cleaning the grout, you first need to do a regular cleaning with your usual detergent.If you are cleaning the grout on the floor, first sweep and then wash it. If you are cleaning the grout in the bathroom or on the kitchen counter, use your usual detergent and then wipe it off.
  2 Make a paste. In a small bowl, combine the hydrogen peroxide and baking soda until a thick paste. The proportions depend on the consistency and thickness of the paste you want to work with.
  3 Apply your mixture to the grout. Use your finger or a toothbrush to apply the paste to the grout. Start with a small area of about 30 to 60 square centimeters. Apply the mixture in a thick layer so that it completely covers the grout and let it sit for 5-10 minutes.
  4 Start cleaning. Use a small brush like a toothbrush (preferably electric) to clean the grout. Apply pressure on a small area to loosen dirt and stains. If there is still dirt on the grout, add more paste and, after a few minutes of waiting, clean again.
  5 Finish cleaning the entire surface. Continue applying the cleaning mixture to the grout and scrubbing. Work slowly to make sure all grout is cleaned off.
  6 Wash your tiles. Use a damp cloth to wipe off any remaining paste on your tile. Finish up with a regular cleaning routine - using a countertop cleaner or a mop and soap on the floors.
Method 3 of 4: Using oxygen bleach
 1 Wash your tiles. Before starting to clean the grout, wash your tile of all dirty surfaces and crumbs. This way you will avoid extra effort. Follow your usual cleaning routine, like sweeping and washing the floor, or using a cleaning spray to clean your countertop.
  2 Prepare your solution. Oxygen bleach is a safe compound that dissolves bacteria and dirt while bleaching the grout. Mix equal parts oxygen bleach and warm water and let the mixture dissolve.
  3 Apply your cleanser. First, select an area of about 30 to 60 square centimeters and fill it with bleach. Make sure the grout is completely covered with grout. If you find it easier, then you can use a spray bottle. Leave the solution on for 15-20 minutes for it to take effect.
  4 Start cleaning. After the bleach has stood, you can start scrubbing the grout to clean up dirt and streaks. Use a small brush, such as a toothbrush, to scrub the grout. To keep the surface moist and speed up the process, you can add more bleach while cleaning.
  5 Wipe off excess liquid. After finishing the procedure, take a dry cloth and wipe off the dirty water with bleach that is on the tile. Squeeze the rag out between uses if you have collected enough liquid. This will make it easier to finish cleaning at the end.
  6 Continue washing your grout. Continue adding bleach to the grout and scrubbing until you've finished cleaning the entire area. For particularly stubborn stains on the grout, you can leave the bleach on for an hour or longer. The longer the bleach stays on the grout, the easier it will be to remove stains.
  7 Final cleaning of your tiles. Rinse the tiles one last time before doing your regular cleaning. A final cleaning will remove any remaining bleach and grime and your grout will shine like new.
Method 4 of 4: Maintaining the grout
 1 If anything spills onto the grout, clean it up immediately. If the cranberry or orange juice is left on the grout for several hours, then a stain will definitely form in this place. As soon as something spills onto the floor, wipe it off with a damp cloth until there is no trace left.
 - If a stain remains, pour hydrogen peroxide over it. Let it stand for a minute before washing it off with a clean cloth.
- If something spilled onto the grout, then if you leave this substance on the floor, it can also stain it. Collect coffee grounds, lumps of dirt, and other solids shortly after they fall.
 2 Remove small stains regularly. To avoid cleaning too often, remove small stains as soon as they appear. If you want to clean a small area, use the same detergent solution you would use for deep cleaning, but using a spray bottle. You can also try alternative methods for removing small stains:
 - Use a baking soda paste. To make a paste, mix baking soda with a little water, then rub it into the stained areas of the grout. Let the paste soak for a few minutes and then use an old toothbrush to scrub the stains.
- Use white toothpaste. Squeeze some toothpaste over the desired area of the grout, then rub it in with your finger. After a few minutes, brush the area with a toothbrush. Wipe it off with a clean, damp cloth.
- Use a pencil eraser. The pencil eraser does surprisingly well for small stains. It is better to choose a white eraser than to leave colored spots. Alternatively, you can paint the grout the same color as the eraser.
 3 Ventilate the room. Fungus and mold often form in bathrooms, which tend to stay damp and sweaty for hours. Use a range hood after showering or bathing, and wipe down damp tiles to protect your grout from mold.
  4 Apply sealant to the grout. Applying sealant to the grout every year will prevent spills from quickly absorbing into the grout pores. This will help prevent mold and mildew in the bathroom. Select a sealant from your hardware store and apply according to the manufacturer's instructions.
  5 Paint the grout a different color. Sometimes maintaining the whiteness of the grout is simply not practical. If you dye your hair, have kids who like to paint in the kitchen, or just don't want to maintain whiteness, consider purchasing a stain-resistant grout and use it to dye the grout a different color. You can choose a color to match the tiles or a completely different color for contrast.
  6 Replace grout promptly. The old grout begins to crack and crumble, and this makes it worse, as moisture constantly seeps under the tiles. Replacing the grout, if necessary, is not a problem, as this will facilitate the cleaning process and prevent the formation of mold and mildew.
Tips
- Make sure the windows are open and the room is ventilated when cleaning.


