Author:
Alice Brown
Date Of Creation:
27 May 2021
Update Date:
1 July 2024

Content
- Steps
- Method 1 of 4: Soak in water
- Method 2 of 4: Soak in brine
- Method 3 of 4: Dry Salting
- Method 4 of 4: Soak in an alkaline solution
- Tips
- Warnings
- What do you need
Olives have been processed for a long time, which gives these initially bitter fruits a wonderful salty and pungent taste. Choose the processing method that works best for your type of olive. They can be soaked in water, brine or lye, or dry processed - each of these methods can give the olives a distinct flavor and texture. Although this is a lengthy process, processing it yourself will produce exactly the kind of olives you like.
- Processing time (with water): 7-10 days
Steps
Method 1 of 4: Soak in water
 1 Purchase fresh green olives. The water treatment gently removes oleuropein, a substance that gives olives a sharp bitter taste. In fact, green olives are unripe fruits (like green tomatoes), they are not very bitter, so plain water is enough to process them.
 - If green olives are left on the tree, they will ripen and turn purple or black. Water alone is not enough to get rid of the bitterness of ripe olives, and different processing methods are required to process them.
 2 Examine the olives. Make sure they are not wrinkled or bruised. Check to see if they are tainted by insects or birds. If olive trees have been treated with chemicals, wash the fruit thoroughly before processing.
  3 Break up the fruit. In order for moisture to penetrate inside the olives, they must be split. This can be done with a hammer or rolling pin. Beat the olives lightly and try to keep them as intact and intact as possible. You need to split the pulp, but you should not crush the olives or tear them into several pieces. Also, be careful not to damage the bones.
 - If you want the olives to look neat, split them with a knife. Take a sharp fruit knife and make three cuts on each fruit so that the water can freely penetrate into the olives.
 4 Transfer the olives to a plastic bucket and cover them with cold water. Use a food grade plastic bucket with a lid. Pour water over the olives so that it completely covers them. You can press down the fruits with something (for example, a plate) so that they do not float to the surface. Place the lid on the bucket loosely and place in a cool, dark place.
 - Be sure to use a container that is suitable for foodstuffs to keep harmful chemicals out of the water. Glassware will also work, but care should be taken to keep it out of sunlight.
 5 Change the water. Drain the old water and fill the olives with fresh cold water at least once a day. Remember to change the water, otherwise bacteria can grow in it and the olives will go bad. To replace the water, pour the olives into a colander, rinse the bucket, put the olives back and fill them with cold water.
  6 Soak the olives for a week. Change the water every day, and after about a week try the olives to see if the bitterness has come out of them and if their taste suits you. If so, they are ready. If you want the olives to be less bitter, soak them for a few more days (remember to change the water daily).
  7 Prepare the final brine. The olives will be stored in this solution. It is a mixture of preservation salt, water and vinegar. The brine will help preserve the olives and give them a spicy, salty flavor. To prepare the brine, mix the following ingredients (per 5 kilograms of olives):
 - 4 liters of cold water;
- 1 1/2 cups (450 grams) preservation salt
- 2 cups (500 ml) white vinegar
 8 Drain and transfer olives to a storage container. Use a large glass jar with a lid or other suitable container. Wash and dry thoroughly before adding olives. Leave 2-3 centimeters of free space at the top of the jar.
  9 Pour brine over the olives. Pour the brine into the jar so that it completely covers the olives. After that, close the jar with a lid and refrigerate.
 - For extra flavor, you can add lemon peel, rosemary sprigs, roasted garlic, or black pepper to the brine.
- Olives in brine can be refrigerated for up to one year.
Method 2 of 4: Soak in brine
 1 Get fresh olives. Both green and black olives can be soaked in brine. Salt water helps preserve olives and gives them a salty taste. Although this processing takes longer than soaking in water, it is best for ripe olives. Olives such as Manzanillo, Mission and Kalamata are often treated with brine.
 - Examine the olives to make sure they are not bruised or bruised. Check to see if they are tainted by insects or birds. If olive trees have been treated with chemicals, wash the fruit thoroughly before processing.
- You can sort the olives by size. Fruits of approximately the same size are processed more evenly.
 2 Chop up the olives. For the brine to penetrate the fruit, the olives must be cut. Take a sharp knife and slice the olives lengthwise. Do not cut the seeds when doing this.
  3 Pour olives into resealable glass jars. Olives should be stored in sealed containers and glass jars are best for this. Pour the olives into the jars and leave 2-3 centimeters of free space on top.
  4 Pour over the olives with moderately salty brine. Dissolve 3/4 cup (about 230 grams) of preservative salt in 4 liters of cold water. Pour the brine into the jars so that it completely covers the olives. Close the jars and place them in a cool, dark place, such as a pantry or cellar.
  5 Wait one week. During this time, the olives will begin to pickle. Wait for the canned olives to soak in the salt water.
  6 Drain the water. After one week, drain the brine from the cans, which has absorbed the bitterness. Leave the olives in the same glass jars.
  7 Pour the richer brine over the olives. Dissolve 1 1/2 cups (450 grams) of preservation salt in 4 liters of water. Pour the brine over the olives so that it covers them completely. Close the jars with lids.
  8 Store olives for two months. Keep them in a cool place away from sunlight. After two months, taste the olives and see if they taste good to you. If they are too bitter, change the brine and let the olives stand for another 1-2 months. This process can be repeated until the olives taste the desired flavor.
Method 3 of 4: Dry Salting
 1 Get ripe olives. Black oily olives are suitable for dry salting. Olives such as Manzanillo, Mission and Kalamata are often subjected to this treatment. Make sure the olives are ripe and dark. Examine the fruit to make sure it isn't bruised or bruised. Check to see if they are tainted by insects or birds.
  2 Wash the olives. If olive trees have been treated with chemicals, wash the fruit thoroughly before pickling and wait until it is completely dry.
  3 Weigh the olives. Use a kitchen scale to determine the exact weight of the olives. You will need 1 1/2 cups (450 grams) of salt for every kilogram of fruit.
  4 Prepare a container for salting. You can use a wooden fruit crate, about 15 centimeters deep, with two bars on the sides. Line the bottom and sides of the box with burlap and nail or pin it to the top edge. Prepare a second, exactly the same box.
 - You can also line the drawer with gauze, old sheets, or rag napkins. As long as there is enough cloth to hold the salt and absorb excess liquid.
 5 Mix olives with salt. Take a large bowl, place the olives in it, and add 1 1/2 cups (450 grams) of preservative salt or medium-grained salt per kilogram of fruit. Stir the olives and salt well to coat all the fruits.
 - Do not use iodized salt as it will alter the flavor of the olives. You will need preserving salt or medium-grained table salt.
- Don't skimp on salt as it will prevent mold growth.
 6 Transfer the olives to the fruit drawer. Pour the olives mixed with salt into the prepared drawer and cover them with a layer of salt to preserve. Cover the drawer with gauze to keep insects out.
  7 Place the box outside under a canopy. You can also place a tarp under the box to prevent the juices coming out of the olives from staining the floor. It is better to place the box not directly on the floor or the ground, but on bricks - this way you will improve air circulation.
  8 Stir the olives after one week. Pour the olives into a second, clean drawer.Shake it well to mix the olives, then gently transfer them back to the first drawer. As a result, the olives will be evenly covered with salt, and you will be able to select damaged and rotten fruits. Remove spoiled olives.
 - Remove any fruit covered with white, rounded spots (most likely fungus). The fungus often infects areas near the stem.
- Check if the olives are evenly salted. If you find wrinkled and swollen areas on the fruit, the olives should be moistened before placing them back in the salt to dry out the puffed areas.
 9 Repeat this procedure once a week for a month. After a month, taste the olives to see if they have the flavor you want. If the olives are still bitter, continue to salt them for a couple more weeks. All processing should take 4 to 6 weeks, depending on the size of the fruit. When the olives are ready, they will shrivel and soften.
  10 Remove salt. You can put the olives on a sieve and shake off the salt, or take them out of the salt one at a time.
  11 Dry the olives overnight. Spread the fruit out on paper towels or napkins to dry thoroughly.
  12 Store olives properly. Mix them with salt at the rate of 500 grams of salt per 5 kilograms of fruit, so that they are better preserved, transfer to glass jars and cover with lids. Store olives in the refrigerator for several months or longer.
 - You can also mix the olives with extra virgin olive oil and add spices to taste.
Method 4 of 4: Soak in an alkaline solution
 1 Take precautions before handling liquor. Lye can cause burns. Be sure to wear chemical resistant gloves and goggles and do not use plastic or metal containers, including lids, as the alkali will dissolve the metal.
 - Do not process olives with lye in places accessible to children.
- Process olives with lye in a well-ventilated area. Open windows and turn on fans to improve ventilation.
 2 Wash and sort the olives. This method is best suited for processing large olives such as the Sevilla variety. It is suitable for both green and ripe fruits. Remove damaged or dented olives and sort by size if desired.
  3 Transfer the olives to an alkali-resistant container. Remember not to use metal utensils. A large glass or ceramic container is best.
 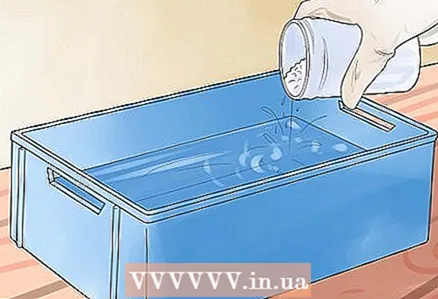 4 Prepare an alkaline solution. Pour 4 liters of water into an alkali-resistant container. Add 60 grams of lye to the water. This will immediately heat the solution. Chill it to 18-21 ° C before pouring it into the olives.
 - Always add lye to water. Never pour water into lye, as this can lead to an explosive reaction.
- Maintain the correct proportion between water and lye. Too much lye will damage the olives, and if you don't have enough lye, you won't be able to process them properly.
 5 Pour the prepared solution over the olives. It should completely cover the fruit. Press down on the olives with a plate so that they do not float, otherwise they will darken on contact with air. Cover the container with cheesecloth.
  6 Stir the solution every two hours until the lye soaks the olives to the very pits. Simply stir the olives for the first eight hours and then press down again with a plate. After eight hours, start checking to see if the lye has penetrated to the pits. Wear chemical resistant gloves and select a few of the largest fruits. If they are easy to cut to the very bone, they have softened and their flesh has turned yellowish-green throughout the depth, then the olives are ready. If the flesh remains pale in the middle, soak the olives for a few more hours.
 - Never handle olives with your bare hands. If you don't have chemically resistant gloves, spoon out the olives and wash them under cold water for a few minutes before checking to see if they're ready.
 7 If necessary, replace the solution with a fresh one. If after 12 hours the olives have retained their original green color, then the lye probably has not penetrated to the very pits. In this case, drain the used liquid and refill the olives with fresh lye solution. If after the next 12 hours the olives are still not pitted with lye, repeat the procedure.
  8 Soak the olives in water for two days. Change the water at least twice a day. This will rinse the olives and remove the lye from them. With each change of water, it will become lighter and lighter.
  9 On the fourth day, taste the olives. If they are sweet and oily, with no bitterness or soapy smell, proceed to the next step. If the olives taste like lye, keep soaking them in water until they taste mild and the water is clear.
  10 Soak olives in mild brine. Transfer the olives to a glass storage container. Dissolve 6 tablespoons (120 grams) of preservative salt in 4 liters of water and pour over the olives until they are completely covered with water. After a week, the olives can be eaten. Store them in brine in the refrigerator for several weeks.
Tips
- Shriveled olives may round slightly if soaked in olive oil for several days.
- In case of a lye burn, keep the burned area under running tap water for 15 minutes, and then consult a doctor. Never try to neutralize a lye burn with lemon juice or vinegar, as the mixture of acid and lye can be dangerous.
- To determine if the brine is suitable for soaking olives, dip a raw, inshell egg into it. If the egg doesn't sink, then the solution is fine.
- Use only food grade lye for processing olives. Never soak olives in pipe cleaners or other household products that contain lye.
- The brine can be made more saturated by boiling a solution of salt in water and then chilling it before pouring it into the olives.
Warnings
- Do not taste olives when they are soaked in alkaline solution, and then wait another three days for them to soak in water.
- Foam may form on the brine surface. Keep the olives completely submerged in the liquid and skim off the foam.
What do you need
- Chemical resistant gloves
- Protective glasses
- Two wooden boxes
- Burlap, gauze, old sheets or rags


