Author:
Florence Bailey
Date Of Creation:
22 March 2021
Update Date:
27 June 2024

Content
- Steps
- Method 1 of 4: Triangle Tie
- Method 2 of 4: Necklace Tie
- Method 3 of 4: Vintage turban
- Method 4 of 4: Bandage
- Tips
The standard square scarf can be used as an accessory for many outfits and should be a must-have for anyone trying to be different and with an alternative take on style and fashion. These scarves are not expensive, but they look creative and unusual. In addition, they are quite voluminous and, with a little knotting experience, fit very well. Below are instructions that you can read to experiment with several options for tying a scarf.
Steps
Method 1 of 4: Triangle Tie
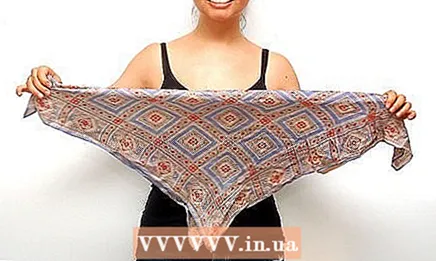
 1 Triangle shape. Spread a handkerchief on the floor or table in front of you.
 - Fold it in half diagonally so that it forms a triangle.It does not have to be perfect, a slight negligence will even come in handy.
 2 Take the two ends of the scarf and lift them up. As a result, they should make up two small corners of the triangle.
 - Next, turn (twist) the ends so that they have a tapered appearance.
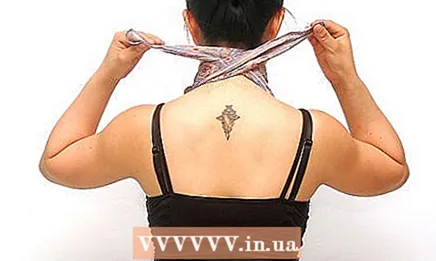 3 The remaining triangular section of the scarf should be located on the chest. Bring the other two ends of the scarf behind the back of the neck.
 - Swap them in such a way that your left hand is holding the right end and your right hand is holding the left end.
 4 Pull the ends around your neck. So that the ends are on the chest like a scarf.
 - Everything should be triangular with both ends hanging down on both sides. If the scarf is tied too tightly around your neck, simply grab the front of the scarf and pull gently to loosen the scarf.
- The knot can be high or low on the chest as you like.
- Remember, the scarf should be comfortable to wear and you should be comfortable in it.
Method 2 of 4: Necklace Tie
 1 Fold the scarf into a triangle. With this tying method, you do not need to use any surface. br>
 - Place the scarf over your chest. Everything should be evenly centered.
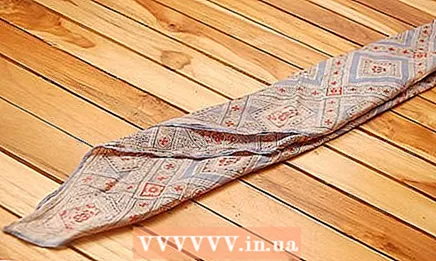
 2 Take the two points of the scarf in the middle, divide it into two equal parts and fold. Wrap the ends around your neck so that they fall over your chest.
 - Tie the tie (scarf) loosely or more tightly, as you see fit.
- Leave the knot over the scarf, or hide it in the folds.
- You can lock the knot to the right or left, feel free to experiment and do not be afraid if the scarf looks asymmetrical.
 3 Spread your scarf! Your scarf should be comfortable enough for you and you should feel comfortable.
 - Depending on the size of your scarf, you can play with the length by tying it in one or two layers. The knot can be locked to the side or under the neck, creating the desired volume.
Method 3 of 4: Vintage turban
 1 Fold the two dots of your scarf in the center to create a double strip. By tying it around your head, you allow yourself to remove your hair and protect it from the wind (they will not rush in different directions).
 - The ends can slightly overlap each other, they can be tied in a knot, or you can pry them under the scarf itself; after wrapping the scarf around your head, do not forget to hide all the corners.
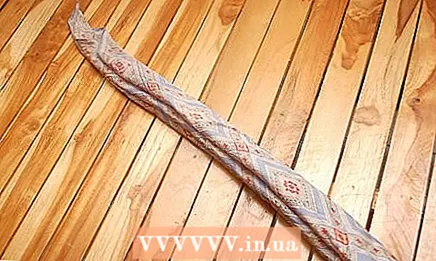 2 Fold the scarf in a line. You have two options.
 - Start at one end and fold until you reach the other.
- Do this on each side until you get to the center.
 3 Take this line and wrap it around your head. Start tying the scarf at the base of your neck.
 - If you want, you can make the scarf a little asymmetrical, to do this, at the beginning of tying, shift its center slightly to the side.
 4 Twist (wrap) the ends around each other in front of you. Connect them at the top of your forehead. It will hold on better and be less likely to fall. Twist it tighter!
 - It should resemble a kind of intertwined "x" shape.
- Tailor your hair to the shape of the knitted scarf.
 5 Tie the ends at the back. Tie the scarf over your hairline.
 - Tuck the loose ends into the inner (bottom) layer of the scarf.
Method 4 of 4: Bandage
 1 Make a wrist band. Small square scarves can be worn on the wrist as a bandage, bracelet.
 - To do this, put a handkerchief and fold it into a triangle.
- Grasp the center scarf and fold it in the middle so that the scarf forms a narrow trapezoid shape.
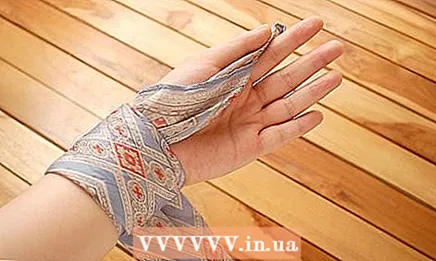 2 Such a scarf is worn as a bandage on the wrist. While tying the bandage, hold the free end with your thumb and forefinger.
 - Use your hands to adjust the bandage as needed to make it look neat.
- Use this bandage as you like, it can be straightened and turned over.
 3 Grasp the opposite end of the scarf and wrap it tightly around your wrist.
- Then release and tuck the remaining ends inward, wrapping them around the bandage.
Tips
- Use scarves of various colors, shades, patterns, prints.
- Mix and match them with your clothes to create different looks.
- Square scarves are popular with both guys and girls. Many guys choose to wear them around their wrists.
- Until you try and practice different ways of tying a scarf, friends can help you (it is especially difficult to make a bandage on your wrist, since it will be difficult to do it with one hand at first).


