Author:
Carl Weaver
Date Of Creation:
28 February 2021
Update Date:
1 July 2024

Content
- Steps
- Method 1 of 5: Inspecting the Valves
- Method 2 of 5: Using the dishwashing detergent method
- Method 3 of 5: Inspecting the air mattress
- Method 4 of 5: Submerging Your Mattress
- Method 5 of 5: Using the garden hose method
- Tips
- Warnings
- What do you need
Air mattresses are comfortable, easy to store, and an indispensable item when visiting friends who want to stay overnight. However, even with a tiny leak, the sleeping person will end up on the floor in the morning. Finding leaks can be like finding a needle in a haystack, although manufacturers recommend several methods for finding leaks. First, consider checking the valves, as this method will most likely reveal the problem. If that doesn't work, try one of the other methods.
Steps
Method 1 of 5: Inspecting the Valves
 1 Remove sheets and all bedding from the air mattress. You won't be able to see holes or leaks in the mattress when bedding is on top of them.
 - Move the bedding to a safe place away from the area where you will be looking for leaks so that they do not get in your way.
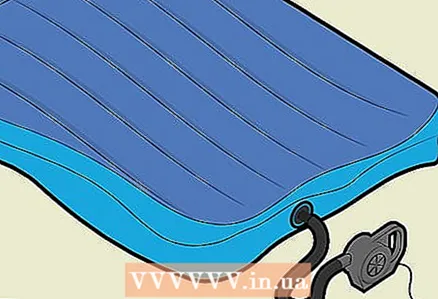
 2 Move the inflatable mattress to a location where there is enough room to manipulate it. You will need to walk around the mattress, turn it over and inflate it.
 - If you live in a tent outdoors, it is a good idea to do so inside the tent, away from wind and noise.
- Make sure the lighting is bright enough. You will have to examine the mattress very carefully to find the holes.
 3 Fill the mattress with air as much as possible, but so that there is no risk of rupture of the mattress. Air mattresses are not designed to be filled with high pressure sources such as air compressors.
 - You can inflate it yourself or use an air pump to inflate the mattress.Many air mattresses come with pumps to make inflation easier.
- Don't inflate your mattress too much. Most manufacturers warn that this could be causing the mattress to rupture.
 4 Examine the valve. It is a good idea to do this before looking at the rest of the mattress, because the valve is a frequent source of leaks. Since valves are a major source of leaks, doing this in the first place can save you a lot of time instead of looking for leaks using other methods.
 - Make sure the valve is securely closed.
- For double locking valves, make sure the valve plug is fully inserted into the valve base.
- If the problem is with the valve, then it can hardly be corrected. However, if the valve plug does not close against the valve stem, you can try inserting a thin piece of plastic for a quick fix.
- If the valve plug is fully inserted into the valve base and the valve stem is fully depressed at the foot behind it, then you need to look for the leak on the mattress itself.
Method 2 of 5: Using the dishwashing detergent method
 1 Add some dish soap to a spray bottle with warm water. Stir well to make sure you can get enough soap all over the mattress.
 - If you don't have a spray bottle, you can use a soapy damp cloth.
- A sponge dampened with soapy water or soap that produces bubbles will also work.
 2 First of all, spray or wipe around the valve. Escaping air will cause bubbles to form on the surface. Make sure your mattress is fully inflated.
 - Always check the valve area first with any method, as valves are a common source of leaks.
- If you see bubbles near the valve, inspect it to make sure it is properly secured.
 3 Spray on surfaces gradually. Start with the seams and continue on to the rest of the fabric.
 - The leak will be revealed with soap bubbles.
- Don't worry if soap gets on the mattress. You can wipe it off later, the mattress will dry.
 4 Mark leaks with a permanent marker as soon as you find them. The permanent marker will not smudge on the wet mattress surface.
 - It will be easier for you to mark the mattress if you use a towel to dry the area first.
- You can also use a piece of duct tape or a marker to sharpen your mark once the mattress is dry.
 5 Dry the mattress in the sun or wind for one to two hours. The seams will take longer to dry.
 - If you do not dry the mattress before storing it, mold can form. It is important to make sure the mattress is 100% dry before setting it aside.
- Before you can use any kind of duct tape to restore your mattress, it must be 100% dry.
Method 3 of 5: Inspecting the air mattress
 1 Examine the air mattress carefully. You must do this while it is still fully inflated.
 - Even a tiny opening can become visible when the mattress is inflated.
- Do this in a place where there is sufficient light.
- Check everything carefully - bottom, top and side.
- Make sure to visually inspect the seams on the mattress, as seams are a common area for damage to the mattress.
 2 Slowly slide the palm of your hand along the surface of the mattress. You can often feel the escaping air “touch” your skin.
 - Before doing this, you can wet your hand with cold water. Escaping air will increase the rate of evaporation from your skin and make your hand feel colder.
- Move your hand slowly along the surface of the mattress. If you move too fast, you may not notice the slight sensation of air coming out.
 3 Press down on the mattress with your hand and listen for leaks. Move, listening, on the surface of the mattress.
 - Your ears are more sensitive to the sound of the air coming out. The air coming out will make a hissing sound.
- Listening to the escaping air is more effective in finding large holes or leaks, but not small ones.
- Listen especially carefully around the seams of the mattress, as this is the most common area for leaks.
 4 Mark the leak with a pen or piece of duct tape. You can then pinpoint the location of the leak to fix it.
 - Some manufacturers provide instructions on how to fix the leak. Others will recommend that you send the mattress to them for repair.
- Do not attempt to repair your mattress without following the manufacturer's instructions. Different methods are suitable for different materials.
- Once you've found one leak, inspect the rest of the mattress. More than one hole or break may be causing the problem.
Method 4 of 5: Submerging Your Mattress
 1 Check the label of your air mattress. Some manufacturers do not recommend immersing their products.
 - Immersion of an air mattress involves contact with a large amount of water. The fabric may become damp.
- As soon as the mattress gets wet with water, the quality of the seams can lose strength. The protective coating on synthetic fabrics may also start to peel off from the fabric.
 2 Partially inflate the mattress with air. If the mattress is not even partially inflated, you will not be able to see the air coming out underwater.
 - If you fully inflate the mattress, it will be very difficult to submerge it in the pool or tub.
 3 Submerge the base with the valve closed in a pool or tub filled with water. Press around the base of the valve.
 - See if this is causing air to escape from the valve.
- Escaping air creates a stream of bubbles around the leak. Look for them around the valve as you apply pressure.
- Submerge the pieces of fabric under water. Look for bubbles indicating escaping air from a leak.
- Do this section by section. It is easier to look at a small area than trying to find leaks on the whole mattress at once.
- Pay close attention to the areas around the seams. Holes and leaks are most common in the seam area.
- Mark the leak with a permanent marker as soon as you find the source. A permanent marker is less likely to smudge on a damp surface.
- You can partially towel dry the area around the leak to make it easier to mark the leak.
- Once the mattress is dry, you can sharpen your mark by placing duct tape or a large mark near the leak.
 4 Dry the mattress in the sun or wind for an hour or two. The seams will take longer to dry.
 - If you do not dry the mattress before storing it, mold may develop later. It is important to make sure the mattress is 100% dry before you put it away.
- Before you can use any kind of duct tape to repair your mattress, it must be 100% dry.
Method 5 of 5: Using the garden hose method
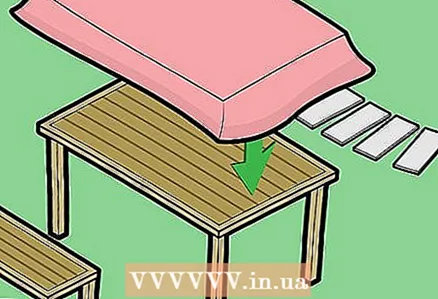 1 Use a table outside to do this method. If your table is wooden, cover it with a blanket, newspaper, or a vinyl tablecloth.
 - It will be annoying if the wooden table gets too damp. This method requires the use of a hose and a lot of water.
- You can also use a terrace or patio to do this method. If you are working on a wooden surface, make sure it is protected.
 2 Install a garden hose and flood the area around the valve with water. Do this slowly as the leak may only be visible for a few seconds.
 - Concentrate on looking for bubbles where the water is flowing.
- Bubbles escaping around the valve can indicate where there is a leak in the valve. Check the valve to make sure it is properly secured.
 3 Fill the rest of the mattress with water. Use a small stream of water and work slowly.
 - Concentrate on looking for a stream of bubbles coming out of the leak on the mattress.
- Examine the area around the seams for bubbles.This indicates escaping air and seams are the most likely location for leaks and holes.
 4 Mark the leak with a permanent marker once you've found the source. A permanent marker is less likely to flow on a damp surface.
 - You can partially dry the area around the leak with a towel to make it easier to mark the leak.
- Once the mattress is dry, you can sharpen your mark by placing duct tape or a larger mark near the leak.
 5 Dry the mattress in the sun or wind for an hour or two. The seams will take longer to dry.
 - If you do not dry the mattress before setting it aside for storage, mold can form. It is important to make sure the mattress is 100% dry before you put it away.
- The mattress must be 100% dry before you can use any kind of duct tape to fix it.
Tips
- Using soapy water makes the bubbles more visible when the liquid covers the source of the leak.
- Rinse the soap off the mattress when you're done and let it dry before proceeding with any kind of patching.
- Consult the manufacturer for information on how best to repair the leak. Some manufacturers send repair kits free of charge or provide advice.
- When filling the mattress, light the incense stick and let the smoke fill the mattress as well. When the air comes out of the hole, the smoke will come out as well.
- You might be better off buying a new mattress. Weigh the time it will take to identify the leak.
- Try using a sound decibel app on your smartphone. Cut out all nearby noise and operate your phone on the mattress surface and look for sound amplification. To check and confirm a leak, move your lips closer to the area, they are more sensitive.
- Place the mattress on a large area and lie on it and see if you can feel the air coming out.
- Some methods will instruct you to put water into the mattress through the valve. Do not do this as it is difficult to dry the inside of the mattress and the water in it can contribute to mold growth. This will ruin your mattress.
Warnings
- Do not place the mattress on a pointed object while looking at it.
- Do not inflate the air mattress too much. This could lead to an explosion.
- Do not pour water into the air mattress. There is no way you can dry it out, and mold will develop.
- Make sure the mattress is 100% dry before storing to prevent mold and mildew.
What do you need
- Soapy water solution.
- Spray
- Garden hose with water
- An outdoor table or surface to work on


