Author:
Gregory Harris
Date Of Creation:
12 August 2021
Update Date:
22 June 2024

Content
Plastic molding can be a fun, inexpensive way to spend time with the whole family. With a little time and ingenuity, you can make parts for a dollhouse and equip it with all the necessary furniture, or build an entire city for a model train. Beads or pendants for jewelry can be made using molded plastic.You can make a replacement for a broken plastic part in just a few hours, instead of waiting days for it to be mailed to you. You can buy specialty plastics at a toy or hobby store. Plastic comes in various colors, or you can
Steps
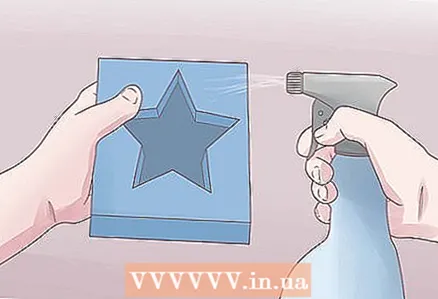 1 Thoroughly clean the mold by spraying it with water to clean any small indentations and threads that will appear on the finished product. Lock the mold at the sides if necessary to keep it upright. For very small pieces, you can glue the mold to a larger piece of plexiglass or ceramic tile for added stability.
  2 Spray a thin layer of mold release oil and let dry.
 3 Wear rubber gloves and safety goggles. This step is critical, as liquid plastic can cause loss of vision if splashed in the eyes. Long sleeves will also help protect your skin from allergies due to prolonged exposure to plastic.
  4 Measure out 2 pieces of plastic in 2 different flexible plastic cups that can be squeezed at the top to form a spout. Pour the contents of 1 cup into another, and pour the plastic from the glass into the glass several times to mix it thoroughly.
 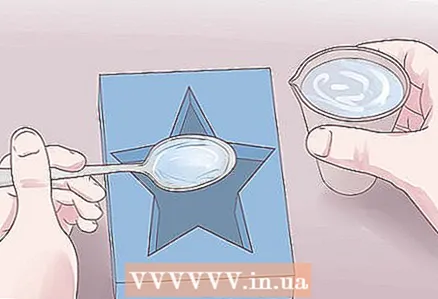 5 Using a spoon, pour a layer of liquid plastic into a shallow mold, then gently fill the mold by pouring the plastic from the cup using a makeshift spout.
- For deep or 2-piece molds, pour liquid plastic into the mold using a food rack or other long stick to guide the plastic to the bottom of the mold.
- If you see air bubbles forming, pierce them with a toothpick or blow lightly on them to smooth them out.
 6 Spread the plastic evenly over the top of the mold using a metal spatula.
 7 Allow the plastic to dry completely according to the injection molding manufacturer's recommendations. You can speed up the drying time by using a handheld hair dryer at low power. Do not hold the hair dryer in one position, instead move it in a circular motion back and forth over the surface of the plastic mold.
Tips
- Set the mold flat on a work surface covered with paper towels or other clean paper. Newspapers are not recommended as the paint can print on your mold or finished plastic parts.
- Newer molds tend to have a thin layer of cornstarch inside to prevent them from sticking to each other. It is generally a good idea to sprinkle cornstarch on the mold before storing it for an extended period of time to protect it.
- Check with your liquid plastic manufacturer how much it will shrink as it hardens. This is very important to keep in mind when choosing the size of the products.
Warnings
- When mixing and pouring plastic, work in a well-ventilated area.
- When making forms, be careful not to use copyrighted items as the basis for them. Some of the most common copyright infringements occur when using cartoon characters, so be careful.
What do you need
- Form
- Liquid plastic
- Transparent flexible plastic cups
- Metal spatula
- A spoon
- Food sticks
- Paper towels or clean paper * Toothpicks
- Hair dryer
- Timer or clock
- Latex gloves
- Eye protection


