Author:
Eric Farmer
Date Of Creation:
4 March 2021
Update Date:
1 July 2024

Content
- Steps
- Method 1 of 3: Writing text vertically
- Method 2 of 3: Rotate the text box (in Word 2007 and later)
- Method 3 of 3: Rotate text (in Word 2003 and earlier)
- Tips
- Similar articles
Learning how to change the direction of printed text comes in handy for creating stylized newsletters, flyer ads, and readable table headings. This article will show you how you can change the direction of text in both older and newer versions of Microsoft Word.
Steps
Method 1 of 3: Writing text vertically
 1 Use this method to create vertical lettering while maintaining the vertical orientation of the letters. This method allows all letters to be written one below the other in a tall, narrow heading. If you also want to change the orientation of the letters so that you have to tilt your head to read the text, skip to other methods.
  2 Insert a text box into your document. By using a text box, it will be much easier for you to adjust the position and orientation of the text. Follow the steps below to insert a text box into a Word document.
 - Word 2007 and later... On the menu ribbon at the top of the window, click the Insert tab, then click the Text Box button and select Draw Text Box. Click on the sheet of the document and stretch the field of the required size.
- Word 2011 for Mac and later... Select the Home tab in the ribbon, then on the right, click the Text Box button and draw a text box in your document.
- Word 2003 / Word 2008 for Mac and earlier... Choose Insert → Text Box from the menu, and then draw a text box in the document.
 3 Write your text. Click on the text box and enter the text you want to give the vertical orientation. If you've already entered this text in your document, just copy and paste it into the text box.
  4 Click on the text box. A rectangle appears around the typed text. There will be a circle in each corner of the rectangle. These circles are handles for dragging the corners of the rectangle and resizing the text box.
  5 Resize the text box. Hold down the mouse button on one of the corners of the text box, and then move the cursor. You need to make the text box tall and narrow.When it gets too narrow to fit two letters side by side, the label will turn vertically and the letters will be positioned one under the other.
 - If the text box rotates or moves without resizing, then you just clicked on it incorrectly. Try clicking on the corner of the text box again.
Method 2 of 3: Rotate the text box (in Word 2007 and later)
 1 Check the version of Word you have installed. This method is suitable for Word 2007 and later versions of the program on Windows, as well as for Word 2011 for Mac and later versions. If you do not know for sure the version of your program, but it has a menu "ribbon", then this method is suitable for you, so you can proceed to the following steps. If the program does not have a menu ribbon, just go to the next method.
 - If the menu ribbon is displayed as a list of tabs "Home", "Insert" and so on, click on one of the tabs to activate the extended display of the ribbon.
 2 Insert a text box. Click the Caption button on the ribbon. In different versions of Word, it can be found either in the Home tab or in the Insert tab.
  3 Enter text in the text box. Click on the text box and type the text you want to expand. Note that after clicking on the text box, its border should appear.
 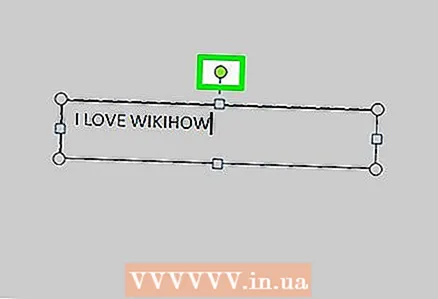 4 Click on the circle above the text box. Notice the line that extends upward from the border of the text box and ends with a circle. Click on this circle and continue to hold down the mouse button.
  5 Drag the circle to rotate the text box. Hold down the mouse button and move the cursor to rotate the text box.
 - If you click on the text field after rotation to edit the text, then the text can take its normal orientation. This is done to make it easier to edit the label. When, after editing the text, you click elsewhere in the document outside the text box, the text inside the box will revert to its settings.
 6 To perform a precise rotation of the text when you rotate the text box, hold down Shift. This will allow you to rotate the text box strictly at an angle of 30º, 45º, 75º, or 90º, making it easier to create parallel headings if needed.
  7 Alternatively, use the menu commands to rotate the text.
- Double-click on the border of the text box to activate the Format menu tab, or simply click on the Format tab in the ribbon.
- Click on the Text Direction button in the ribbon. In some versions of the program, it can be represented by a small icon without a signature with the image of vertical text.
- Select one of the text layout options offered by the program.
Method 3 of 3: Rotate text (in Word 2003 and earlier)
 1 Check your program version. This method is suitable for Word 2003 for Windows, Word 2008 for Mac, and earlier versions of programs.
  2 Insert a text box into your document. On the menu bar, click "Insert" and select "Text Box" from the drop-down list. Click on the gray rectangle that appears to enter text into it.
  3 Move and resize the text box if necessary. To move the text box, click on its outer border and drag; to resize the text box, you need to click on the blue circles or squares and drag them.
  4 Click on the text field. This will allow you to format the text within it separately from the rest of the document.
 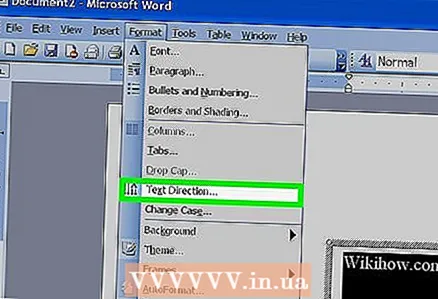 5 On the Format menu, select Text Direction from the drop-down list. This will open a dialog box where you can choose the orientation of the text you want.
 - Not all older versions of programs have this ability to rotate text. If you were unable to rotate the text using this method, or if you simply do not see such items in the menu, go to the next step.
 6 Insert a WordArt instead of the text box. Select Insert → Picture → WordArt from the top menu. Enter your text and style it.
 - Subsequently, you will not be able to edit the text as it is converted to an image.
 7 Rotate the WordArt. Click on the newly created image to display its borders. A circle-ending line appears above the top border. Click on the circle and drag it to rotate the drawing.
 - To reduce the number of possible options for skewing text when rotating an object, hold down Shift.
Tips
- To rotate the text in the table, select the required cells. Right-click on the selected area, and then select "Text Direction" from the context menu. In Word 2003 and earlier, choose Format → Text Direction from the top menu instead.
Similar articles
- How to apply conditional formatting in Excel
- How to create and set symbols in Microsoft Word
- How to remove horizontal line in Word
- How to add a font to Microsoft Word
- How to turn a scanned document into a Microsoft Word document
- How to rotate text in Microsoft Word
- How to delete a blank page in Word
- How to convert Excel to Word


