Author:
Gregory Harris
Date Of Creation:
8 August 2021
Update Date:
1 July 2024

Content
- Steps
- Method 1 of 4: Run the flight simulator
- Method 2 of 4: Using the control board
- Method 3 of 4: Controlling the Ship
- Method 4 of 4: Landing
- Tips
- Warnings
- What do you need
If you have a version of Google Earth that was released on or after August 20, 2007, you must have access to a flight simulator. Google Earth Flight Simulator immerses you in reality using satellite photos. Depending on your system, this option can be enabled by pressing the key combination Control + Alt + A, Control + A, or Command + Option + A, and then pressing the Enter key. After this option has been activated once, its icon will be permanently highlighted in the toolbar. Starting from version 4.3 of the program, the option does not need to be enabled, it is enabled by default. Currently, flight simulation can only be performed on F-16 Fighting Falcon and Cirrus SR-22 aircraft. You will definitely like it, you just have to try it.
Steps
Method 1 of 4: Run the flight simulator
 1 Open the flight simulator. Open the drop-down Tools tab on the top toolbar of Google Earth.
 - If you have an older version of the program than 4.3, start the flight simulator by pressing + Alt + A, Control + A, or Command + Option + A, and then pressing Enter. after this option has been activated once, its icon will be permanently highlighted in the toolbar.
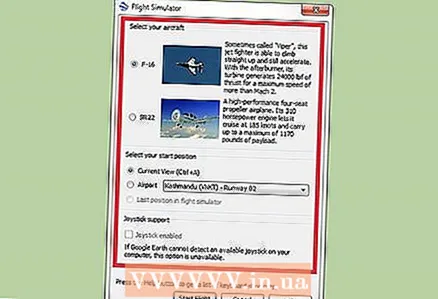 2 Set your personal preferences. You should have a small window open, which consists of three parts: aircraft type, launch position and joystick.
 - Aircraft. Select the plane on which you would like to fly. The SR22 is slower and easier to fly, making it a good choice for beginners. The F-16 is suitable for advanced users. In this guide, we use the F-16 as an example.
- Start position. You can set takeoff from the airport of any large city or take off from the point where you were last using Google Earth. Newbies are better off starting at New York Airport.
- Joystick. You can use the joystick to control the planes.
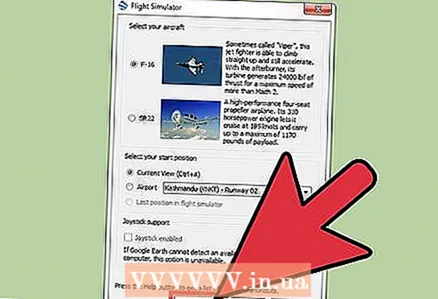 3 At the bottom of the window, click the "Start flight" button.
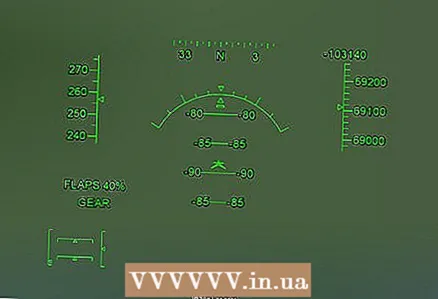 4 Wait a few seconds for the map to load.
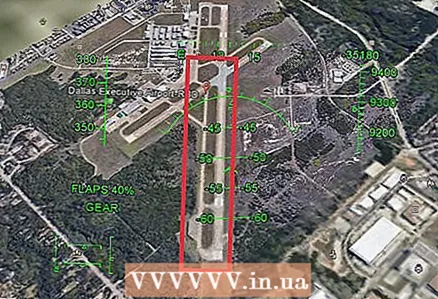 5 Select all the airports where you want to land regularly. Since it is nearly impossible to see the runways and runways without some extra help, draw lines along the runways. Paint the stripes in different colors using 5mm thick lines. The stripes are now clearly visible from medium heights.
 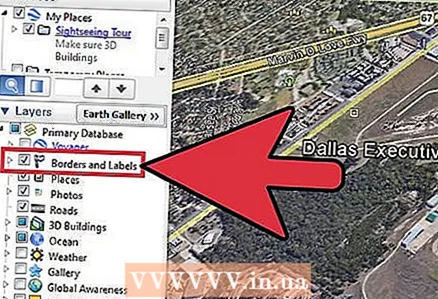 6 Open the side panel. Turn on the Borders and Transportation option. This will also help you navigate.
Method 2 of 4: Using the control board
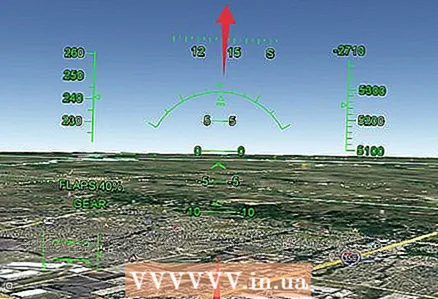
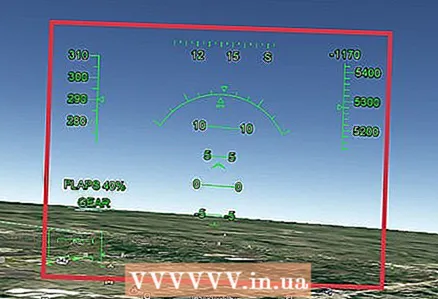 1 Find the control board. On the screen, you should see an area with a lot of green. This is your control board.
 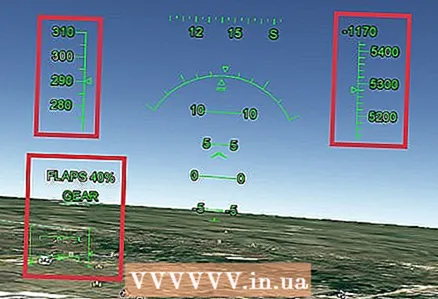 2 Get to know the scoreboard.
- The dial at the top shows the speed in knots. Nearby at the top is a device displaying your course. On the right you will see a small button that says Quit Flight Simulator. Click on it if you want to exit the simulator completely. Below is the number 0. This number represents the vertical speed. Sometimes this number will be negative, which means that you are declining.
- Below is your altitude in feet above sea level.At the moment, this figure should be equal to 4320.
- In the center of the screen there is a sector with other data. This is your main control board. The arch shows the roll angle. Parallel lines are the slope in degrees. Thus, if this figure is 90, it means that the vessel is pointing up.
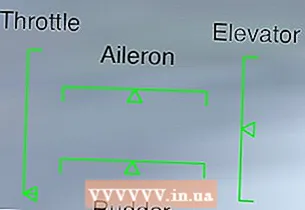 There is another panel on the bottom left. The left side is the throttle, the top is the aileron. On the right is the elevator, and below is the rudder.
- There is nothing else at the top, but the flap and landing gear indicator will be displayed there later. The SR22 is equipped with an automatic chassis so you have nothing to worry about.
Method 3 of 4: Controlling the Ship
 1 Remember that the control is inverted. Therefore, if you move the mouse down, the nose of the plane will go up and vice versa.
  2 Prepare for takeoff. If the plane starts to move to the side, press on the English layout "," to steer the plane to the left and "." to go right.
 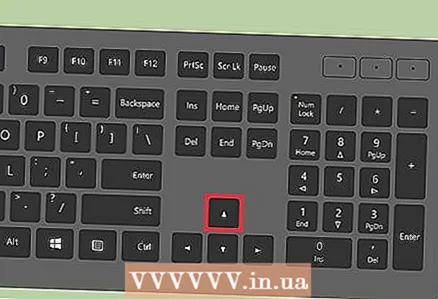 3 Take off. Press the takeoff button and then the PageUp button on your keyboard to boost the propulsion and propel the aircraft along the runway. As soon as the plane began to move, move the mouse down. The first speed of the F-16 allows it to accelerate to 280 knots. Upon reaching 280 knots, the plane should take off.
 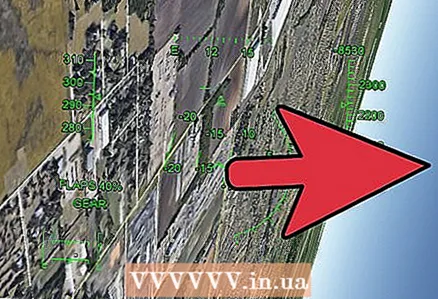 4 To turn right. Move the cursor to the right until you see the ground on the right side, and then move the cursor to the bottom of the screen. Thus, you turn right.
 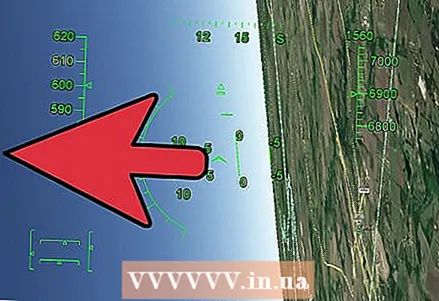 5 To turn left. Move the cursor to the left until you see the ground on the left side, and then move the cursor to the bottom of the screen. Thus, you will turn left.
 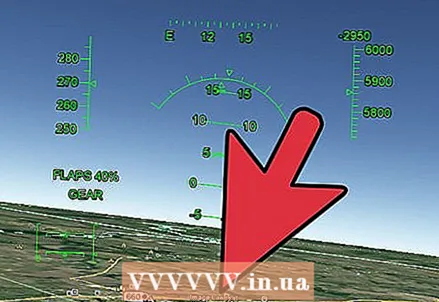 6 To fly up. Aim the plane towards the top by moving the cursor to the bottom of the screen.
 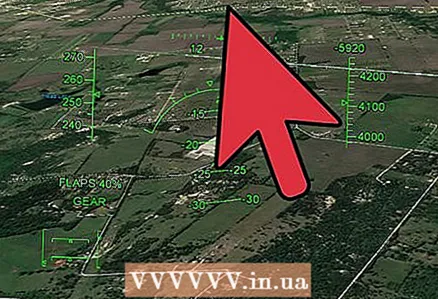 7 To fly down. Aim the plane downward by moving the cursor to the top of the screen.
 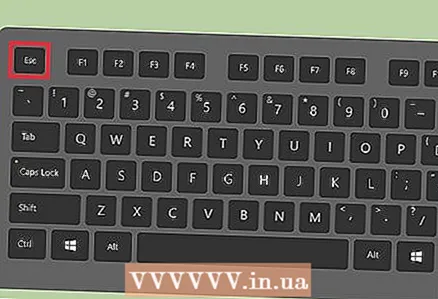 8 If you want to exit, just press the Escape key.
Method 4 of 4: Landing
 1 Fly towards the airport where you want to land. Increase overclocking to maximum. Open the flaps and landing gear. You should be flying at a speed of about 650 knots.
 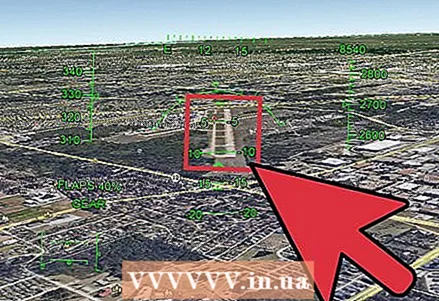 2 Come up to the runway. When you are ready to land, align the boat with the landing strip so that it is centered on the screen.
 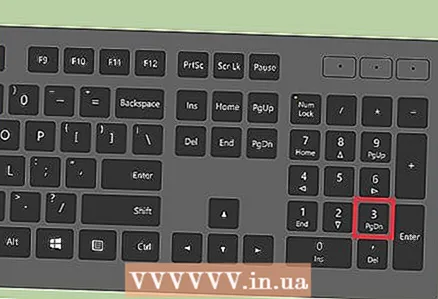 3 Slow down completely. Hold the Page Down key to decrease the speed. You should start to lose momentum immediately.
 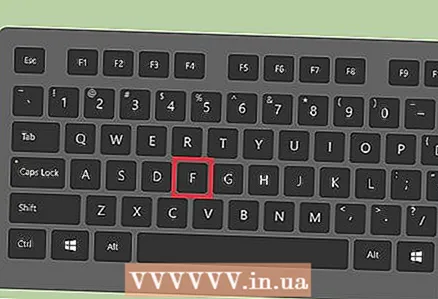 4 Press the F key on the English keyboard to adjust the flaps. This will slow the aircraft down. You will also find it a little more difficult to steer the boat. Go to flaps 100%.
 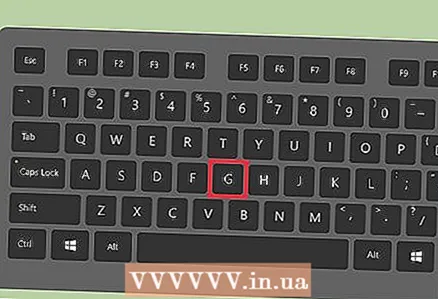 5 Extend the chassis by pressing the G key. This option is only applicable to the F-16 aircraft model.
 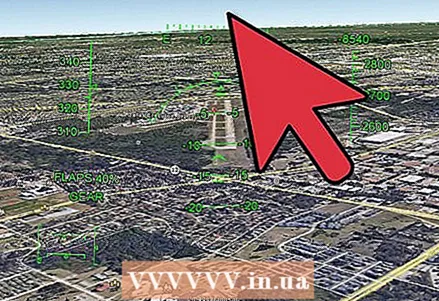 6 Slowly start moving the cursor up to decrease.
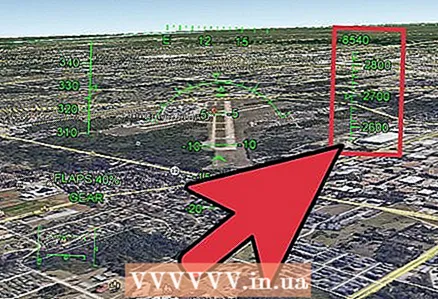 7 Keep track of your flight altitude.
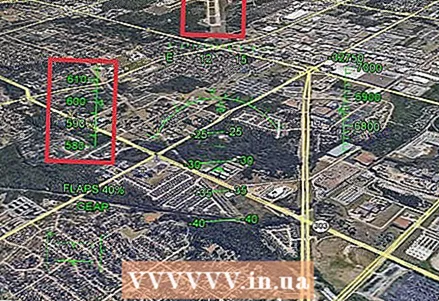
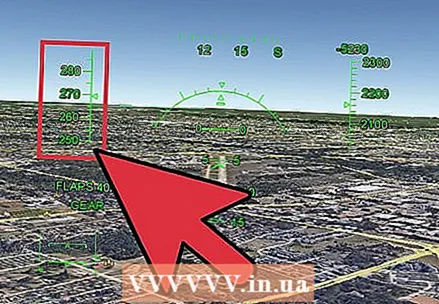 8 When you are close to the airport, make sure your speed is slow enough to land. For the F-16, this speed should be around 260 knots. If you fly faster than this speed, the plane will crash.
 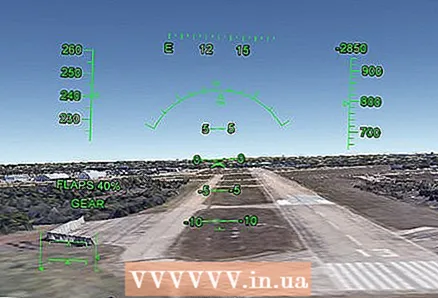 9 Make the final descent smoothly. When you are about 300 meters (100 feet) away from the ground, make sure you descend smoothly. It's easiest to crash at this stage. On landing, you can hit the ground and be pushed away, in which case just slowly descend again. Make sure to descend very slowly.
 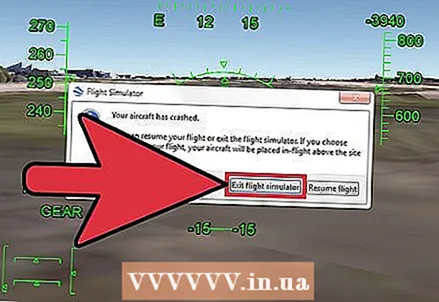 10 Refund if a crash occurs. In the event that you are doomed to crash, a message will appear on the screen that will give you the opportunity to exit or resume the flight.
 - If you resume the flight, it will resume where you crashed. You should repeat all the previous steps for a correct landing.
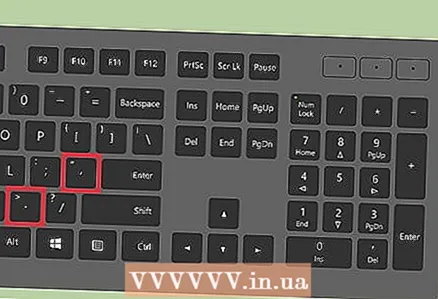 11 Stop the plane completely. At this point, you should be already on the ground, but still in motion. Press the "," and "." Keys together, this way the plane will come to a complete stop in a matter of seconds.
Tips
- To remove the control board, press the H key on the English layout.
- A complete flight simulation guide is available here https://support.google.com/earth/answer/148089?guide=22385&ref_topic=23746
Warnings
- When simulating flying, you may feel dizzy. In this case, just hit the space bar and take a break.
What do you need
- Computer with mouse and keyboard.
- Google Earth (Version 20/08/2007 or later)
- Internet access


