Author:
Mark Sanchez
Date Of Creation:
7 January 2021
Update Date:
1 July 2024
Content
Learn how to scan a document on your Mac using a connected scanner or multifunction device (MFP). When you connect your scanner or MFP to your computer and install the required software, you can scan the document, and then use the Viewer to save the scanned document to your hard drive.
Steps
Part 1 of 2: How to Connect a Scanner
 1 Connect a scanner or MFP. In most cases, this can be done using a USB cable that connects to the scanner / MFP port and to the back or side of the computer.
 - You can also use a scanner / MFP with a wireless module.
- If the scanner is connected to a computer wirelessly, set up the scanner. Make sure it is connected to the same wireless network as your computer.
 2 Open the Apple menu
  . Click on the Apple logo in the upper left corner of the screen.
  3 Click on System settings. This option is on the menu. The System Preferences window will open.
  4 Open the menu View. It's at the top of the screen.
  5 Click on Print and scan. This option is on the menu. A pop-up window will open.
  6 Click on +. It's in the lower-left side of the window. A list of available printers and scanners will open.
  7 Select your scanner. Click on his name in the list.
  8 Follow the onscreen instructions if prompted to set up your scanner.
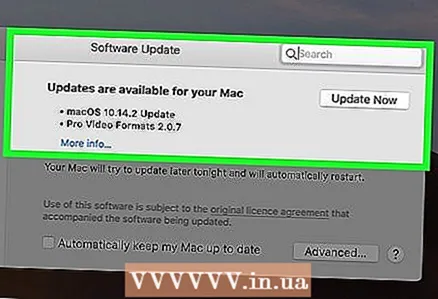 9 Update the scanner software (if needed). Once the scanner is set up, check its software to make sure it doesn't need an update:
 - macOS Mojave and newer - open the Apple menu
 and click Software Update> Update All.
 - macOS High Sierra and older - open the Apple menu , click App Store, go to the Updates tab, and click Update All (if available).
- macOS Mojave and newer - open the Apple menu
Part 2 of 2: How to scan a document
 1 Place your document in the scanner. In this case, the text of the document should be directed downward.
  2 Open Spotlight
  . Click the magnifying glass icon in the upper right corner of the screen.
  3 Open Preview. Enter viewing in the Spotlight text box, and then double-click View in the search results.
  4 Click on File. This menu is in the upper left corner of the screen.
  5 Please select Import from Scanner. This option is on the menu. A new menu will open.
  6 Click on Enable network devices. This option is in the new menu.
  7 Select your scanner. When Viewer finds network scanners, do the following:
 - Click "File".
- Select Import from Scanner.
- Click the name of the scanner.
 8 Click on File > Export to PDF. The "Save As" window will open.
  9 Enter your name. In the Name text box, enter a name for the scanned PDF document.
  10 Select a folder to save. Click on "Where" and select the desired folder from the menu.
  11 Click on Save. This button is at the bottom of the window. The scanned document will be saved in PDF format in the specified folder.
Tips
- If you are using a wireless scanner and it does not work, check if it is connected to a wireless network.
Warnings
- Some installation discs are out of date and may cause problems on your Mac.


