Author:
Clyde Lopez
Date Of Creation:
17 June 2021
Update Date:
1 July 2024

Content
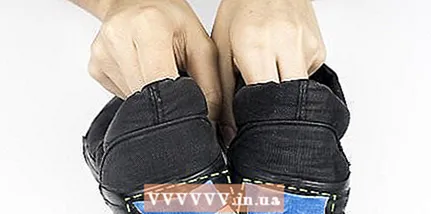
1 Take out the laces and set them aside. The laces will need to be hand washed separately. Pull out your laces and tackle your sneakers. The laces will need to be reinserted at the very end when the shoes are cleaned and treated with shoe polish. 2 Remove dirt. Take your sneakers outside and knock them against each other so that dried dirt crumbles from them. If the dirt does not come off, remove it with a stiff brush. There is no need to rub the dirty cloth - at this stage, you just need to get rid of the pieces of dirt. 3 Prepare a solution of water and a mild detergent solution. Pour into a medium bowl or shallow pan of water and add a little detergent. Stir to make a soapy solution. 4 Scrub vigorously with a stiff brush. Dip the brush into the solution and scrub your shoes. Start at one end and work your way to the other, working on all areas.
 - The sneakers should not get completely wet - just moisten them with a brush and soapy water.
5 Brush the rubberized sides around the shoe. Many black Vans sneakers have black soles and are easy to clean. If the sides are white, rub them a little longer to get them clean and bright again. 6 Wash off the solution with a damp cloth. Dampen a rag with clean water, wring out the rag. Use a rag to remove the soapy water from your shoes. Wet and wring out the rag again and continue rinsing off the soapy water until there are no marks on the sneakers. - Do not rinse off the solution completely with a wet rag and do not let the shoes get completely wet.
- Let the sneakers dry before applying the cream. The sneakers do not need to be dried completely - you can apply the cream even if the sneakers are a little damp.
Method 2 of 3: How to restore the color
 1 Cover the red logo on the heel with masking tape. Vans logo on the heel. It is on the rubber part, not on the fabric. Tear off small pieces of masking tape and cover the logo completely so that it is not visible.
 - Most Vans lovers prefer to keep the logos, so tape them over to avoid staining with shoe polish.
- 2 Apply a small amount of liquid shoe polish to one sneaker. When you remove the lid from the cream, you will find a sponge applicator. Flip the bottle over your sneaker and squeeze some of the cream directly onto your shoes.
- This cream is sold in all shoe stores and hypermarkets.
- Work on one sneaker and then move on to the second.
- 3 Use the applicator sponge to dispense the product. Sponge the sneakers with quick strokes until the cream is absorbed. Don't push too hard. Relax your arm for short, quick movements.
- You will notice how the cream immediately refreshes the color.
- 4 Work quickly and use a small amount of cream. Continue to squeeze out the cream and rub in in quick strokes. Do not apply a new layer of cream until the previous one is dry. Act quickly to distribute the cream evenly until it is absorbed in one place.
- The surface of the fabric should not look damp from the cream. Do not let the cream build up on the fabric.
- If there are faded areas or scuffs on the fabric, pay more attention to them.
- 5 Apply cream to the side rubber areas. When you completely cover the fabric with the cream, the same will need to be done with the rubber. Apply a small amount of the cream and spread it over the entire surface. The rubber inserts will transform immediately.
- Remember to cut the black plastic rings around the lace holes. Be careful with the logo near the lace holes - don't use cream if you don't want to paint over it.
- Some black Vans sneakers have white rubber bands on the sides. In this case, nothing needs to be done.
- 6 Examine your sneakers and add more cream if needed. Black cream will help you achieve an even color. Make sure that the cream is evenly distributed over the fabric and that any color imperfections can be masked. Finish any folds.
- 7 Wet a rag and walk over the surface of the sneaker. Dampen a clean cotton rag under the tap. Squeeze out. Lightly rub the surface of the shoe to fully distribute the cream. If excess cream has collected somewhere, blot the surface until it becomes even. Your shoes will now be clean, fresh and shiny.
- 8 Do the same for the second sneaker. Work one shoe at a time. When you're done with the first, remove it and move on to the second. Do the same: spread the cream over the entire surface of the fabric, as well as the rubber parts.
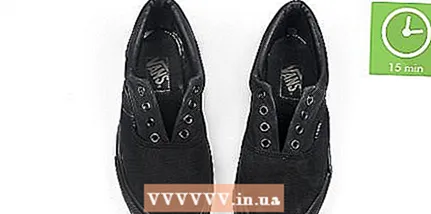 9 Leave the shoes to dry for 15 minutes. Set your sneakers aside and wash the laces. Typically, the cream takes about 15 minutes to dry completely. If you've used a lot of cream, your shoes will take longer to dry. Before putting on your sneakers, make sure they are dry.
 - When the cream is dry, remove the masking tape from your heels.
Method 3 of 3: How to clean your laces
- 1 Prepare fresh soapy water. Discard the used solution and prepare a new one. Pour enough water into the bowl so that the laces can be submerged whole. Stir the detergent thoroughly in the water. The water should be cloudy from soap.
- 2 Dip both laces into the water. Place the laces in a bowl so that the water covers them completely. Leave it on for a few minutes to help loosen dirt and stains. Use the tip of an old toothbrush or your finger to gently move the laces in the water to speed up the cleaning process.
- 3 Rub your laces with an old toothbrush. Take the laces out of the water and squeeze out the water. Rub the laces with a brush, starting at one end. Pay special attention to heavily soiled areas. Reach the other end, flip the lace and do the same. Then repeat with the second lace.
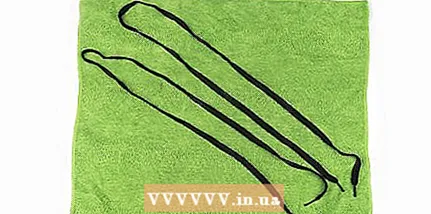 4 Spread the laces on a flat surface to dry. Place them on a clean, dry cloth or paper towels and let sit for a few hours. When the laces are dry, insert them into your sneakers and use the shoes as usual. At this point, the cream will have dried, but you should still run your fingers over the sneakers to make sure they are completely dry.
What do you need
- Mild detergent
- Stiff bristled brush
- A bowl
- Clean rag
- Black shoe polish
- Old toothbrush


