Author:
Robert Simon
Date Of Creation:
20 June 2021
Update Date:
1 July 2024

Content
- Picture stickers (as well as nails and hangers) can be purchased at stationery stores, handicraft stores, home appliances or online.

- Let the surface dry before applying the patch.

- One set of stickers can hold 1.36kg, and holds most pictures of 20x28 cm in size. If you are using only one set of stickers, stick it right in the center of the top edge of the picture.
- Two sets of stickers can hold 2.7 kg, and holds most pictures 28x44 cm in size. Two sets of stickers will be stuck in the upper two corners of the picture.
- Four sets of stickers can hold 5.4 kg, and holds most pictures 46x61 cm in size. Stick 2 sets of stickers in the two upper corners of the picture, the other two on both sides, at a distance of 2/3 from the top.
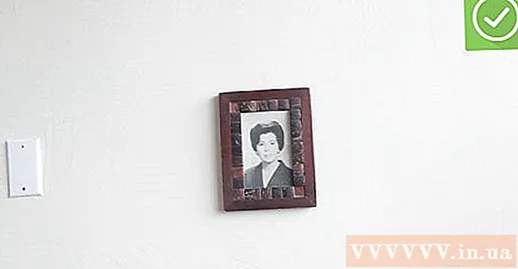
Fix the picture to the wall. First you remove the protective paper to reveal the adhesive, then press the picture against the wall. Slowly separate the stickers on the picture from the ones on the wall, by gently pulling the picture at the bottom two corners and lifting it up. Press the stickers on the wall with your finger for 30 seconds.

- The backs of nails and hooks have adhesive to stick to walls, and you can hang pictures on them with the mounting parts pre-installed on the picture. Depending on the mounting parts available on the picture, you must purchase the appropriate wall mounting device.

Prepare the glued surface. Remove the protective paper from the patch and stick it to the hook or nail.
- Some adhesive hooks have a fixed patch on the back. Skip this step and go to the next if you buy a latched hook.


Wait about an hour for the glue to dry. After an hour, hang the picture as usual using the hooks on the picture.
- Remember to determine the weight of the picture before you buy the nail, as they usually only hold the weight between 2.3 - 3.6 kg, while the smaller hooks only hold the weight 0.5-0, 9kg.
- If you want to hang pictures that are heavier than the holding capacity of nails or hooks, you can use more than one. Ensure even weight distribution by using a leveling ruler during installation.
Method 3 of 5: Use a push hook
Attach the hook to the wall. Push the head long, slightly curved and bevelled against the wall. After most of the tip has been pushed, position it so that the outer hook is facing up (so you can hang the item in there). Fix the hook by pushing all the sharp ends against the wall.
Hanging pictures. Push-in hooks are usually sold in packs of four or more. To hang heavy pictures using two hooks, measure the width of the picture and divide it into three parts. Install one hook at the one-third position, and the second hook at the two-thirds position. For heavier pictures that require three hooks, measure the picture's width and divide it into four sections. Fit one hook at the one-quarter position, one hook at the two-quarter position (center), and the other hook at the three-quarter position. advertisement
Method 4 of 5: Use reusable tape or adhesive tape
Prepare the wall. Adhesive works best on flat surfaces, so clean your wall with a clean cloth and alcohol. While you wait for the wall to dry, wipe the back of the poster or picture with a clean, dry cloth.
- Wash your hands before using the reusable adhesive to prevent dust and sweat from sticking to the glue.
Prepare the picture. Place the picture on the flat surface. Press a small piece of adhesive tape or a piece of double-sided tape against the corners of the picture (back of picture). If the picture is large, put duct tape around the edges behind it.
Hanging pictures. After placing the tape or adhesive tape, lift the picture and place it on the wall to be hung, press the picture against the wall to fix the adhesive or tape. advertisement
Method 5 of 5: Hanging pictures
Find an available wall mount. Look for existing hooks, screws, vents, or protrusions on the wall that can add a few pounds to it. Note that this method is best suited for light pictures without a frame.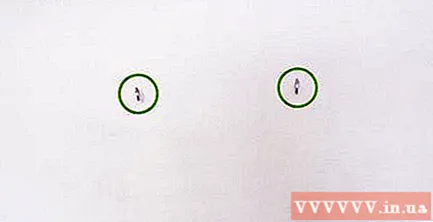
- Look for wall protruding structures that can be wired across and do not cause them to be overly stressed.
Tie the rope. Cut a piece of wire, twine or wire long enough to stretch across two possible places on the wall, cut off a stretch to tie the ends. Tie each end of the string to those positions. You can either stretch the string or let it sag slightly.
- Stretch strings look stiffer and more even, while the sash is more artistic. Choosing between these two types of wiring is just a matter of aesthetics.
- Wire is harder to tie than regular wire or braided wire (it's easier to wrap the wire around the structure than knotted), it gives an industrial look and allows the painting to slide back and forth if you want to change the taste. mind. Wire is thin and strong, but cannot sag.
- Twine and string are usually easier to tie and can be loose or stretched, giving a more rustic look than wire. Braided wire is thicker than wire and wire, but stronger than ordinary wire. The rope is usually thinner than the twine, but weaker.
Hanging pictures. Use clothes clips or general clips to fix the picture to the string. If the cord starts sagging more than expected or the knot falls off, the picture's weight may be too heavy. Use thicker wire or wire, or tie an extra string to other braces for a second row of pictures.
- To distribute the weight and the number of pictures evenly on the string, place the first picture in the center of the string with a tape measure or eye alignment. Use the center picture as the center point to divide the rope in half, divide the other halves in half, and hang a picture at each center point. Continue to divide the blank sections in half and hang the pictures on the center point until all the pictures are hanging.
Advice
- Staples mounted on the wall or against the wall can be used to hang pictures.
- The stapes can be used to hang framed pictures, posters or very light wire-framed pictures, as long as you can press it against the wall.
- Framed or unframed paintings can be displayed by placing them against a bookshelf, furniture, or other objects, or by being placed in a picture frame with a stand.


