Author:
Robert Simon
Date Of Creation:
17 June 2021
Update Date:
1 July 2024

Content
Sunflower seeds are an easy seed to harvest, however, you will need to wait until the flowers are completely dry before you can harvest them easily. You can let the flowers dry on their own or you can remove them and let them dry indoors. Whichever option you choose, take care to protect the seeds when the flowers are dry. Here's what you need to know to properly harvest sunflower seeds.
Steps
Part 1 of 3: Self-Drying on Trees
Wait until the flowers start to fade. You can harvest it when the base of the flower starts to turn brown. However, if you grow flowers in a humid climate, the flowers may become moldy and rotten (in this case, you will need to cut the flower's base when they are yellow, then put it in a greenhouse or warehouse for the flowers continue to dry). You should prepare for the drying process when the back of the flower base is yellow or golden brown.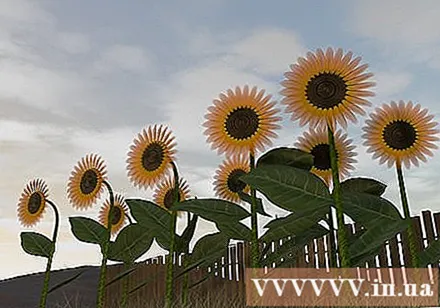
- To harvest the seeds, you have to wait for the base to dry completely. Otherwise, you will not be able to separate the seeds from the flower base. Usually, a few days after the onset of wilting, the sunflower will dry enough to be ready for harvest.
- If you grow flowers in a dry, sunny climate, it's much easier to let the flowers dry on their own. However, if you are in a humid climate, you should consider cutting the flowers from the branches and drying them indoors.
- Prepare to harvest when at least half of the yellow petals have fallen. The flower base should also droop and look dead but still with the seeds. This means that the sunflower has dried perfectly.
- Particle check. Even when the sunflower seeds remain firmly attached to the flower base, they will soon separate. Sunflower seeds should be hard, with a characteristic black-and-white stripe, or completely black, depending on the type of flower.

Wrap the flower base with a paper bag. Place the paper bag on the flower base and tie it lightly with twine or nylon thread to prevent it from falling off.- You can also use a light cloth or similar breathable fabric, but never use a plastic bag because they won't allow air to circulate, causing the seeds to become damp. If too wet, the seeds will rot or mold.
- Wrapping the soles in the bag will help prevent birds, squirrels and other animals from sneaking on "harvesting" the seeds before you. This also prevents the seed from falling to the ground.

Change bags as needed. If the bag gets wet or torn, carefully remove it and replace it with a new one.- You can keep the bag from getting wet in the rain by bundling a plastic bag outside but not using a lanyard and must be removed immediately when the rain stops to avoid mold.
- Change the paper bag as soon as it gets wet. Wet paper bags easily tear and mold will easily develop on the seeds if left in the wet bag for too long.
- Harvest the fallen seeds when changing the bag. You should check for damaged seeds. If the seeds are not spoiled, store them in a sealed container until you are ready to harvest all the seeds on the flower base.

Cut the flower base. When the back of the flower base turns brown, cut the base from the stem and prepare to harvest the seeds.- Leave a flower stalk about 30.5 cm long from the base of the flower.
- Make sure the paper bag still covers the flower base. If the paper bag falls off during the cutting and transporting of the flower base, you may lose a lot of seeds.
Part 2 of 3: Indoor Drying
Prepare the flowers to dry. Sunflowers are ready to dry when the back of the base starts to turn a dark yellow or golden brown.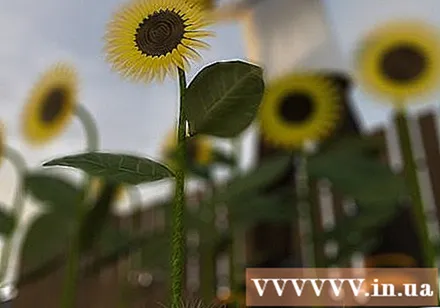
- Flowers must be completely dried before seed is harvested. Once the base of the flower is dry, it's easy to harvest the seeds while it will be almost impossible to harvest the seeds while the base is still damp.
- Most of the yellow petals have now fallen off and the base begins to droop or wilt.
- The sunflower seeds should be hard and the skin should be completely black and white or completely black, depending on the type of flower.
Wrap the flower base with a paper bag. Tie a brown paper bag to the flower base with twine, nylon thread or string.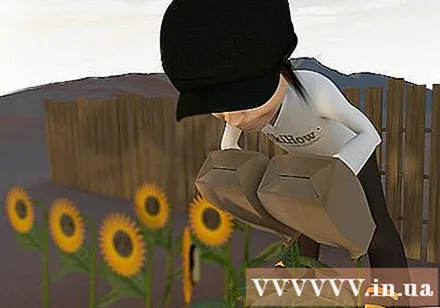
- Do not use a plastic bag because the plastic bag will not allow the flower base to "breathe", causing moisture to accumulate in the bag. If excess moisture is present, the seeds will rot or mold and cannot be used anymore.
- If you don't have a brown paper bag, you can use a light fabric or similar breathable fabric.
- Since it is dry indoors, you don't need to worry about animals being able to eat your seeds. However, you must still wrap the flower base with a paper bag to prevent the seeds from falling.
Cut the flower base. Use sharp scissors or scissors to cut the flower base.
- Leave a stem of about 30 cm with the base.
- Be careful not to slip the paper bag out during cutting.
Hanging flower base upside down. Let the flower base continue to dry in a warm place.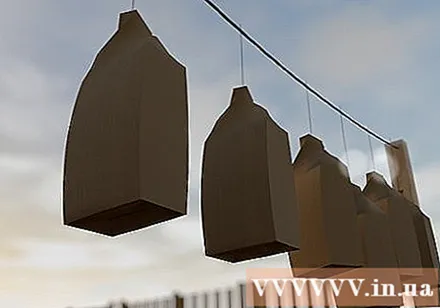
- Use twine or nylon thread to tie one end to the stem close to the flower base and the other end to a hook, rod or bracket. Flowers will dry from the tie gradually towards two sides: stem and flower base.
- Let the flowers dry indoors, in a dry, warm and well-ventilated place to avoid moisture build-up. You should also hang the flowers high, away from the ground or floor to avoid rodents.
Check the flower base periodically. Every day, carefully open the bag to harvest the seeds that fall into the bag.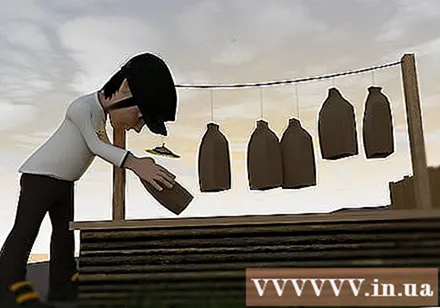
- Store the seeds in a sealed container until you have harvested the seeds from the flower base.
After the flower base is completely dry, remove the bag. When the back of the flower base has turned dark brown and is completely dry, the sunflower seeds are ready for harvest.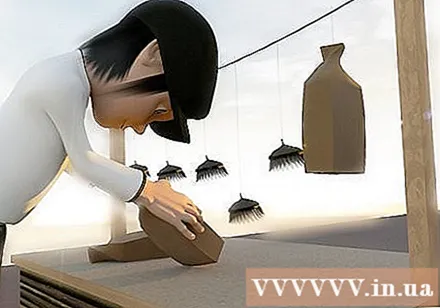
- The base drying process takes an average of one to four days, but can also take longer, depending on when the base is cut and the environmental conditions where you dry the flowers.
- Do not remove the paper bag until you are ready to harvest the seeds. Otherwise, the seeds will fall to the ground and you will lose quite a bit.
Part 3 of 3: Harvesting and Preserving the Seeds
Place the flower on a clean, flat surface. Place the flower base on a table top or similar flat surface before removing the paper bag.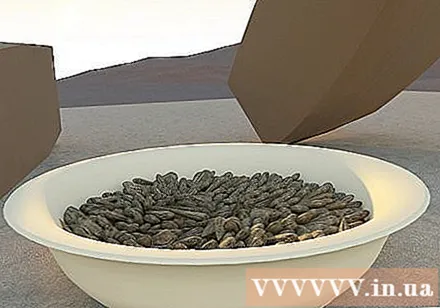
- Harvest the seeds from the bag. If there are seeds in the bag, transfer them to a bowl or container.
Rub your hands over the seeds. To separate the seeds, simply scrub with your hands or a stiff vegetable brush.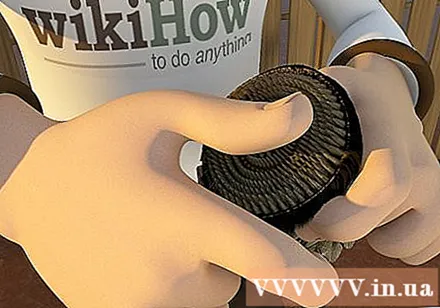
- If there is more than one flower base to be harvested, hold one flower in each hand and gently rub it together.
- Continue rubbing until all the seeds have been removed.
Wash the seeds. Transfer the harvested seeds to a sieve and rinse them under cold running water.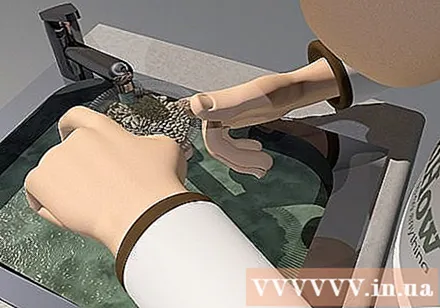
- Allow the seeds to dry completely before removing them from the sieve.
- Washing the seeds has the effect of removing dust and bacteria that may be on the seeds while they are in the outside environment.
Dry the seeds. Spread the seeds thinly on a thick towel and let the seeds dry naturally for a few hours.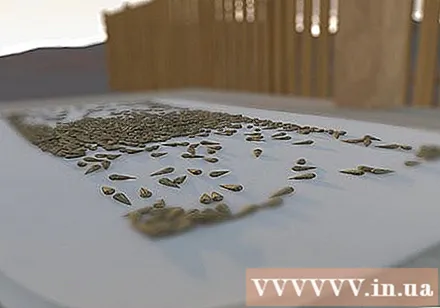
- You can also place the seeds on several layers of paper towels instead of using a towel. Either way, you must spread the seeds very thinly, so that the seeds do not overlap to allow them to dry quickly.
- When spreading seeds to dry, take care to remove foreign objects or damaged seeds.
- Make sure the seeds are completely dry before proceeding to the next step.
Salt and roast if desired. If you want to eat right away, you can salt and roast the seeds immediately after drying.
- Soak seeds overnight in salt water (2 liters of water and 60 to 125 ml of salt).
- Alternatively, boil the seeds in the brine solution above for 2 hours instead of soaking the seeds overnight.
- Dry the seeds on a dry, absorbent paper towel.
- Spread the seeds very thinly on top of a baking sheet, and place in the oven for 30 to 40 minutes at 150 degrees C until the seeds are golden brown. Stir the seeds occasionally during baking.
- Let the seeds dry completely.
Store sunflower seeds in sealed containers. Place the baked or not roasted sunflower seeds in a sealed container and store in the refrigerator or freezer.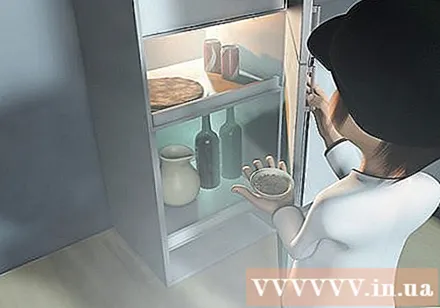
- Roasted sunflower seeds should be refrigerated for best and can last for several weeks.
- Raw sunflower seeds can be stored for several months in the refrigerator or freezer and of course, stored in the freezer for the longest time.
What You Need
- Brown paper or fabric bag
- Twine, nylon thread or lanyard
- Sharp scissors or scissors to cut trees
- Sieve
- Thick tissue or towels
- Medium or large pan
- Sealed box


