Author:
Lewis Jackson
Date Of Creation:
14 May 2021
Update Date:
1 July 2024

Content
This wikiHow teaches you how to add a data chart to a Microsoft Word document.
Steps
Part 1 of 2: Insert Chart into Word
Open a Microsoft Word document. To proceed, you can either double-click an existing Word document, or open Microsoft Word and select the file from the section Recent (Recently).
- With the new document, just open Microsoft Word and click Blank document (Document is blank).

Click where you want to insert the chart on the document. The mouse pointer will blink where you clicked; Here is the chart display position then.- For example, if you click below the paragraph it will be the chart insertion position.

Click the card Insert (Insert) at the top of the Word page, to the right of the card Home.
Click Chart (Chart). This option has a multicolored icon and is located below the right side of the card Insert.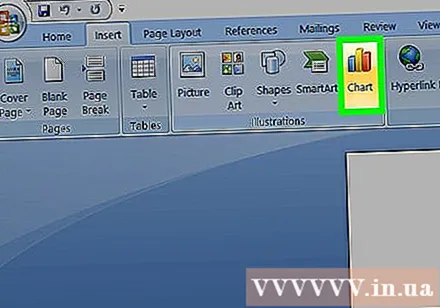
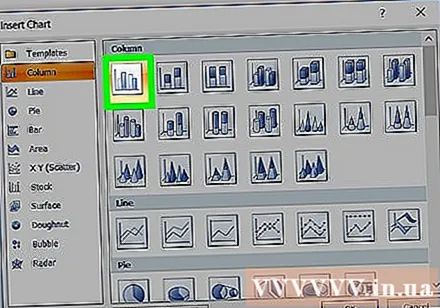
Click Format Chart. This option is listed on the left of the Chart pop-up window- Some common chart formats are lines (Line), column (Column) and circle (Pie).
- You can customize the chart format by clicking the display options at the top of the formatting window.
Click OK. The chart will be inserted into the document.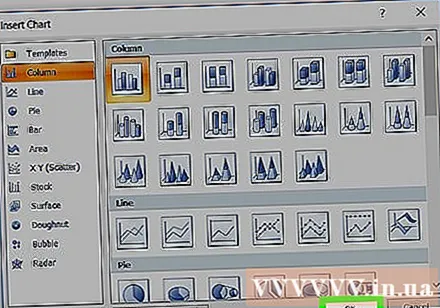
- A small Excel window with cells will also appear for you to enter data.
Part 2 of 2: Adding data to the chart
Click a cell in the Excel window. This cell will be selected and you can add data points to it.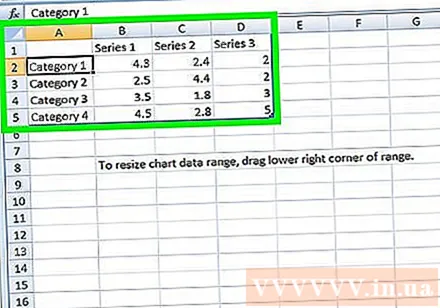
- Values in column "A" represent data on the chart's X-axis.
- Each value in row "1" represents a line or bar (for example, "B1" is a line or bar, "C1" represents a line or bar, and so on).
- Numeric values outside column "A" and row "1" represent different data points in the Y axis.
- All data that you enter into Excel cells will be re-imported to reflect the chart's data.
Enter numbers or names.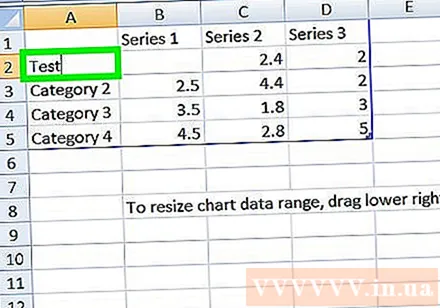
Press ↵ Enter or ⏎ Return. The data will be entered into the cell, then you will be able to continue with another cell.
Repeat this process for each data point. As you enter the data, the chart changes accordingly.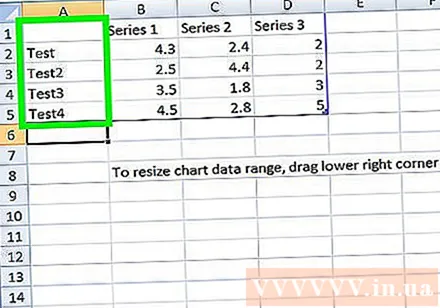
Click the button X in the upper-right corner of the Excel window. This window will close and save the changes made to the chart.
- You can reopen the Excel window at any time by clicking on the chart.
Advice
- On Word 2010 and earlier, an Excel window will pop-up outside of Microsoft Word as a completely new Excel document.
Warning
- Don't forget to save the current session!
")


