Author:
Laura McKinney
Date Of Creation:
6 August 2021
Update Date:
1 July 2024
Content
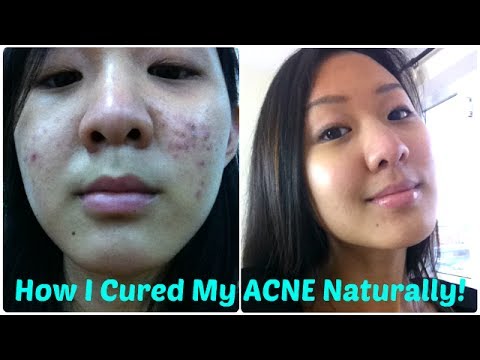
Acne products can prevent acne but can also cause dry skin, change in pigmentation and irritate the skin. These products are not only potentially unwanted but also costly! Look for scientifically proven and inexpensive natural acne treatments using the ingredients available around you.
Steps
Method 1 of 6: Sauna to clean your face
Prepare a steam bath to clean your face. If your hair falls into your face, tidy it up and tie it with a hair tie, headband or toothpicks. Wash your face with gentle cleansing cleansers - you can use those that do not contain oils or that contain vegetable oils. Dermatologists recommend glycerin, grape seed oil, and sunflower oil because it is the best absorbent and dissolving other oils.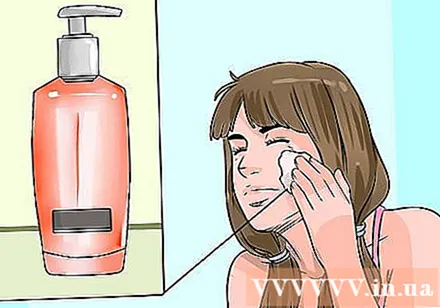
- Use your hands to wash your face instead of using a washcloth or sponge to avoid rubbing damage your face.
- Massage gently with the cleanser in a circular motion for about 1 minute. There is no need to scrub hard, you just need to make the cleanser soak into your face through the pores to remove dirt and sebum.
- Wash your face clean with warm water.
- Use a dry cotton towel to pat dry your face. Absolutely do not wipe or rub vigorously because this will further irritate the face.
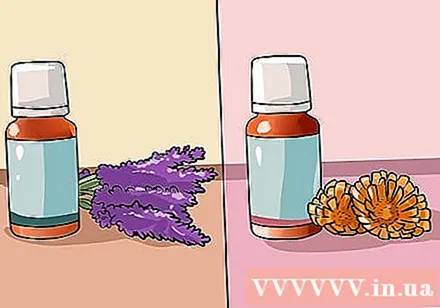
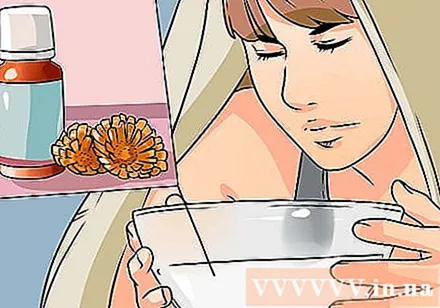
Choose the essential oils for you. All of the essential oils listed below have antibacterial or antiseptic properties, meaning they can eliminate acne-causing bacteria and prevent new acne formation. You can choose the right essential oil depending on your personal taste (in terms of scent), or your specific condition. If you are nervous or stressed, use lavender essential oil. If you have acne (usually caused by bacteria) and blackheads, use an herbal essential oil with antibacterial properties. If you have an upper respiratory tract infection, thyme oil to both treat signs of infection and break down congestion with heat (essential oils) will be the option for you.- Peppermint or peppermint oil can be irritating to some people, so check first by dropping a drop of oil on your wrist and leaving it on for 10 to 15 minutes. Without irritation, you can safely use the oil. Start with one drop of essential oil to about a liter of water. Both peppermint and peppermint essential oils contain menthol, which has both antibacterial and immune-boosting properties.
- Thyme has immune-boosting and antibacterial properties. It also helps increase blood circulation by opening up blood vessels.
- Calendula increases skin healing and has antibacterial properties.
- Lavender has a gentle scent that helps soothe feelings of anxiety and tension.Lavender also has antibacterial properties.
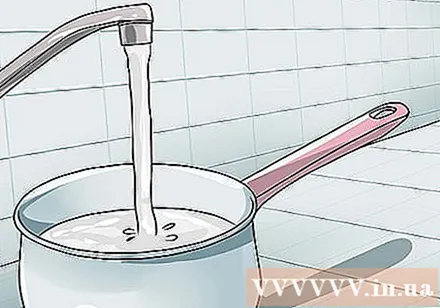
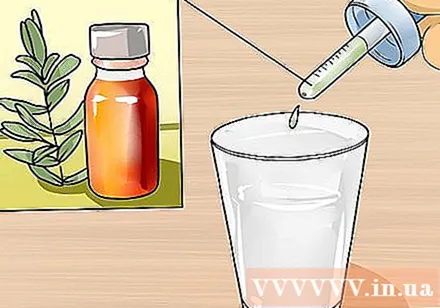
Prepare a steam bath. Pour into a pot about 1 liter of water, boil for about 1-2 minutes. Then add 1-2 drops of essential oil (listed above) into the pot.- If you don't have essential oils, you can substitute teaspoon of dried herbs mixed with one quart of water.
- After adding the herbs or essential oils to the water, boil the water for a while.
- Turn off the heat and carry the steam pot to a convenient location for steam. Make sure you don't have to bend over as you will be in this position for quite a while.
Test skin sensitivity. Keep in mind that you may be at risk of an allergy to any herbal essential oil. Whether it's the kind you've used safely before, always double-check every time you plan to steam your face. Test each oil for about 1 minute, then leave your face away for about 10 minutes. If you don't sneeze and show no signs of irritation, reheat the water and perform the steam as usual.
Steam your face. Place a clean cotton towel over your head to keep the steam around your face. After creating one tent fake with such a cotton towel, tilt your face in a steamy place to steam.
- Always keep your eyes closed during a steam bath to avoid the heat from burning your eyes.
- Keep a distance of 30cm from the steamer to avoid skin burns. You just want a steam to loosen blood vessels and open up pores, not the heat to damage your skin.
- Keep your breathing normal and relax. Relax during the sauna.
- Steam for about 10 minutes.
Skin care after steam. Wash your face with warm water and pat dry with a clean cotton towel, taking care to avoid vigorous wiping. Moisturize your skin with non-comedogenic rose water or non-pore-clogging creams so that acne doesn't worsen. Read the labels to make sure it's a non-comedogenic product.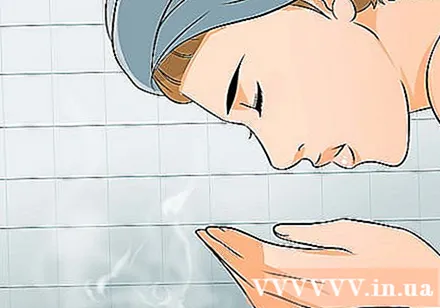
- "Non-comedogenic" products will not promote the formation of acne types such as acne, blackheads, whiteheads, or pimples. People with acne prone skin should be very careful with all products applied to the face. From cleansers, toners to makeup products, all must be used without acne.
- One of these skin moisturizing oils is coconut oil. You can use virgin coconut oil or a mixture of coconut oil mixed with garlic: squeeze the juice of a clove of garlic into a jar of coconut oil and stir well. The mixture can be stored for 30 days in the refrigerator cooler. Apply a thin layer of this mixture on your face 1-2 times / day. Both garlic and coconut oil can kill the bacteria that cause acne. Medium chain fatty acids "liquefy" acne and help keep pores in the skin from clogging. Garlic will give your skin a characteristic odor, if you don't like the smell of garlic, you can use virgin coconut oil.
Maintain this routine of care until you see an improvement. In the beginning, you can do a facial steam twice a day - once in the morning and once in the evening. After about two weeks, you should see signs of improvement in your skin, now reduce the number of inhalations to 1 time / day. advertisement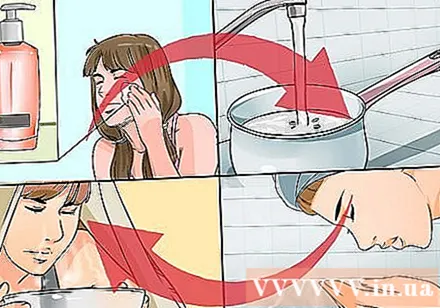
Method 2 of 6: Herbal Masks
Find out why herbal masks can help with acne. The masking ingredients described below have the properties of cleansing, tightening pores, and regenerating damaged skin layers during acne treatment. Since astringents can dry out the skin, be careful not to apply it to dry areas. However, if you have oily skin, a pore tightening mask will help balance skin moisture.
Mix the herbal mask mixture. Add 1 tablespoon of honey, one egg white and one teaspoon of lemon juice tea in a bowl and mix well. These ingredients all have natural skin-healing properties. Honey, for example, has antibacterial properties and astringent properties. Egg whites not only thicken the mask but also have astringent effects, while lemon juice has both an astringent and natural skin whitening agent.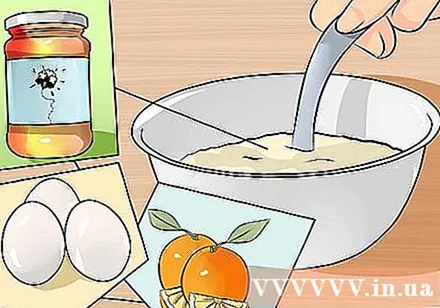
Add essential oils. Once you've mixed the masking mixture, add ½ teaspoon of one of the following essential oils: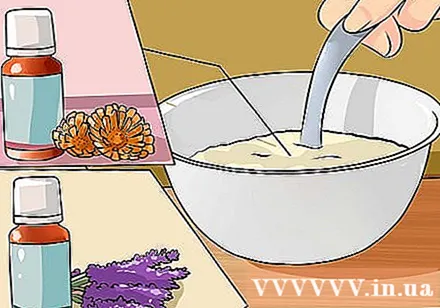
- Mint
- Spearmint
- Lavender
- Chrysanthemum money
- Musk
Mask. Use your hands to apply the mixture to your face, neck or any problematic area. The application of the mask can cause dirt, so be careful to apply the mask in an area that is easy to clean, such as in the bathroom. Don't overdo it, as the mask may fall off or you will have to wait for the mask to dry.
- If you do not want to apply the mask on the entire face, you can apply the mask to the areas of the skin that need acne treatment. Use a cotton swab to dab the mixture on the pimples.
Wait for the mixture to dry. Depending on whether your mask layer is thick or thin, drying times will vary. Usually the mask will dry after about 15 minutes. Be careful not to let the mask fall off in the meantime.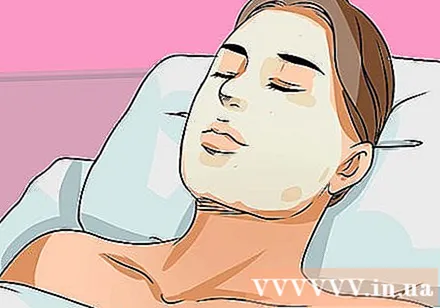
Wash your face. After fifteen minutes the mask has dried and absorbed into the skin, now it's time to rinse the mask off. Use your hands to wash them thoroughly with warm water. Avoid using a washcloth or sponge, as this can irritate your acne skin. Pat dry skin gently with a clean cotton towel, avoiding vigorous rubbing that causes skin irritation.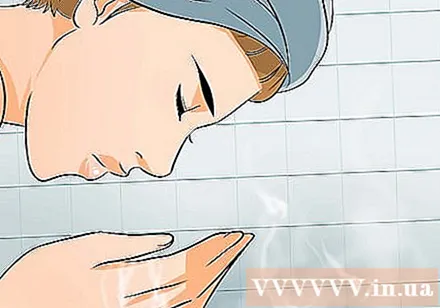
- Apply moisturizer to finish.
Method 3 of 6: Use Sea Salt
Learn how sea salt treats acne. Experts cannot exactly explain how sea salt reduces acne. It could be because the high salt content kills bacteria, or the sea salt helps replenish the healing minerals. Sea salt may also have a sebum-dissolving effect.
- This method helps people with mild or moderate acne improve their acne condition without the intervention of any acne medication.
- However, it is best to consult a dermatologist to be sure about the safety of the therapies you are using at home.
- Be careful not to use too much sea salt because it can cause dry skin and stimulate sebum secretion that causes acne.
Wash skin to treat acne. Always use an alcohol-free cleanser. Dispense a small amount of cleanser onto palm and rub gently in a circular motion to remove dirt. Wash with cleanser for a minute, then rinse with cool or warm water. Pat dry your skin with a towel, then use one of the following sea salt treatments to treat acne after washing your face:
Mix a sea salt mask. The sea salt mask is quite effective with acne on the face. Stir one teaspoon of sea salt tea with three teaspoons of hot water tea. The water should be hot enough for the salt to dissolve as you stir. Then add a teaspoon of tea of one of the following to the solution: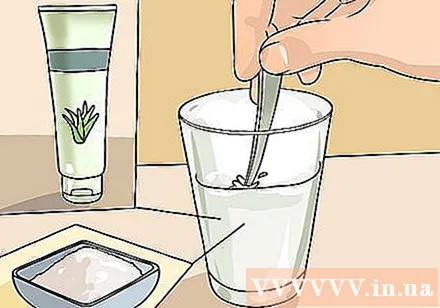
- Aloe vera gel (helps to heal skin)
- Green tea (for anti-oxidation)
- Honey (to antibacterial and promote skin healing)
Mask. Use your hands to apply the mixture evenly on your face, avoiding overly thickening. Avoid applying near eye area. Leave on for about 10 minutes, but take care not to take longer. Sea salt absorbs water and can make your skin very dry.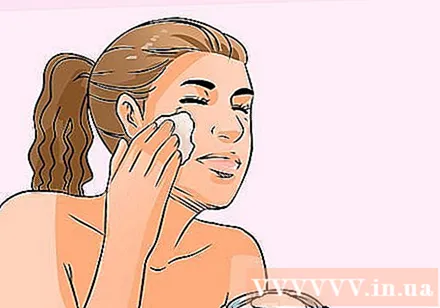
- After 10 minutes, rinse the mask with cool or warm water, pat dry with a clean towel.
- Finally apply a layer of acne-free moisturizer.
- You may be very excited, but use this facial cleanser only once a day; otherwise your skin will become very dehydrated, even with moisturizer.
You can make a spray of sea salt instead of a mask. The ingredients for making a spray are the same as in a mask. However, use 10 teaspoons of sea salt tea mixed in 30 teaspoons of hot water and 10 teaspoons of aloe vera / green tea / honey. Once done, pour the resulting solution into a clean spray bottle.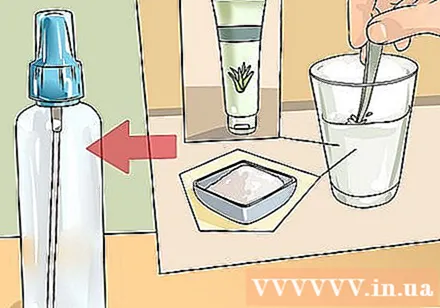
- Store this solution in the refrigerator.
Spray this solution on your face. Every time you use any product to treat acne, be sure to rinse it off with warm water and a gentle cleanser. Be sure to close your eyes so they don't get sprayed in sea salt, then spray the sea salt solution on your face and neck.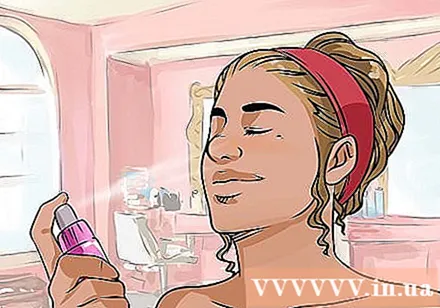
- As with the mask, do not leave the solution on skin for more than 10 minutes, then rinse thoroughly with cool or warm water.
- Pat your skin dry, then apply a non-acne-causing moisturizer.
Soak in a bath with sea salt to treat body acne. If you have large-scale breakouts, soaking your entire body in acne water is a better option than using a mask or spray. Although salt usually does not hurt your skin, it does not contain healthy minerals such as calcium, magnesium, sodium, chlorine, iodine, potassium, zinc and iron. So, if you use regular salt, bathing won't be as effective.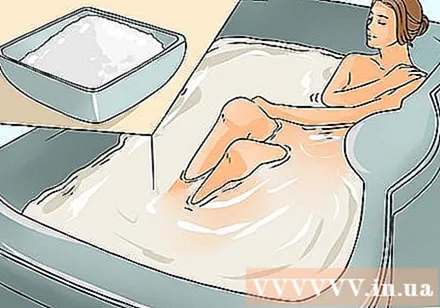
- When the bath tub has been filled with water, add 2 cups of sea salt. Use warm or hot water to allow the sea salt to dissolve completely.
- Soak in water for about 15 minutes, but not longer. Soaking in salt water for longer will cause the skin to dry out.
- If your face is blemished, soak a clean washcloth in the aqueous bath and leave it on your face for about 10-15 minutes.
- Wash off sea salt water with cool water.
- Pat your skin dry and apply moisturizer to avoid the sea salt drying out your skin.
- Do not bathe with sea salt more than once a day.
Method 4 of 6: Use Homemade Natural Cleanser
Find out how acne is formed. Sebum is an oil secreted naturally, when too much sebum is secreted it will clog pores, causing blackheads and whiteheads. When the skin is infected with bacteria Propionibacterium acnesPimples, pustules, cysts, and abscesses will form.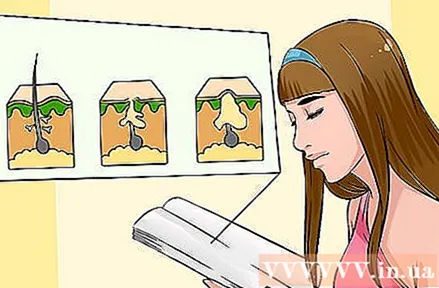
Get familiar with natural acne treatments. Sebum, the most direct cause of acne, is an oil. Based on chemical principles, the best way to dissolve oil (and dirt, dead skin, dirt, bacteria, etc.) is to use a different oil. We are used to thinking that oils are bad for our skin, so we often use cleansers that contain irritating chemicals to remove oil. However, we have forgotten that oils are secreted naturally to protect, moisturize and keep skin healthy. Oil has the ability not only to remove dirt and unwanted excess oils, but also protect the skin from becoming thinner when using soap.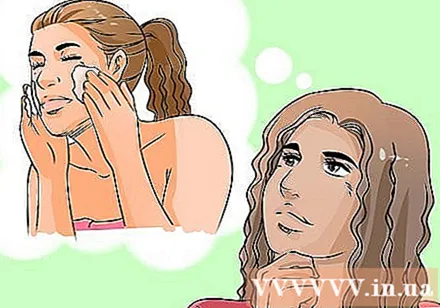
Choose the main oil for you. Choose oils with caution to avoid skin sensitivity and allergies. For example, if you have a nut allergy, don't use hazelnut oil. The list of oils below is extensive - some are more expensive and some are easier to find than others. However, all of these types are non-comedogenic and do not clog pores:
- Argan oil
- Hemp seed oil
- Shea oil
- Sunflower oil
- Some other non-comedogenic (for most people) oils include olive oil and castor oil. Castor oil can cause dry skin in some users, while it has a moisturizing effect on many.
- Coconut oil differs from other oils in that it contains medium chain triglycerides. Coconut oil kills acne-causing bacteria, including bacteria Propionibacterium acnes. This oil can fight the long-chain fatty acids in the pore clogging sebum.

Choose an additional antibacterial oil. The herbal essential oils listed below have properties that minimize the appearance of bacteria P. acnes. Most of these have a pleasant aroma, so you can choose according to your personal preference. With all oils applied to your skin, always be sure to test it on a small area of skin to see if there is any irritation.- Oregano: antibacterial, anti-inflammatory.
- Tea tree: antibacterial, antifungal.
- Lavender: antibacterial, soothing.
- Rosemary: special antibacterial that causes acne P.
- Frankincense: anti-inflammatory, antibacterial.
Make an essential oil cleanser. You can do as much or as little as you like. However, doing a large amount will save money, and you can store it in a cool place away from light. The rates you should maintain for all times are:- For each 30ml of primary oil, add 3-5 drops of additional herbal essential oil.
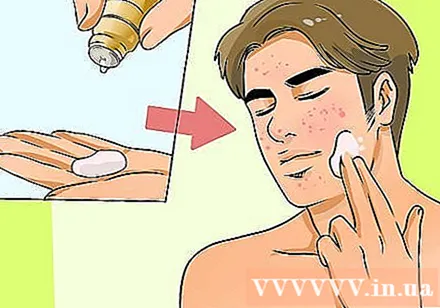
Use homemade cleansers. Pour a small amount of the oil mixture into the palm of your hand and apply it to your face. Absolutely do not use a washcloth or sponge to avoid irritating the skin. Gently massage in a circular motion over your face for about 2 minutes.
Wash your face. Simply washing your face with water will not remove oil from your face. To remove the oil from your face, place a washcloth soaked in warm water over your face for about 20 seconds. Slowly and gently wipe off the oil, then rinse your face with warm water. Repeat until you have removed all of the oil from your face.
- Pat your face dry with a cotton washcloth.
- Use this method twice a day and after sweating heavily.
Method 5 of 6: Create an Effective Cleaning Routine
Wash your face every day. Wash your face at least twice a day - once when you wake up to remove the oils that build up on your skin during sleep, and once before bedtime to remove all the dirt that accumulates during the day. Also, always wash your face after sweating a lot, for example after exercising or going out on a hot day. Take a shower at least once a day and might consider taking another shower if you experience a lot of perspiration.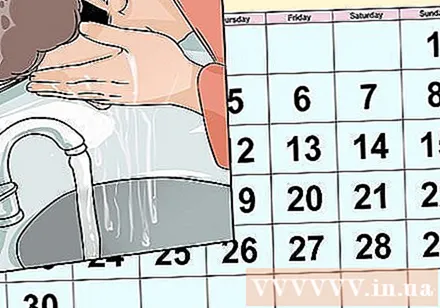
- Always use one of two types: either your acne-free product or your homemade facial cleanser.
- Use sea salt as directed. Soaking your skin in dry sea salt for too long can dehydrate your skin, leading to flare-ups.
Wash your face properly. You can use a washcloth or an exfoliating glove to wash your face, but it's actually best to wash your face with your hands directly. Especially when your skin is blemished, you should not use types with rough surfaces to further irritate your skin. Massage gently in a circular motion for about 10 seconds so the cleansers penetrate into the skin.
- Do not peel acne-prone skin, as it can strip young skin that is forming and leave scarring and uneven areas of skin.
Do not squeeze pimples. No matter how bad your pimples look, you need to understand that pimples and pustules are loaded with harmful bacteria. Pus from broken pimples is filled with P. acnes bacteria. You may feel good at seeing a pimple burst, but you are actually causing the acne-causing bacteria from the old pimples to spread to other healthy skin areas. This action leads to the spread of the pimple and not the removal of the pimple. Squeezing pimples can also cause scarring and uneven skin tone areas.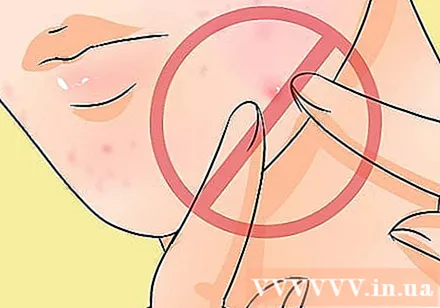
Protect skin from the sun. There is a common perception that tanned skin can treat acne, but scientists have not found evidence to support this. In fact, both the sun and the process of staining can damage your skin and increase your risk of skin cancer. Some acne medications or other medications can actually make your skin more sensitive to the sun. These include antibiotics such as ciprofloxacin, tetracycline, sulfamethoxazole, and trimethoprim; antihistamines such as diphenhydramine (Benedryl); medicine used to treat cancer (5-FU, vinblastine, dacarbazine); heart medication such as amiodorone, nifedipine, quinidine, and ditiazem; nonsteroidal anti-inflammatory drugs such as naproxen and the acne medications isotretinoin (Accutane) and acitretin (Soriatane). advertisement
Method 6 of 6: Adjusting your Diet
Eat foods with a low glycemic index (GI). Dermatologists claim that milk and chocolate or diet don't directly cause acne, however, recent research has examined diets among acne-free teenagers around the world. gender. The study compared the diets of more than 70% of teenagers in the US with acne and the diets of adolescents without acne. The result: clearly adolescents without acne were not consuming dairy products high in sugar like the American teenagers. This explains why certain foods including dairy products and processed products high in sugar increase the risk of acne in some people. These foods increase the risk of infection and provide a favorable environment for bacteria to grow. Studies have shown that foods with a low glycemic index (GI) decrease the severity of acne. Low glycemic index foods are foods that release sugar into the bloodstream (blood sugar metabolism) more slowly. The lowest GI foods are: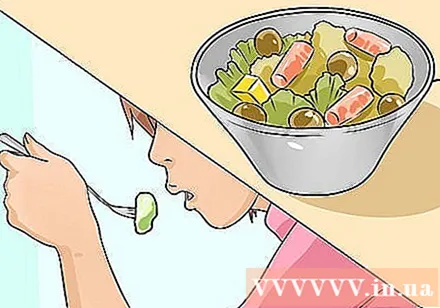
- Grains, natural muesli, rolled oats
- Whole wheat breads, rye breads, whole grain breads
- Most vegetables except beets, pumpkins and parsnips
- Nuts
- Most fruits except watermelon and dates. Mango, banana, papaya, pineapple, raisin, and fig have an average glycemic index (GI).
- Kinds of bean
- Yogurt
- Whole grains have a low to moderate glycemic index (GI). Brown rice, barley, and whole-grain pasta are the types with the lowest GI.
Add vitamins A and D to your diet. Along with setting up a diet of foods with a low glycemic index, you need to make sure you get enough vitamins needed for healthy skin. In which vitamins A and D are the most important vitamins for the skin. Include the following foods in your diet:
- Vegetables: sweet potatoes, spinach, carrots, pumpkins, broccoli, red peppers, zucchini
- Fruits: cantaloupe, mango, apricots
- Legumes: black beans
- Meat and fish: beef liver, herring, salmon
- Fish: cod liver oil, salmon, tuna
- Dairy products: Milk, yogurt, cheese
Synthesize vitamin D by sun exposure. Although there are many types of vitamin D supplements, vitamin D is not really much in the foods that we eat. You can try to increase the absorption of vitamin D from food, the simplest way to get vitamin D is by exposure to the sun for 10 to 15 minutes per week. The sun stimulates the skin to produce vitamin D. Don't wear sunscreen and expose your skin to as much direct sunlight as possible.
- Don't stay in the sun for too long without using sunscreen as it is very dangerous and can lead to skin cancer.
Increase your intake of omega-3 fats. Studies show that people with acne can find acne-fighting benefits from omega-3 fats. Omega-3 fats inhibit the body's production of leukotriene B4 - substances that increase sebum secretion and lead to inflammatory acne. Sebum is a natural oil secreted to keep skin moist, but when excess sebum is secreted, it clog pores and cause skin pimples. By increasing omega-3 fats in your diet, you can control your acne Foods you should look for include: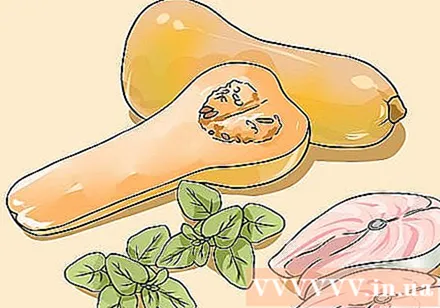
- Fruits and seeds: flaxseed and flaxseed oil, chia seeds, pumpkin seeds, walnuts
- Fish and fish oil: salmon, sardines, mackerel, white fish, herring
- Herbs and spices: basil, oregano, cloves, oregano
- Vegetables: spinach, radish sprouts, mustard greens
Advice
- Cover your pillowcases with a clean towel and change each day, half of the cleaning task done. Oil and bacteria from your face and hair stay on the pillowcase for a long time. Try this method to keep bacteria from spreading - it's an effective way to get rid of those nasty pimples.
- Wash your face with mild soap, then mix the water with baking soda into a paste and apply to your face. Finally, use your hand to pick up the water and gently pat the face. Do this twice a week.
- Use only one remedy at a time to see which works and what doesn't. So you can find the most effective acne treatment for you.
- If you've tried all of these methods and still don't see any improvement, you should probably see your doctor or see a dermatologist.
- In women with severe acne, perhaps the main cause of acne is a hormonal imbalance. For example, for women with polycystic ovary syndrome (PCOS) undergoing a hormone test by a saliva test, their estrogen levels may be too high while progesterone levels are too low. This condition is called "estrogen dominance" and is treated with bioidentical progesterone cream. Any natural therapist can effectively treat this condition. Women who experience this condition find that using progesterone cream causes their acne to increase by at least 50% compared with not using progesterone cream. However, not all acne is caused by a hormonal imbalance.
Warning
- Do not let dry sea salt directly onto your skin. It can burn, and "too much is not good".
")


