Author:
Louise Ward
Date Of Creation:
4 February 2021
Update Date:
1 July 2024
Content
Resolution is the number of pixels (pixels) that the screen displays. Usually this is shown as W x H (Such as 1920px x 1080px).In general, the more pixels you have, the clearer the text and image will be. Current digital flat screens are having an unprecedented high pixel density. When you choose the correct screen resolution, using the computer becomes a lot more comfortable.
Steps
Before start
Learn some commonly used terms. This makes it easier to adjust the screen resolution:
- Pixel - A pixel is a small bright spot on the screen. This highlight will change color based on the displayed content. Every pixel on the screen works together to show the image you see.
- Resolution - this is the "size" of your screen measured in pixels. For example, "1366 x 768" means the screen is displayed by 1366 pixels horizontally and 768 pixels in height. The higher the resolution, the smaller and sharper the subject displayed on the screen.
- Native resolution (recommended) - is the number of physical pixels present on your screen, which is usually the highest resolution the monitor can display. When choosing this resolution, you get the clearest picture.
- Aspect Ratio - as widescreen displays have become so popular, aspect ratios are no longer a big deal. It is the ratio between the width and height of the screen. Older CRT monitors and original flat panel monitors have an aspect ratio of 4: 3. Meanwhile, nearly every modern monitor has an aspect ratio of 16: 9. 16:10 "Cinema" screens are also gaining popularity.

Find your screen's native resolution. Capturing your monitor's natural resolution will help you quickly adjust for the clearest picture. With Windows 7, 8, and most versions of OS X, the recommended resolution is specified. Here are some common resolutions:- Desktop widescreen monitors are typically 1920 x 1080. Even so, 1600 x 900 and 2560 x 1440 are also common. Older 4: 3 flat screens may have a resolution of 1024 x 768.
- Laptop screen resolutions are typically 1366 x 768, although 1280 x 800, 1600 x 900, and 1920 x 1080 are also common.
- The resolution of the 13 "s MacBook Pro (2014 or later) is 2560 x 1600. The resolution of the 15-inch MacBook Pro Retina display is 2880 x 1800.
- Some newer laptops also have higher-end displays with resolutions of 2560 x 1440, 3200 x 1800, or even 3840 x 2160 ("4K"), respectively.
- High-end high-end desktop monitors have high resolution, such as 3840 x 2160 ("4K") or 5120 x 2880 ("5K"), and Dell has also released a 100 million dong monitor with resolution up to 7680 x 4320 ("8K").
- Most high-resolution monitors have a zoom feature, allowing the full screen resolution to be used without making UI elements too small. Thanks to this feature, manufacturers are able to launch high-resolution screens on small devices.
Method 1 of 2: Windows
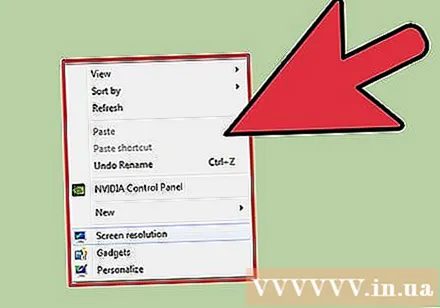
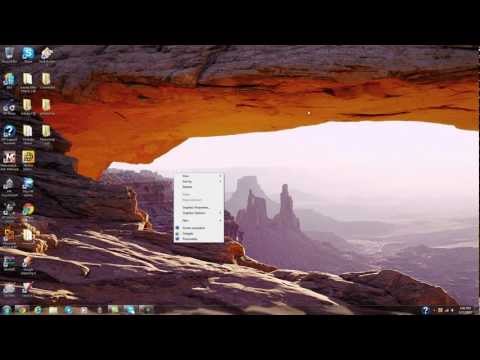
Right click on your desktop. This is the fastest way to access your monitor setup.
Select "Screen resolution" with Windows 8 and 7, "Personalize" under Vista, and "Properties" under XP. Screen setup menu will be displayed.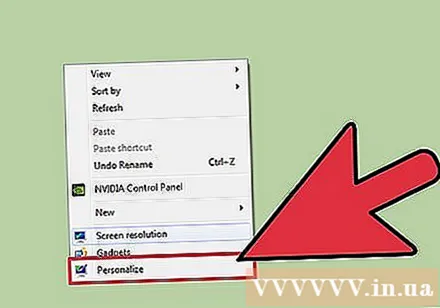
- Windows Vista: Click the "Display Settings" option in the Personalization menu.
- Windows XP: After selecting "Properties", click the "Settings" tab.
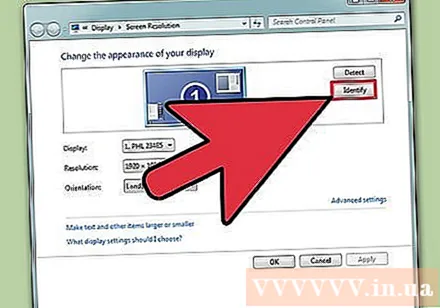
Select active display (if required). Here, select the monitor for which you are trying to check the resolution. Click the Identify button to display the parameters for each monitor, thereby identifying the correct display you want to select.- If you only have one monitor, you can skip this step.
Record current resolution. The current resolution will be displayed on the "Resolution" drop-down menu or slider.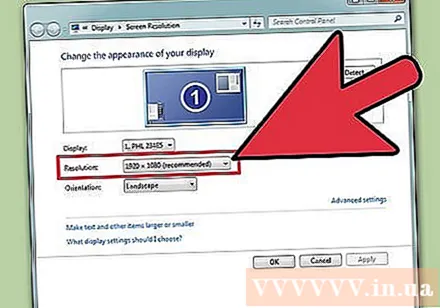
Check if it's the recommended resolution - "Recommended". The recommended resolution is the native resolution of the monitor. With it, you get the clearest picture.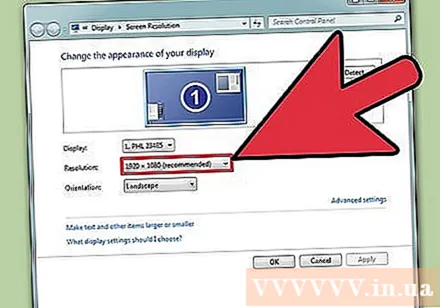
- Windows Vista and XP do not display the recommended resolutions. You will need to refer to the monitor user manual to determine this parameter.
Change resolution using the slider. Click the "Resolution" drop-down in Windows 7 and 8, and a slider will appear. When using a resolution other than the recommended resolution, you will get blurred, stretched / broken images.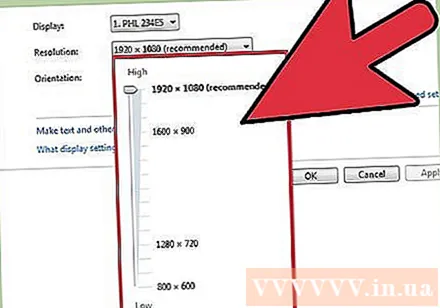
- Choosing a lower resolution will increase the size of objects on the screen.
- If you don't know your monitor's native resolution, you can set it to the highest viable option to get the clearest picture.
Press Apply (Apply) after setting change. The screen may turn off or flicker slightly before displaying with the new resolution. You will be asked to confirm the changes are made or revert to the original settings. If you do not make a choice, after 15 seconds, the image will automatically revert to the old settings.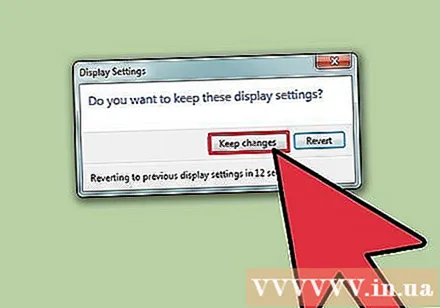
- If you want to save your changes, tap Keep changes.
- If you don't see anything after changing the settings, just wait for the screen to revert to the original settings.
Method 2 of 2: Mac
Click the Apple menu and select "System Preferences". By default, OS X will choose the native resolution, giving you the clearest picture. You can change this when a program requires a certain resolution or when you need to adjust the size of objects on the screen.
Click the "Displays" option and select the "Display" tab. In the case of multiple monitors, you can select the monitor you want to adjust.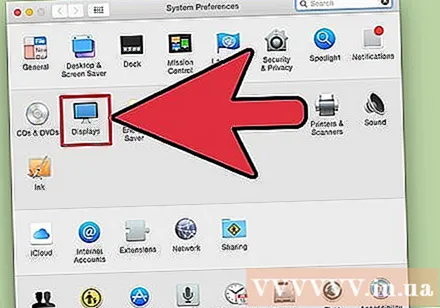
Select the "Scaled" option to change the resolution. By default, the "Best for display" option will be selected. The monitor will then be set to its native resolution. Please select "Scaled" if you want to use another option.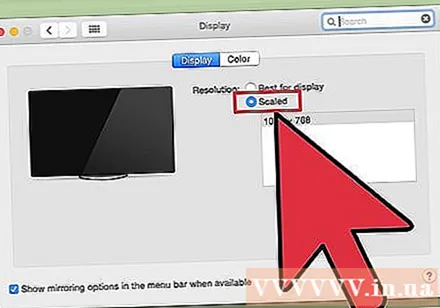
Select the resolution you want to use. The "low resolution" option will result in a blurry image. With the "stretched" option, the subject on the screen will become wider or thinner than usual.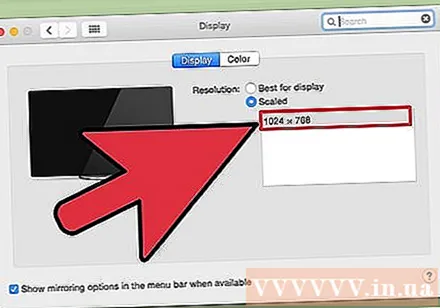
- Most likely you could choose a resolution higher than the monitor's native resolution. Although the displayed object becomes smaller, the computer's processing speed may be significantly affected.
- When a certain resolution is selected, the change will take effect immediately.
Wait to see if your image appears after the change. If you don't see anything with the new resolution, wait 15 seconds for the screen to return to factory settings. If that still doesn't work, press Esc.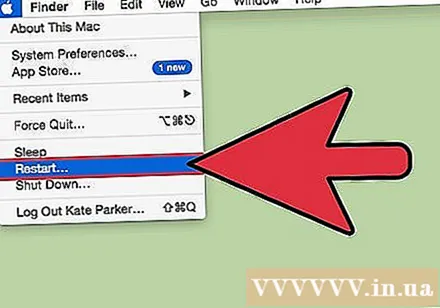
- If the screen still doesn't change back to its old settings, start your Mac in safe mode and choose a new resolution.


