Author:
Eugene Taylor
Date Of Creation:
10 August 2021
Update Date:
1 July 2024
Content
- To step
- Method 1 of 3: Repair installation
- Method 2 of 3: Format and install
- Method 3 of 3: Install without a CD
- Tips
Sometimes system files can get damaged and you have to try to work with a barely functioning copy of Windows XP. Maybe all your programs are running slowly and you wish there was a way to get Windows running as fast as it used to be. Fortunately, restoring or reinstalling Windows XP is quite easy. Regardless of which version of Windows XP you are using, follow these steps for a painless installation.
To step
Method 1 of 3: Repair installation
 Insert the Windows XP CD into the computer. If you no longer have a copy of the CD, contact the computer manufacturer for a replacement, download an .iso from the Internet that you can burn onto a blank CD. Be aware of viruses and know that you will still need to install a valid product key.
 - Make a note of your product key. It is helpful to have this before you begin the installation process. This key is a 25-character code that you must enter to install Windows. It can usually be found in a few different places:
- Stuck to the sleeve of your Windows XP CD, usually on the back.

- On your computer. If it is a desktop, the code is usually on the back of the case. With a laptop on the bottom.
- Stuck to the sleeve of your Windows XP CD, usually on the back.
 Restart your computer. Make sure the Windows XP CD is inserted. Your computer must first be set up to boot from a CD. To do this, you will have to go to the BIOS.
 - To access the BIOS, press the Setup button as soon as the logo of your computer manufacturer appears. This key varies by manufacturer, but is generally F2, F10, F12, or Del. The correct key is shown on the same screen as the logo.

- Once you are in the BIOS, go to the boot menu. Set the 1st boot device as a CD drive. Depending on your BIOS and your settings menu, this may also be called the DVD drive, Optical drive, or CD / DVD drive.
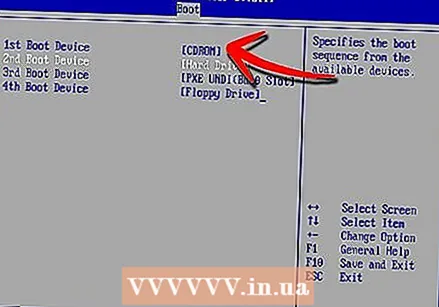
- Save your changes and exit the BIOS. This will restart the computer.

- To access the BIOS, press the Setup button as soon as the logo of your computer manufacturer appears. This key varies by manufacturer, but is generally F2, F10, F12, or Del. The correct key is shown on the same screen as the logo.
 Start the installation. Once the manufacturer's logo has disappeared, a message will appear saying “Press any key to boot from CD…” Press any key on the keyboard to begin the installation process. If you don't press any key, the computer will boot from the hard drive as usual.
  Setup will be loaded. Windows must load drivers to begin the setup process. This may take a while. Once it is complete, you will be greeted with the welcome screen. Press Enter to start a repair installation. Do not run the Recovery Console.
  Read the license agreement. After reviewing the license agreement, press F8 to continue. Setup will list your Windows XP installations. Most users will only see one entry here.
  Select the previous installation. If you only have one installation, it will be selected automatically. Press R to start repairing. Windows will start copying files and then restart the computer. It will then start the repair installation.
 - You will be asked to confirm the date and time, as well as a few other basic settings. Usually the default option is okay.

- You will be asked to confirm the date and time, as well as a few other basic settings. Usually the default option is okay.
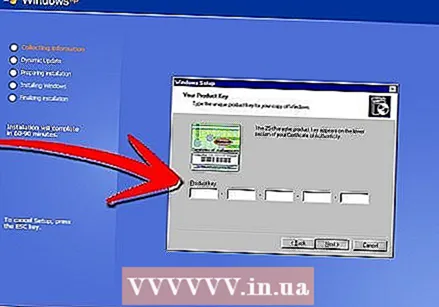 Enter the product key. You will be asked to enter the product key towards the end of the installation. Windows will check it to make sure there is a valid key before proceeding.
 - After installation, you will need to confirm your version of Windows, online or over the phone. The Product Activation Wizard will appear when you log in to your new, restored copy. If you have an internet connection, you should be able to activate the version of Windows you have by clicking a button.

- After installation, you will need to confirm your version of Windows, online or over the phone. The Product Activation Wizard will appear when you log in to your new, restored copy. If you have an internet connection, you should be able to activate the version of Windows you have by clicking a button.
- Check your programs. Once the installation is complete, you will be taken to your restored installation of Windows. Because some system files have been replaced, some of your installed programs may not work and may need to be reinstalled.
- The drivers for some of your devices may need to be reinstalled. To see which devices are not properly installed, open the Start Menu and right-click on My Computer. Select the Hardware tab, then click Device Manager. If devices are indicated with a yellow exclamation mark, their drivers may need to be reinstalled.

- Your personal information and documents should be untouched after a restore installation. Check everything is where it should be.

- The drivers for some of your devices may need to be reinstalled. To see which devices are not properly installed, open the Start Menu and right-click on My Computer. Select the Hardware tab, then click Device Manager. If devices are indicated with a yellow exclamation mark, their drivers may need to be reinstalled.
Method 2 of 3: Format and install
 Back up your data. Formatting and reinstalling Windows will erase your entire hard drive. Be absolutely sure that you have backed up all your important files before you start. Photos, movies, documents and music are all erased.
 - Insert the Windows CD. Write down the product key you will need during installation. Boot from the Windows CD to start the Setup program.
- Details for this step can be found in steps 1-4 in the first section of this guide.
- Setup will load. Windows loads the drivers for the setup program. Once this is complete, press Enter at the Welcome screen to start the installation. Do not run the Recovery Console.
- Read the license agreement. After reviewing the license agreement, press F8 to continue. Setup will list your Windows XP installations. Press Esc to proceed with a completely new installation.
- Delete the partition. You will see a list of hard drive partitions. These are your C: and D: stations (the lettering will depend on how the system is set up).
- This is your last chance to reboot and back up any files you have forgotten. After the partition is deleted, all your data will be gone.
- Select the partition that contains Windows. This is usually the C: partition. Press D to delete the partition. Confirm that you want to delete that partition by pressing Enter.

- You now have one more chance to go back. If you really want to confirm that the partition can be deleted, press a.

- This is your last chance to reboot and back up any files you have forgotten. After the partition is deleted, all your data will be gone.
 Create a new partition. Select the unpartitioned space. Press C to create a new partition. Enter the maximum size possible and press Enter.
 - You can create a smaller partition if you later want to create other partitions on your hard drive via Windows. There are multiple reasons why someone might do this, but for most users simply choosing the largest partition is fine.

- You can create a smaller partition if you later want to create other partitions on your hard drive via Windows. There are multiple reasons why someone might do this, but for most users simply choosing the largest partition is fine.
- Start with the Windows setup. After the partition has been created, select it and press Enter to begin the Windows installation. You will be asked to format the partition. Select "Format the partition with the NTFS file system." Choose NTFS instead of FAT, as NTFS is much more stable for Windows.
- Formatting will begin. This can take several hours, depending on the size and speed of your hard drive, but it shouldn't take more than a few minutes for most users.

- After formatting, Windows will copy the files it needs for Setup to the hard drive. This takes a few minutes and requires no user intervention.
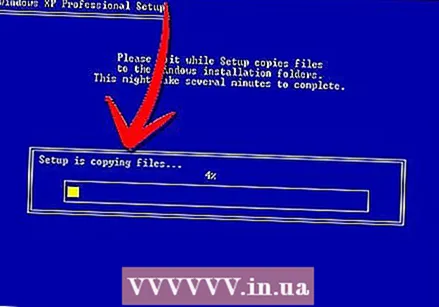
- Formatting will begin. This can take several hours, depending on the size and speed of your hard drive, but it shouldn't take more than a few minutes for most users.
 Windows will be installed. This process is automated for the most part, except at a number of points where the user has to enter some information. The first option shown is to change the default language and region. Click Customize ... if the settings are incorrect for your region. If the settings are correct, click Next to continue.
 - When prompted, enter your name and the name of your organization. These will be used for identifying documents and can be changed later through Windows settings.

- When prompted, enter your name and the name of your organization. These will be used for identifying documents and can be changed later through Windows settings.
 Enter your product key. You will be asked to enter your 25-digit product key. If you are installing from a Windows XP SP 3 disk, you will not be prompted for this yet.
  Enter the name of your computer. This is the name displayed on the network to describe your computer. Windows will automatically create a name for you, but you are free to change it to whatever you want.
 - For XP Professional you will be asked for an administrator password, which will be used to access your administrator account.

- For XP Professional you will be asked for an administrator password, which will be used to access your administrator account.
 Set the correct date and time. You will now see a calendar and clock that can be adjusted for your specific time. You can also set the correct time zone for your location.
  Set up the network. You will be asked if you want to install the default or custom network settings. Standard is the right choice for almost all users. If you are installing in a business environment, please contact your system administrator first.
 - When asked to enter a workgroup, most users will choose the first option, leaving the default workgroup name as it is. If you are in a business environment, you may need to provide a domain. Again, contact your administrator.

- When asked to enter a workgroup, most users will choose the first option, leaving the default workgroup name as it is. If you are in a business environment, you may need to provide a domain. Again, contact your administrator.
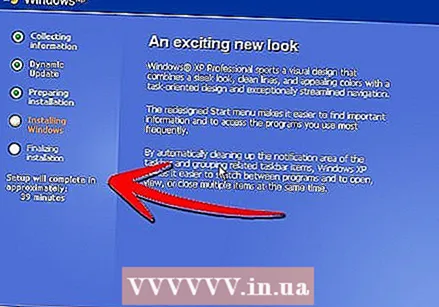
 Windows will complete the setup. This can take some time and does not require any input from the user. Once completed, your PC will automatically reboot and Windows XP will load.
 - If you had to make changes to your BIOS to boot from CD-ROM, you will probably see the option "Press any key to Boot from CD…" again. Do not press any keys and wait for the screen to clear. Your computer will now continue to boot from the hard drive and complete the Windows installation.
- If you had to make changes to your BIOS to boot from CD-ROM, you will probably see the option "Press any key to Boot from CD…" again. Do not press any keys and wait for the screen to clear. Your computer will now continue to boot from the hard drive and complete the Windows installation.
 Select OK to adjust the screen resolution. Windows will try to automatically resize the screen to make reading easier. Once the screen is reset, you will be asked if you can read the new text box. If you can, click OK to continue. If you can't, hit cancel or just wait 20 seconds for the screen to return to its original settings.
 - Select Next to continue with the installation. The Welcome to Microsoft Windows screen is displayed once the changes have been made to the screen. This process only takes a few minutes.
- Windows will try to check the network connection. If you plan to set this up later, you can skip this screen.

- The subsequent windows will ask if you are connecting to the Internet through a LAN or a home network, or if you are directly connected to the Internet. If you are using a router for the network, select the first option. If the modem is connected directly to your computer, select the second option.

- You will now be given the option to register your product with Microsoft. Whether or not you do this is up to you, it is not required to work with Windows.

- Windows will try to check the network connection. If you plan to set this up later, you can skip this screen.
 Specify the names of the users. In this step you can create separate logins for each of the users of your computer. You must provide at least one name. You can enter a maximum of five users in this screen; more can be entered via Control Panel, after installation.
 - After entering the names, click Finish to complete the installation. Windows will need a little while longer, after which you will be greeted by your new desktop.

- After entering the names, click Finish to complete the installation. Windows will need a little while longer, after which you will be greeted by your new desktop.
 Run Windows Update. Your installation is now complete, but it is important to run Windows Update as soon as possible. This downloads the most recent system files from Microsoft. These are very important as they fix vulnerabilities and stability issues.
 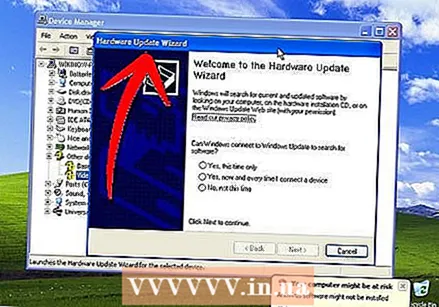 Install your drivers. Chances are you will have to reinstall drivers now that the computer has been formatted. Depending on the devices you have connected to your computer, this may include your video card, modem or network card, and / or your sound card.
 - These drivers can be found on the discs supplied with your computer, but can also be downloaded from the manufacturers' websites.
Method 3 of 3: Install without a CD
- Install from the recovery partition. Many computer manufacturers ship their computers with a hard drive partition containing the Windows installation files. To access this, you will need to boot from the recovery partition.
- The most commonly used key to open the partition is F11. This will appear under the manufacturer's logo immediately after starting the computer.

- Recovery partition boot procedures vary by manufacturer. Follow the steps on the screen to open the Windows setup program. Once setup has started, follow the steps in the section above, starting at Step 3.

- The most commonly used key to open the partition is F11. This will appear under the manufacturer's logo immediately after starting the computer.
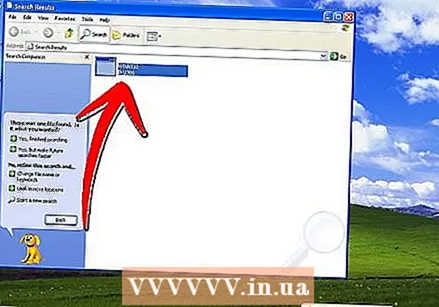 Install from Windows. For this you need a file called winnt32.exe. This file is a Windows installation file which can be run within Windows XP. To find it, open the Start menu and click Search. Select "all files and folders" in the left frame. Type "winnt32.exe" in the search box.
 - Running winnt32.exe will reboot your computer in Windows setup. From this point you follow Step 3 in the section above. You still need to enter a valid product key. Your data will be deleted in the same way as during a regular installation.

- Running winnt32.exe will reboot your computer in Windows setup. From this point you follow Step 3 in the section above. You still need to enter a valid product key. Your data will be deleted in the same way as during a regular installation.
Tips
- Gather everything you need before you start. Make sure you have easy access to your product key. Put all your drivers (drivers) on a USB stick so you can install them all at once when you have finished the Windows installation.


